Zesty Lemon Mochi: A Refreshing Twist on a Classic Chewy Dessert


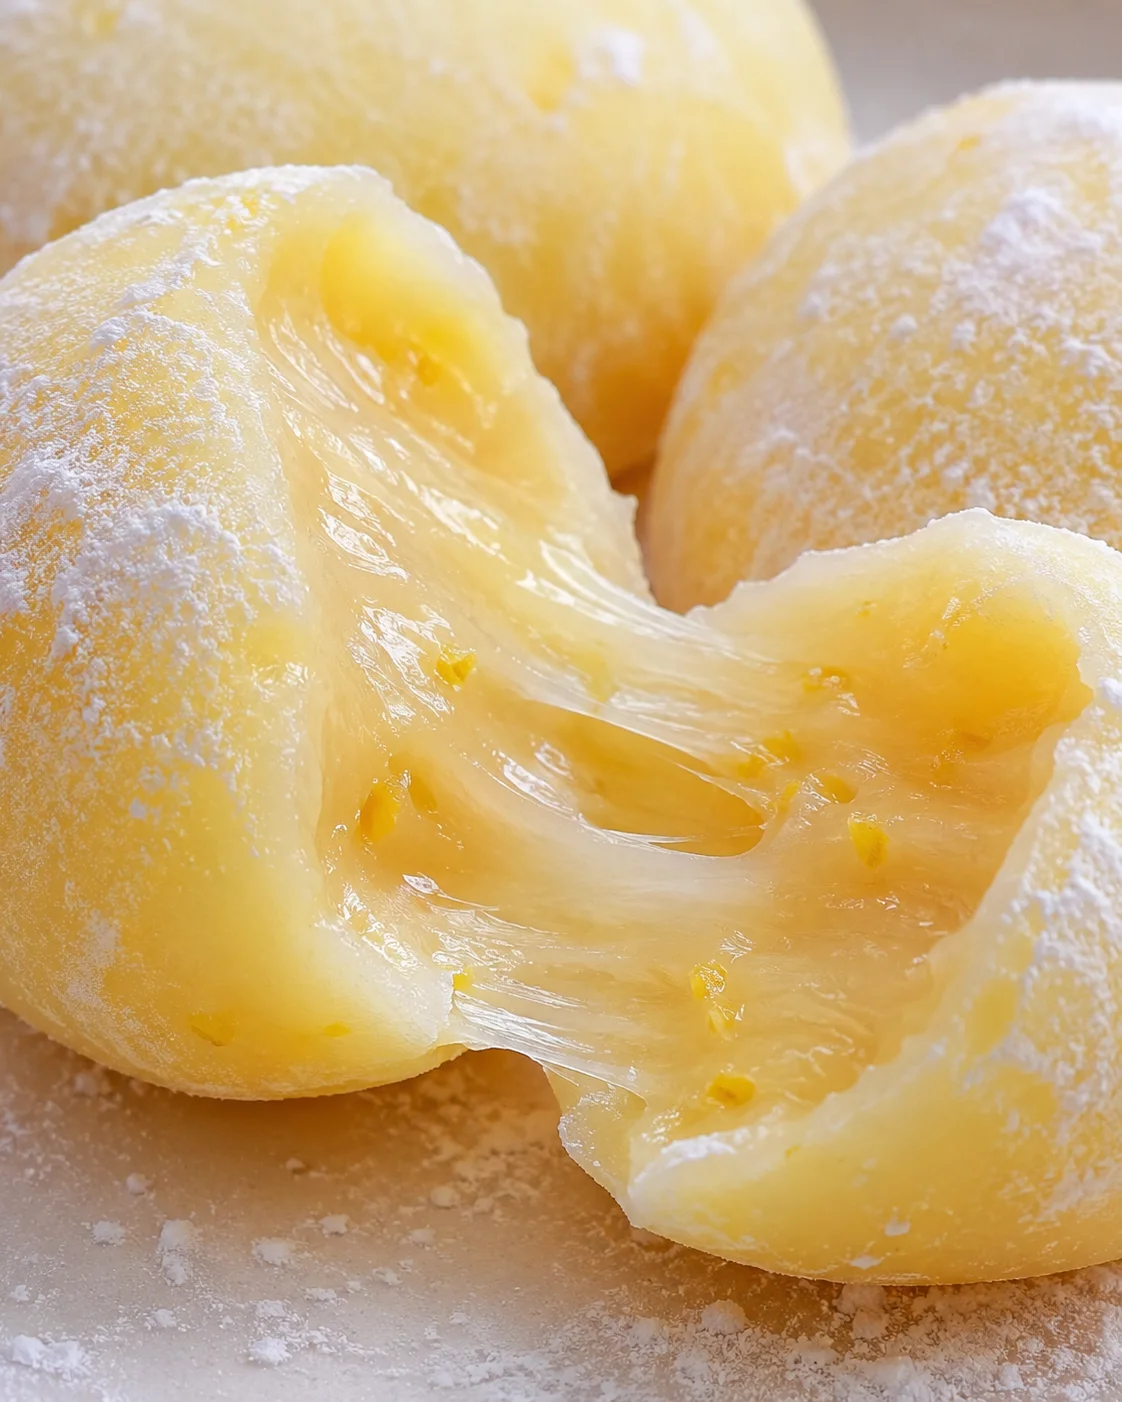
Hi there, dessert fans and kitchen adventurers! If you love discovering new, exciting sweet treats, you’re going to adore this lemon mochi recipe. It’s a fun twist on classic mochi—a wonderfully chewy Japanese dessert—infused with fresh, zesty lemon flavor that wakes up every bite. If lemon mochi is new to you, get ready for that bright citrus pop balancing perfectly with the soft and chewy texture you know and love. I’m excited to take you step-by-step through this delicious and surprisingly easy-to-make dessert. Let’s get started with our little lemon mochi adventure!
Why Lemon Mochi Is So Delightful:
Mochi is famous for its soft chewiness and how versatile it is, and adding lemon takes it into a whole new delicious zone. That bright, tangy punch from lemon juice and zest pairs beautifully with the natural sweetness and sticky texture of mochi. It’s the kind of treat that feels refreshing and light, making it perfect for a snack, a sweet to share over afternoon tea, or just whenever you want a unique bite of happiness. The lemon mochi offers a clever way to enjoy familiar comfort with a fresh twist that wakes up your taste buds.
The Ingredients You’ll Need:
Here’s what you’ll gather to whip up your own batch of lemon mochi:
– 1 cup glutinous rice flour (mochiko)
– 1/2 cup granulated sugar
– 1 cup water
– 1/4 cup freshly squeezed lemon juice
– Zest from one lemon
– 1/2 teaspoon lemon extract (optional, for an extra punch of lemon flavor)
– Potato starch or cornstarch (for dusting)
How to Make This Lemon Mochi:
1. Grab a microwave-safe bowl and mix together the glutinous rice flour and sugar until they’re blended throughout.
2. Slowly pour in the water while stirring constantly to avoid lumps—keep going until it’s smooth and thick, like thick batter.
3. Stir in the fresh lemon juice and zest. If you want to dial up the lemon flavor, add that optional lemon extract now and mix well.
4. Cover the bowl with plastic wrap or a microwave-safe lid and microwave on high for 2 minutes.
5. Carefully take it out—it’ll be hot! Give the mixture a good stir to redistribute heat and break up any clumps.
6. Cover again and microwave for another 1 to 2 minutes until the mochi becomes thick, glossy, and translucent—just like mochi should be.
7. Let the mixture cool down a bit so it’s easier to handle.
8. Sprinkle some potato starch or cornstarch on a clean surface or cutting board to keep your mochi from sticking to everything.
9. Use a spoon or cookie scoop to drop small portions of the mochi onto your dusted surface.
10. Roll each piece into a ball or any shape you like. You can even pop a little fruit or filling inside for a fun surprise.
11. Enjoy your fresh lemon mochi right away or store them safely for later snacking.
Enjoying Your Lemon Mochi Treats:
Here’s the best part: taking that first bite! Let the chewy texture mingle with that zingy lemon flavor—it’s a delicious contrast that feels light but totally satisfying. Lemon mochi makes a fantastic treat on warm days or any time you want a bright, sweet pick-me-up. It’s simple, fun, and sure to bring a smile to your face.
Storage Tips for Your Lemon Mochi:
If you have leftovers (though they rarely last!), keep your lemon mochi in an airtight container at room temperature for up to two days. They taste best fresh when the lemon flavor is brightest and the texture soft. After a day or two, the texture changes and it won’t be quite the same, so try to enjoy them quickly.
Lemon mochi takes a classic chewy favorite and adds a burst of citrus sunshine. The chewy texture with that zesty lemon brightness is a wonderful pairing that’s both nostalgic and new. Ready to make your kitchen smell like fresh lemons? Let’s gather those ingredients, tie on your apron, and bring this fantastic lemon mochi to life for a truly special treat!
Welcome! If you adore chewy sweets with a citrus twist, you’re in the right place. This recipe transforms classic mochi by blending lemon juice and zest right into the soft, sticky mochiko dough. The beauty here is in the contrast—the pillowy chew from glutinous rice flour teamed up with a fresh, lively pop of lemon flavor.
This method is quick and forgiving. Using the microwave means no fussing with yeast or waiting around for rises. You’ll make a small batch that’s easy to shape, fill, and share. Plus, the ingredients are simple, pantry staples, and this recipe is vegan as is. You can switch things up with fillings like red bean paste, lemon curd, cream cheese (for those not vegan), or swap the lemon for matcha or lime if you want to explore flavors.
In the sections ahead, you’ll find everything you need to nail the perfect lemon mochi at home:
- A clear ingredient list and simple microwave steps;
- Helpful pro tips for texture and shaping;
- Flavor twists and filling ideas; and
- Storage advice plus answers to your common questions.
Why You’ll Love Lemon Mochi
What’s so great about lemon mochi? It combines the classic chewy, addictive texture you love with a bright, refreshing lemon tang. It comes together quickly—no yeast or long waits—similar to a no-bake citrus dessert like this No Bake Lemon Tart. The sweet and tangy balance makes it a light, perfect dessert or an afternoon snack. The microwave method keeps things simple and quick, and once it’s made, these little bites are fun to shape, portable, and easy to personalize with fillings or extra flavors; for pairing ideas, see how brilliantly lemon works with berries in this Lemon Blueberry Layer Cake.
Exact Ingredient Measurements
- 1 cup glutinous rice flour (mochiko)
- 1/2 cup granulated sugar
- 1 cup water
- 1/4 cup freshly squeezed lemon juice
- Zest from one lemon
- 1/2 teaspoon lemon extract (optional, for an extra punch of lemon flavor)
- Potato starch or cornstarch (for dusting)
Step-by-Step Microwave Method
- In a microwave-safe bowl, whisk together 1 cup glutinous rice flour (mochiko) and 1/2 cup granulated sugar until evenly combined.
- Gradually pour in 1 cup water while stirring continuously until a smooth, lump-free, thick batter forms.
- Stir in 1/4 cup fresh lemon juice, zest of 1 lemon, and 1/2 teaspoon lemon extract (optional) until fully incorporated.
- Loosely cover the bowl with plastic wrap or a microwave-safe lid and microwave on high for 2 minutes.
- Carefully remove the hot bowl and stir vigorously to redistribute heat and break up any clumps.
-
Cover again and microwave in 1-minute bursts for another 1–2 minutes until the mixture is thick, glossy, slightly translucent, and pulling away from the sides of the bowl.

- Let the mochi cool until warm enough to handle, about 5–10 minutes.
- Heavily dust a clean work surface and your hands with potato starch or cornstarch to prevent sticking.
- If the dough is too sticky to handle, chill it in the refrigerator for 5–10 minutes, then dust and proceed.
- Scoop small portions of mochi onto the dusted surface using a spoon or cookie scoop.
- Dust your hands and shape each portion into a ball or desired shape; to fill, flatten a portion, add filling, pinch closed, and reshape.
- Place finished mochi on a starch-dusted plate and brush off excess starch before serving.
Expert Tips for Perfect Texture
- Measure mochiko by spooning it into your cup and leveling off—don’t pack it down, or your mochi will be too dense.
- Always use fresh lemon juice and zest if possible—bottled juice works but lacks that fresh zing and acidity that set desserts like lemon posset (3-ingredient recipe).
- Use potato starch, not flour, to dust your surface and hands. It prevents a pasty coating and keeps the mochi soft.
- Watch your cooking time carefully—overcooked mochi can turn rubbery or too firm. Microwave in short bursts if your appliance runs hot.
- When shaping mochi, keep your hands either slightly wet or dust them with starch. This stops sticking and helps get smooth, beautiful balls.
- If the dough feels too sticky to handle, pop it in the fridge for 5–10 minutes to firm up, then dust with starch and shape.
Creative Flavor Swaps and Fillings
- Yuzu or lime mochi: Swap out lemon juice and zest for yuzu or lime to mix up the citrus vibe.
- Matcha-lemon: Add 1-2 teaspoons of matcha powder to the dry ingredients for a green tea twist that pairs wonderfully with lemon.
- Filled mochi: Try stuffing the mochi with sweet red bean paste, tangy lemon curd (a classic lemon bar filling works well), or a dollop of sweetened cream cheese for an extra surprise inside.
- Coconut lemon: Swap up to 1/4 cup of water with coconut milk for a richer, tropical flavor that’s still light and refreshing.
- Baked or steamed option: Instead of microwaving, steam the batter in a heatproof dish for 15-20 minutes until it’s translucent and set. Cooking times may vary.
Storing and Reheating Guide
Keep your finished lemon mochi stored in a tightly sealed container at room temperature for up to two days for the best texture and freshest lemon aroma. Refrigerating makes mochi firmer and chewier, so if you store it in the fridge, let it warm to room temp or reheat gently before eating. If you prefer a lemon dessert that’s best served chilled, try a classic lemon icebox cake (no bake).
To reheat, place mochi in a microwave-safe dish, cover loosely, and zap in 10-15 second bursts until soft and warm. Alternatively, a quick steam will soften mochi without drying it out.
If you want to freeze lemon mochi, wrap each piece tightly in plastic wrap and stash them in a freezer-safe bag for up to one month. Thaw at room temperature and refresh with a short microwave or steam before enjoying.
Answers to Common Questions
- What is mochiko/glutinous rice flour? Mochiko is finely ground sweet rice flour, perfect for making mochi. Despite the name, it’s gluten-free and totally different from wheat flour.
- Can I use regular rice flour? No, regular rice flour won’t give you that signature chewy texture. Mochiko or glutinous rice flour is key here.
- Is this recipe vegan? Yes! All the listed ingredients are plant-based. Just remember that add-ins like cream cheese will make it non-vegan unless you swap for a vegan version, such as the dairy-free cream cheese used in this Vegan Biscoff Cheesecake recipe.
- Why microwave instead of steaming? Microwaving is super fast, easy, and excellent for small batches. Steaming is gentler but takes longer and is a bit less hands-on.
- How do I know when the mochi is done? It should look shiny, slightly see-through, and thick enough to pull away from the bowl’s sides. Stop cooking then to avoid toughness.
-
Why is my mochi too sticky? Usually it means it’s undercooked or you didn’t use enough starch when shaping. Make sure to dust your surface and hands generously with potato or cornstarch.
A refreshing twist on classic Japanese mochi, featuring a soft, chewy texture infused with bright, tangy lemon flavor, made easily with a microwave method.
- Prep Time: 10 minutes
- Cook Time: 5 minutes
- Total Time: 15 minutes
- Yield: About 12 small mochi pieces 1x
- Category: Dessert
- Cuisine: Japanese
Ingredients
- 1 cup glutinous rice flour (mochiko)
- 1/2 cup granulated sugar
- 1 cup water
- 1/4 cup freshly squeezed lemon juice
- Zest from one lemon
- 1/2 teaspoon lemon extract (optional, for an extra punch of lemon flavor)
- Potato starch or cornstarch (for dusting)
Instructions
- In a microwave-safe bowl, whisk together 1 cup glutinous rice flour (mochiko) and 1/2 cup granulated sugar until evenly combined.
- Gradually pour in 1 cup water while stirring continuously until a smooth, lump-free, thick batter forms.
- Stir in 1/4 cup fresh lemon juice, zest of 1 lemon, and 1/2 teaspoon lemon extract (optional) until fully incorporated.
- Loosely cover the bowl with plastic wrap or a microwave-safe lid and microwave on high for 2 minutes.
- Carefully remove the hot bowl and stir vigorously to redistribute heat and break up any clumps.
- Cover again and microwave in 1-minute bursts for another 1–2 minutes until the mixture is thick, glossy, slightly translucent, and pulling away from the sides of the bowl.
- Let the mochi cool until warm enough to handle, about 5–10 minutes.
- Heavily dust a clean work surface and your hands with potato starch or cornstarch to prevent sticking.
- If the dough is too sticky to handle, chill it in the refrigerator for 5–10 minutes, then dust and proceed.
- Scoop small portions of mochi onto the dusted surface using a spoon or cookie scoop.
- Dust your hands and shape each portion into a ball or desired shape; to fill, flatten a portion, add filling, pinch closed, and reshape.
- Place finished mochi on a starch-dusted plate and brush off excess starch before serving.
Notes
Measure mochiko by spooning it into your cup and leveling off—don’t pack it down, or your mochi will be too dense., Use fresh lemon juice and zest whenever possible for the best flavor., Use potato starch (not flour) for dusting to keep mochi soft and prevent stickiness., Microwave in short bursts and watch the cooking time closely to avoid overcooking and rubbery texture., Dust hands or keep them slightly wet when shaping for smooth, manageable mochi., Chilling sticky dough makes shaping easier., Try flavor variations such as replacing lemon with yuzu or lime juice and zest, adding matcha powder, or stuffing mochi with sweet red bean paste, lemon curd, or cream cheese., You can steam the batter as an alternative cooking method (15–20 minutes until translucent)., Store mochi in an airtight container at room temperature up to 2 days for best texture., Reheat gently in short microwave bursts or by steaming to soften mochi., Freeze wrapped mochi up to one month, thaw at room temperature, then refresh by steaming or microwaving.
Nutrition
- Serving Size: 1 mochi piece
- Calories: Approximately 70 kcal per mochi piece (estimation based on ingredients)
- Fat: 0.1 g per serving (approximate)
- Carbohydrates: 16 g per serving (approximate)
- Protein: 1 g per serving (approximate)
More in Baking & Desserts

Apple Fritter Cinnamon Roll Bake

Apple Pie Cookies Recipe

Cinnamon Apple Bread