Mochi Ice Cream

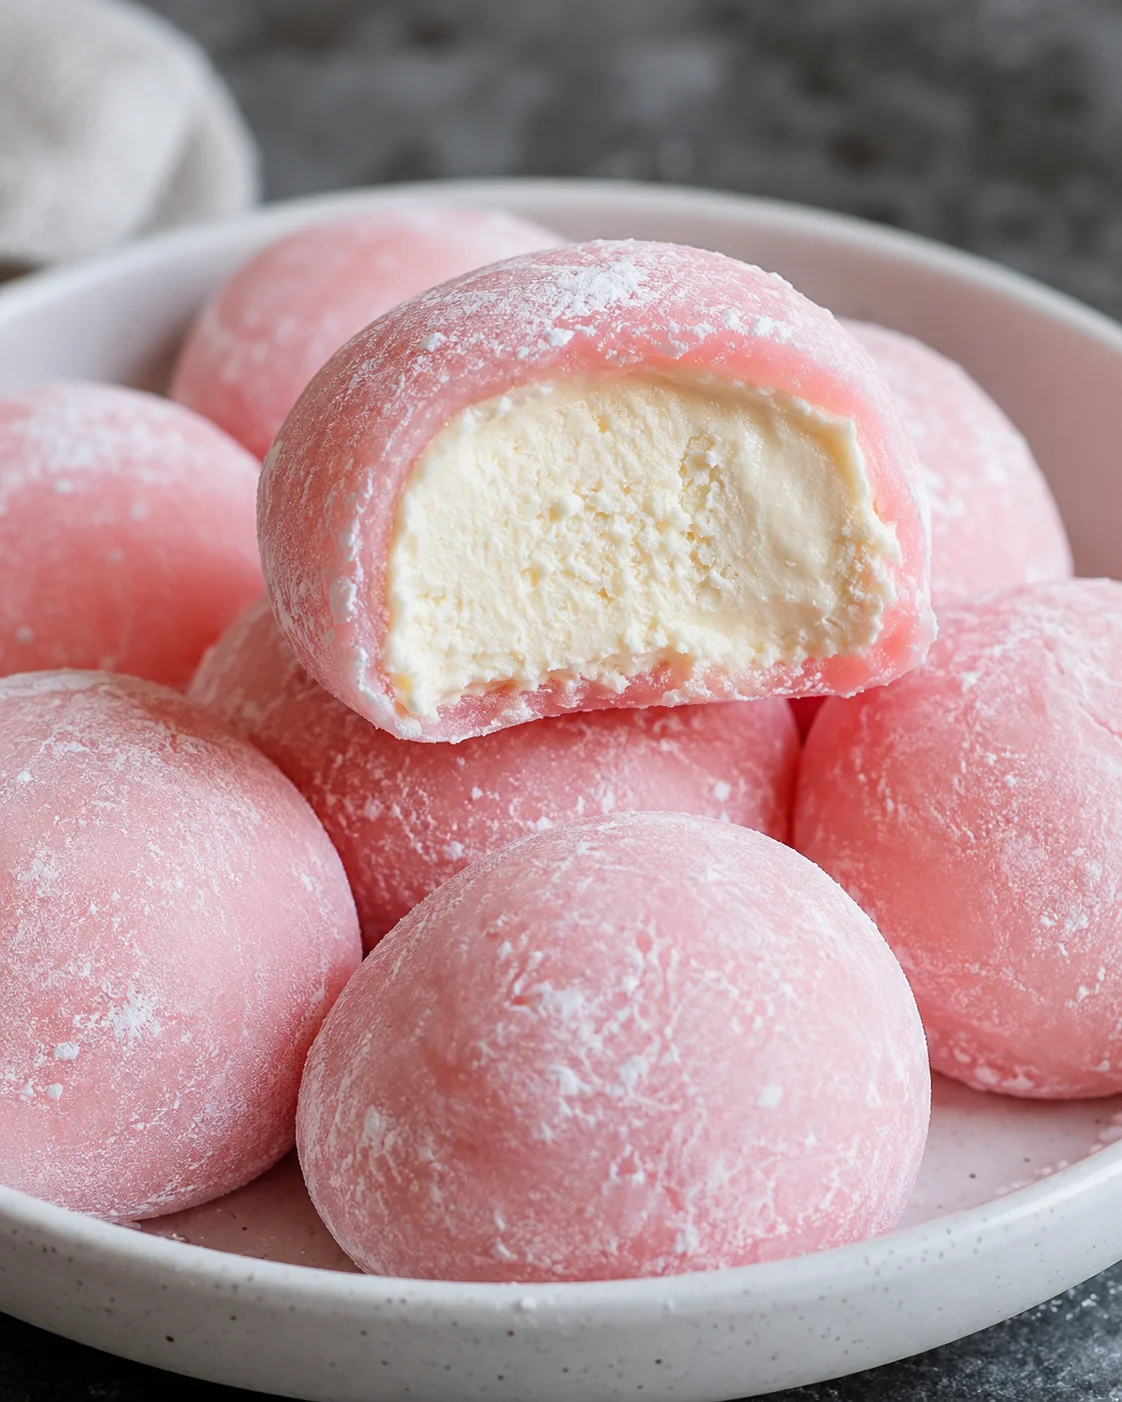
Making your own mochi ice cream at home is easier than you think! These Japanese rice cakes with a creamy ice cream center wrapped in soft, chewy sweet rice dough are such a fun treat to enjoy anytime.
I first fell in love with mochi ice cream a few years back when a friend from Laos brought some to a dinner party. That chewy, soft texture combined with cold, creamy ice cream inside is just magic! Since then, mochi ice cream has become a regular guest in our house. I spot it in just about every grocery store freezer, and my kids have happily devoured Costco-sized packs for dessert night. But I finally decided to take the plunge and make homemade mochi ice cream myself. Spoiler alert: I’m never going back to store-bought!
Some recipes call for a sweeter dough using more sugar — about twice the sugar to flour ratio. If you want to explore that version, I’ve got you covered with another recipe you can check out.
Mochi is a classic Japanese treat made from glutinous rice. Traditional mochi is made during the New Year through a special and labor-intensive practice called mochitsuki, where steamed rice is pounded into a sticky dough. I love watching videos of that process — it’s fascinating! But for everyday cooking, this recipe keeps it super simple by using glutinous rice flour mixed with water and sugar, then steamed or microwaved instead of pounding.
If you’ve ever enjoyed a mochi ice cream — that delightfully soft, slightly chewy rice cake surrounding a cool, creamy ice cream center — you know it’s one of those little treats that always feels special. The best part? You don’t have to buy a pack from the store freezer. With this recipe, you’ll learn how to make real-deal mochi ice cream right in your kitchen using simple ingredients and everyday tools.
Here’s the quick rundown: the dough comes together with glutinous rice flour, a bit of sugar, and water. You can cook it quickly in the microwave or use a steamer for a more traditional approach. Plan for about 25 minutes of prep, just 3 minutes of cooking, and roughly 2½ hours total including freezing. This recipe makes about 12 small, delightful mochi treats.
So, what else will you find here?
- Step-by-step instructions: how to scoop and freeze the ice cream balls, make the mochi dough, roll it out, cut, and wrap each piece with ease.
- A handy ingredient list and a few kitchen tools you’ll need — things like an ice cream scoop, rolling pin, a 3-inch round cutter, some plastic wrap, and either a microwave or steamer.
- Tips for working with sticky mochi dough, how to prevent the ice cream from melting while you work, and tricks to get clean, tight mochi wraps.
- Ideas for different flavors and fillings, plus advice on storing and serving your mochi ice cream so they stay fresh and delicious.
- Answers to common questions, from handling sticky dough to choosing the right cutter size and making dairy-free versions.
Ready to impress your family (and yourself!) with a fun, homemade treat? Let’s jump in — making mochi ice cream at home is easier and more fun than you might think.
Homemade mochi ice cream is a tender, chewy Japanese rice dough wrapped around your favorite ice cream flavors for a fun and delicious treat you can make from scratch!
Prep: 25 minutes mins
Cook: 3 minutes mins
Total: 2 hours hrs 30 minutes mins
Servings: 12
Fast, Fun, and Customizable
- Super EASY! It may look fancy, but trust me, making mochi ice cream is super straightforward. Grab your favorite ice cream, pick up sweet rice flour (like mochiko), and most of the other ingredients are probably hanging out in your pantry already. The dough cooks in just minutes, and the prep clocks in around 25 minutes total.
- Make it your own. This recipe is so versatile! Change the ice cream flavors, or mix things into the dough. I recently stirred in peanut butter — so good! More on flavor ideas coming up.
Ingredients and Pantry Staples
- 1 cup glutinous rice flour (Sweet rice flour, I recommend shiratamako or mochiko)
- ¼ cup sugar
- 2 Tablespoons powdered sugar
- 1 cup water
- Food coloring (optional, to change the color of the dough)
- Cornstarch or potato starch (for dusting and rolling)
- Ice cream (your favorite kind)
Cook, Shape, and Freeze
- Line a baking sheet with parchment paper; scoop small, firm balls of ice cream, flatten one side so they sit flat, place on the sheet and freeze until solid (about 1 hour).
- In a microwave-safe bowl, whisk together glutinous rice flour, sugar, and powdered sugar; slowly add water while stirring until smooth and lump-free.
- Cover the bowl tightly with plastic wrap and microwave 1 minute; remove and fold with a wet spatula to prevent sticking, cover and microwave 1 minute more; fold again and microwave 30 seconds; if the dough isn’t shiny and stretchy, microwave an additional 30 seconds.
- Alternatively, instead of microwaving, steam the mixture for 15 minutes, stir, then steam another 5 minutes until shiny and stretchy.
- On a countertop covered with parchment dusted generously with cornstarch or potato starch, scrape the hot mochi dough onto the parchment and dust the top with more starch.
- Roll the dough with a rolling pin into a large rectangle about 1/4 inch thick, dusting as needed to prevent sticking; transfer the parchment with the rolled dough onto a baking sheet and chill in the refrigerator 30 minutes.
- Cut plastic wrap into large squares—one per ice cream ball—and set aside.
- Use a ~3-inch round cutter to cut circles from the chilled dough and brush off excess cornstarch from each circle.
-
Working with one frozen ice cream ball at a time, place the scoop in the center of a mochi circle, gently gather and pinch the dough up and around the ice cream to seal tightly and remove air pockets.
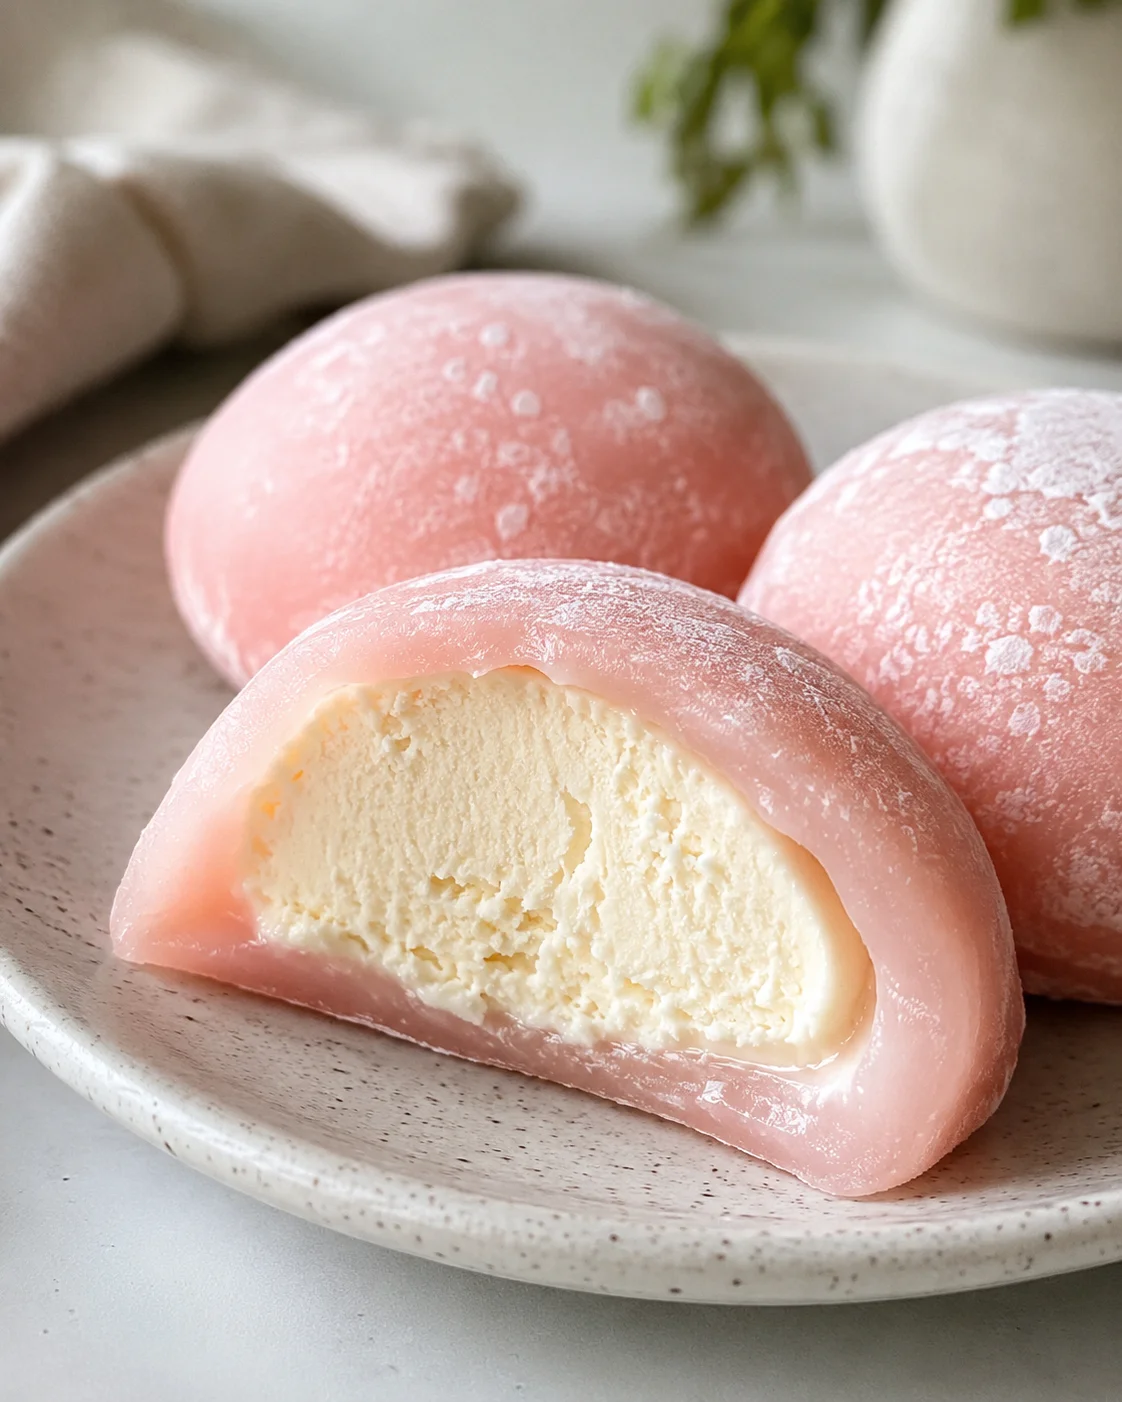
- Set each sealed mochi ball on a square of plastic wrap, twist the top to seal, repeat with remaining balls, then place the wrapped mochi in the freezer (twist-side down) and freeze at least 1 hour before serving.
Tips for Easy Handling
Mochi dough is famously sticky! To keep things manageable, have plenty of cornstarch, potato starch, or tapioca flour nearby for dusting your hands, tools, and work surface. Also, keep a small cup of water handy to dip your spatula in — this prevents it from sticking while you fold and handle the dough. And trust me, soaking your dishes in water right after you’re done makes cleanup so much easier.
Choosing your cutter: Pick a biscuit or cookie cutter roughly an inch wider than your ice cream scoop. This ensures the mochi circle is just large enough to wrap the ice cream snugly without leaving pockets of air or extra dough edges that get tough when frozen. For another example of a tight, clean wrap around a round filling, see the Whole Peach Mochi recipe. Fun tip: I’ve even used the lid from my cornstarch container for this — it worked perfectly! If you do end up with extra dough around the edges when wrapping, trim it off. Too much dough can get chewy and dense after freezing.
Cooking the mochi dough: I love the microwave method — it’s fast and fuss-free. Traditionalists swear by steaming, which is certainly authentic and yields a lovely texture too. If you’d like to practice the dough with a simple flavor variation, try our Zesty Lemon Mochi.
Flavor Swaps and Fillings
Here are some tasty ways to mix up your homemade mochi ice cream:
- Switch up the filling: use any ice cream, gelato, sorbet, or a dairy-free frozen dessert to suit your tastes or dietary needs.
- Try something different than ice cream — nutella, sweet red bean paste (anko), peanut butter, edible cookie dough, or even a juicy fresh strawberry make delicious surprises in the center.
- Add flavor to your dough: stir in matcha green tea powder, cocoa powder, peanut butter, vanilla extract, or a splash of coconut milk before or just after cooking for extra flair.
- Make your mochi colorful: a few drops of gel food coloring can brighten up your mochi without altering texture or taste.
- Roll your finished mochi in toasted coconut, crushed nuts, powdered sugar, cocoa powder, or Oreo crumbs for a fun coating and a bit of crunch or sweetness contrast.
- Have fun with size: try mini mochi using a small melon baller, or go big with a larger cutter, adjusting prep and freezing times as needed.
Freezing and Serving Tips
Here’s how to keep your mochi ice cream fresh and ready to enjoy:
- Long-term storage: Wrap each ball tightly in plastic wrap, then tuck them in an airtight freezer bag or container. Store in the freezer for up to 3 months for best flavor and texture.
- To serve: Take mochi ice cream out and let it sit at room temperature for 5–15 minutes so the dough softens just enough and the ice cream is easy to bite into. The exact timing will depend on your room temp and ice cream style.
- Avoid reheating: Don’t zap the whole mochi in the microwave — it melts unevenly and can get soggy. If the dough feels too firm, just let it thaw a bit at room temp before serving.
- Make-ahead tip: You can prepare and freeze mochi ice cream ahead of time by assembling fully and storing as described. If you want to prep the cooked dough in advance, cool it fully, wrap tight, and refrigerate up to 24 hours. The texture might firm up, so warm it briefly in the microwave before rolling.
-
Refreezing caution: Once mochi thaws and softens, try not to refreeze multiple times. This can cause icy crystals and change texture.
Common Questions and Fixes
Here are some answers to frequent questions about making homemade mochi ice cream:
- Can I use regular rice flour or wheat flour? No, you’ll want glutinous (sweet) rice flour like mochiko or shiratamako. Ordinary rice or wheat flour won’t give you that signature chewy texture.
- My dough is super sticky. What can I do? Use lots of cornstarch or potato starch on your hands, tools, and work surface to keep it manageable—techniques you’ll also see in pan-fried fresh milk mochi to control stickiness and get that extra-stretchy bite. Also, dip your spatula in water frequently to avoid sticking while folding.
- Microwave or steam the dough? Both work! Microwave is faster and easier, while steaming is traditional and yields a lovely texture but takes longer.
- How do I stop the ice cream from melting during assembly? Work quickly and only with one scoop at a time. Keep the rest frozen until you’re ready. Freezing scooped balls for an hour before wrapping makes this step smoother.
- Can I make this dairy-free or vegan? Absolutely! Just use non-dairy or vegan ice cream or sorbet. The mochi dough itself is naturally dairy-free.
- How big should my cutter be? Choose one about 1 inch bigger than your ice cream scoop diameter to get a snug but not excessive dough wrap.

An easy and delightful Japanese-inspired dessert featuring chewy, sweet rice dough wrapped around your favorite ice cream flavors. This recipe yields about 12 small mochi ice cream treats with a tender, chewy texture and creamy ice cream center.
- Prep Time: 25 minutes
- Cook Time: 3 minutes
- Total Time: 2 hours 30 minutes
- Yield: 12 mochi ice cream pieces 1x
- Category: Dessert
- Cuisine: Japanese
Ingredients
- 1 cup glutinous rice flour (sweet rice flour, such as shiratamako or mochiko)
- 1/4 cup sugar
- 2 tablespoons powdered sugar
- 1 cup water
- Food coloring (optional, to tint the dough)
- Cornstarch or potato starch (for dusting and rolling)
- Ice cream (your favorite kind)
Instructions
- Line a baking sheet with parchment paper; scoop small, firm balls of ice cream, flatten one side so they sit flat, place on the sheet and freeze until solid (about 1 hour).
- In a microwave-safe bowl, whisk together glutinous rice flour, sugar, and powdered sugar; slowly add water while stirring until smooth and lump-free.
- Cover the bowl tightly with plastic wrap and microwave 1 minute; remove and fold with a wet spatula to prevent sticking, cover and microwave 1 minute more; fold again and microwave 30 seconds; if the dough isn’t shiny and stretchy, microwave an additional 30 seconds.
- Alternatively, instead of microwaving, steam the mixture for 15 minutes, stir, then steam another 5 minutes until shiny and stretchy.
- On a countertop covered with parchment dusted generously with cornstarch or potato starch, scrape the hot mochi dough onto the parchment and dust the top with more starch.
- Roll the dough with a rolling pin into a large rectangle about 1/4 inch thick, dusting as needed to prevent sticking; transfer the parchment with the rolled dough onto a baking sheet and chill in the refrigerator 30 minutes.
- Cut plastic wrap into large squares—one per ice cream ball—and set aside.
- Use a ~3-inch round cutter to cut circles from the chilled dough and brush off excess cornstarch from each circle.
- Working with one frozen ice cream ball at a time, place the scoop in the center of a mochi circle, gently gather and pinch the dough up and around the ice cream to seal tightly and remove air pockets.
- Set each sealed mochi ball on a square of plastic wrap, twist the top to seal, repeat with remaining balls, then place the wrapped mochi in the freezer (twist-side down) and freeze at least 1 hour before serving.
Notes
Use plenty of cornstarch, potato starch, or tapioca flour to prevent sticking while working with the mochi dough., Dip your spatula in water to keep it from sticking during folding and handling the dough., Choose a cutter about 1 inch larger than your ice cream scoop diameter for a snug wrap without excess dough., Microwave cooking is quicker and fuss-free; steaming yields traditional texture but takes longer., Try flavor variations by adding matcha powder, cocoa powder, peanut butter, or vanilla extract to the dough., Use any ice cream, gelato, sorbet, or dairy-free frozen dessert to suit dietary needs., For storage, wrap each mochi tightly in plastic wrap and place in an airtight container to freeze up to 3 months., Allow mochi ice cream to sit at room temperature for 5–15 minutes before serving for optimal softness., Avoid reheating mochi ice cream directly in the microwave as it can melt unevenly and become soggy.
Nutrition
- Serving Size: 1 mochi ice cream ball
More in Baking & Desserts

Apple Fritter Cinnamon Roll Bake

Apple Pie Cookies Recipe
Cinnamon Apple Bread