Pumpkin Dump Cake

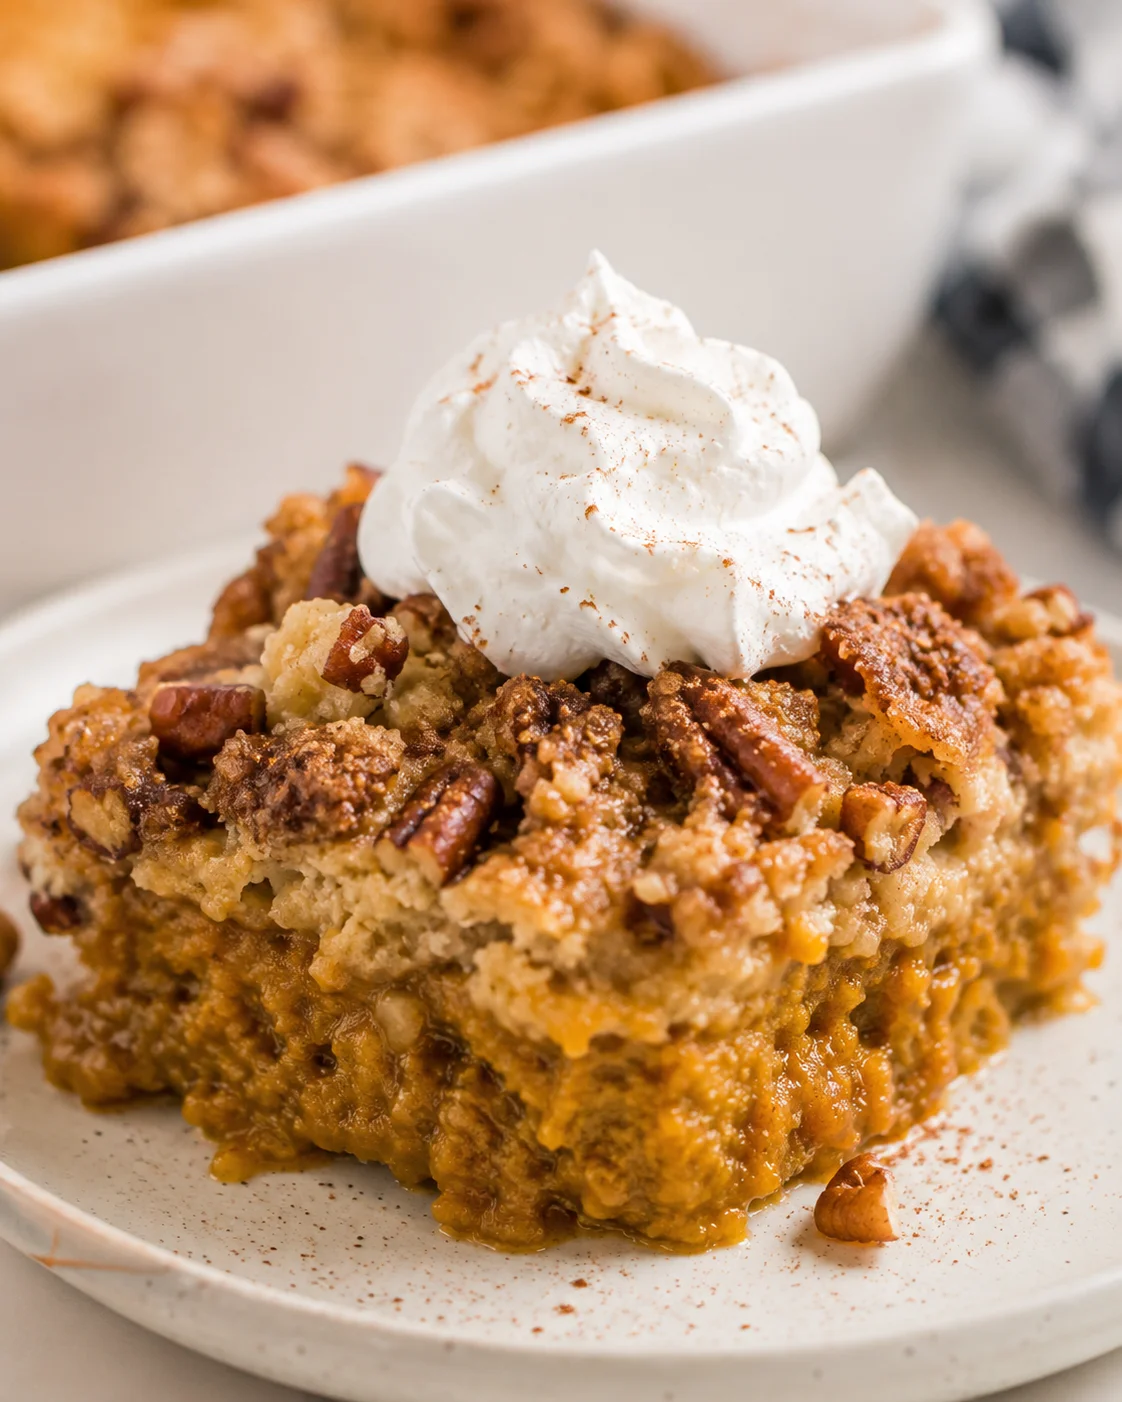
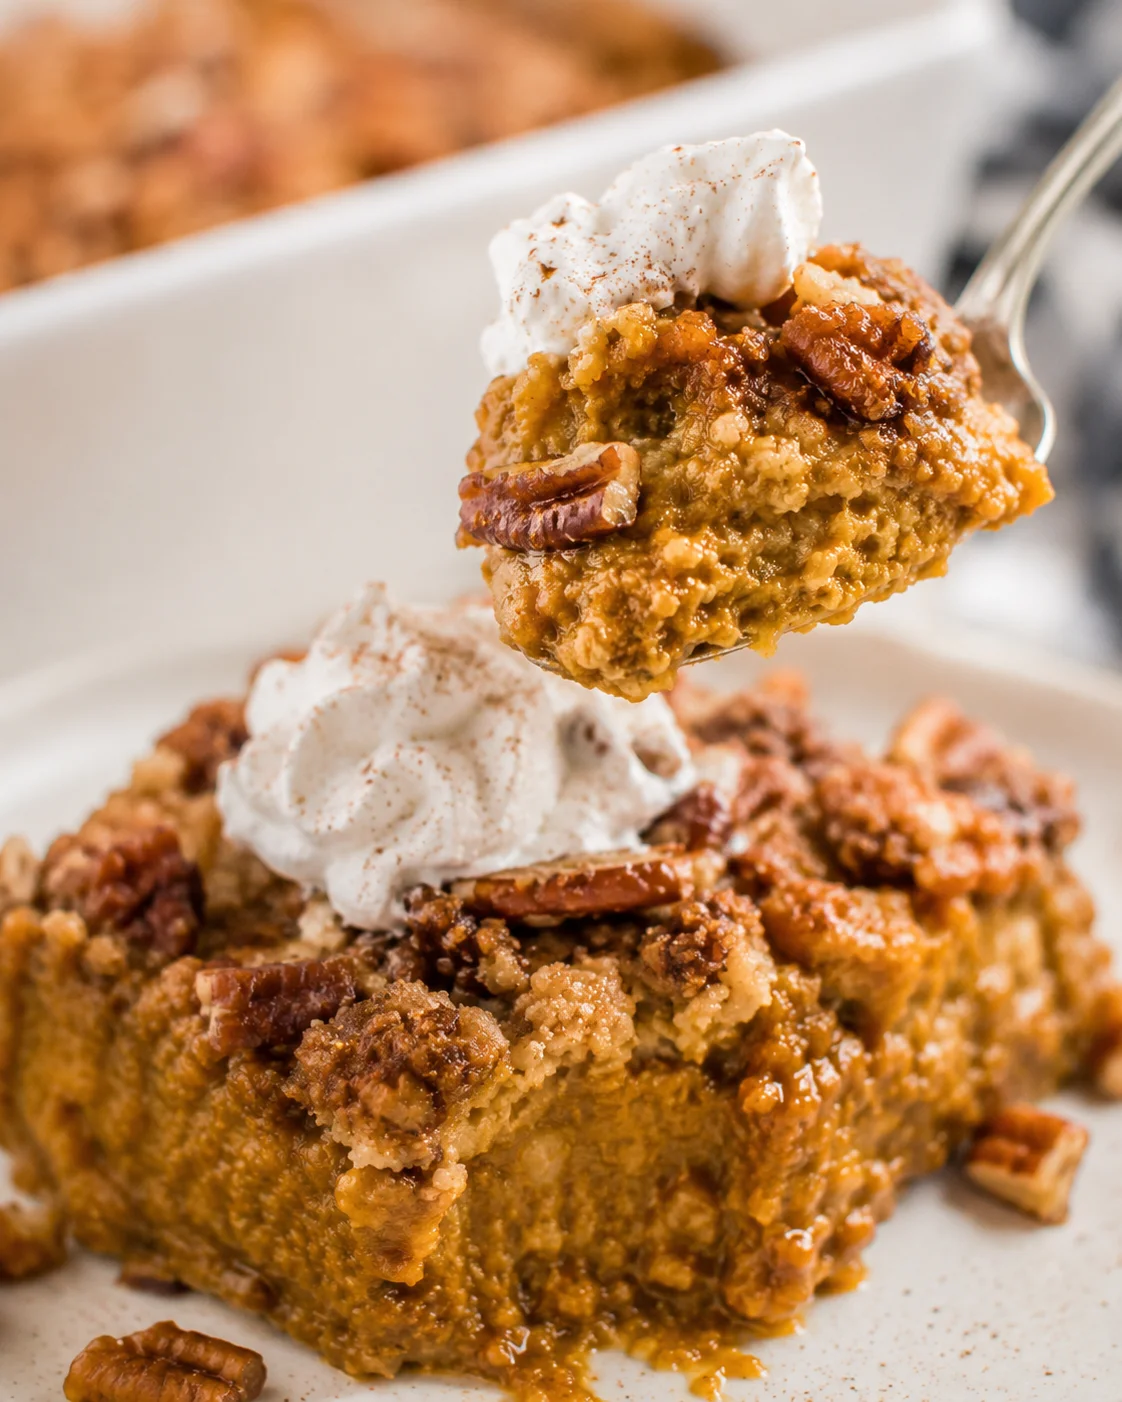
This easy pumpkin dump cake recipe is such a breeze to make—just dump and bake for a cozy fall treat. The bottom layer is a creamy, dreamy pumpkin filling, just like pumpkin pie, while the top layer is a buttery, nut-studded cake that’s crunchy and delicious.
So, what’s a dump cake? It’s honestly one of the simplest desserts you can make, perfect for busy days. We adore pumpkin around here in the fall, and this pumpkin dump cake hits that nostalgic note without any fuss. You just mix up a few ingredients, dump it all in a pan, scatter some boxed cake mix on top, and bake. Easy as pie—without the pie crust!
I don’t know about you, but I’m always on the lookout for no-fail, effortless recipes, especially during the busy holiday season when life gets hectic. This pumpkin dump cake really fits the bill for a quick, tasty dessert. Serve it straight from the oven or add a dollop of whipped cream or a scoop of vanilla ice cream for an extra special touch. It’s a guaranteed crowd-pleaser!
Welcome! You’re just moments away from making a lovely, super-simple fall dessert: a true dump-and-bake pumpkin dump cake. If you want that smooth, pumpkin pie-like filling without the hassle of rolling out crust or standing at the stove, this recipe is for you. You just mix the pumpkin filling, layer it in your pan, sprinkle dry cake mix over it, drizzle melted butter, add your nuts, and bake away.
- Quick snapshot: About 5 minutes prep, 1 hour baking, so roughly 1 hour 5 minutes total. This recipe serves around 8.
- What you’ll get: A luscious, smooth pumpkin custard (make sure to use canned pumpkin puree, not pie filling) with a crisp, buttery cake topping studded with pecans or walnuts.
- Why it’s great: Super simple and fast—ideal for busy holiday days, potlucks, or just an easy weeknight dessert. It’s best served warm with some whipped cream or vanilla ice cream.
Keep scrolling for the full list of ingredients, detailed steps, helpful tips, fun variations, and storage advice so you can easily get it just right every time.
Why You’ll Love This Cake
- Effortless autumn treat: Seriously, this pumpkin dump cake couldn’t be easier—just mix, pour, and bake!
- Warm, cozy flavors: Pumpkin puree and comforting pumpkin pie spice come together to create a classic fall taste you’ll love.
- Great for gatherings: This recipe is perfect for potlucks and parties since it tastes fantastic warm or at room temperature and is easy to transport.
Ingredients and Key Notes
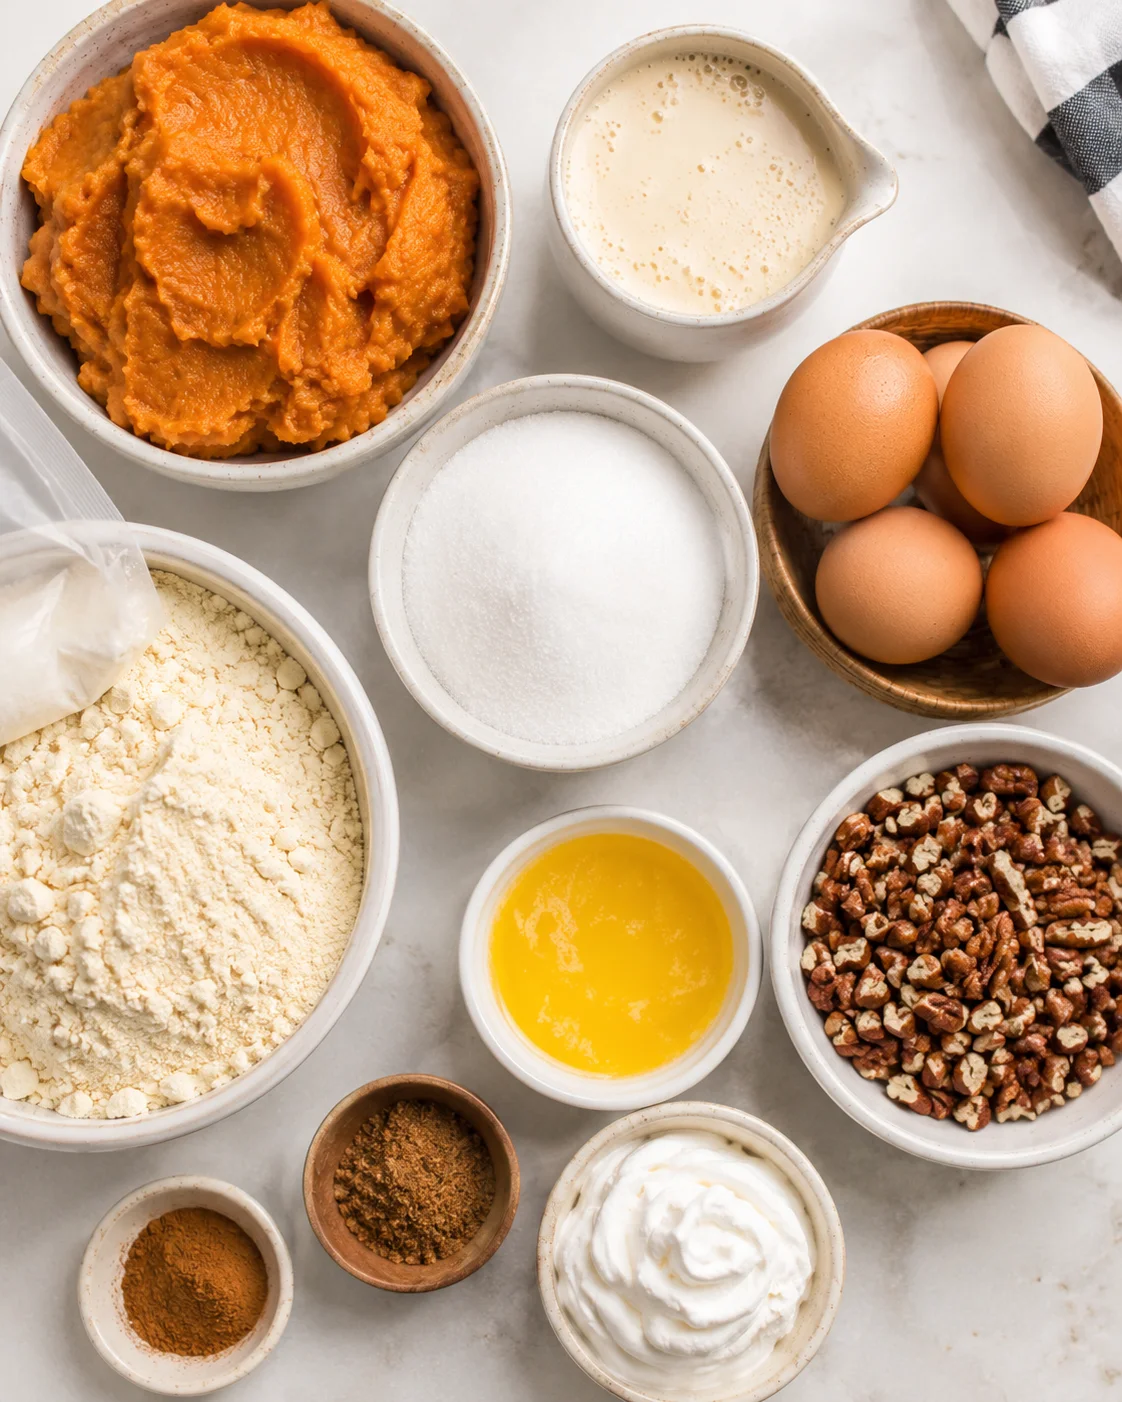
- 30 ounces pumpkin puree (not pumpkin pie filling)
- 12 ounces evaporated milk
- 4 eggs
- 1 ½ cups sugar
- 2 teaspoon cinnamon
- 2 teaspoon pumpkin pie spice
- 1 box yellow cake mix
- 1 cup butter
- 1 cup chopped pecans (can also use walnuts)
- whipped cream for serving
How to Assemble and Bake
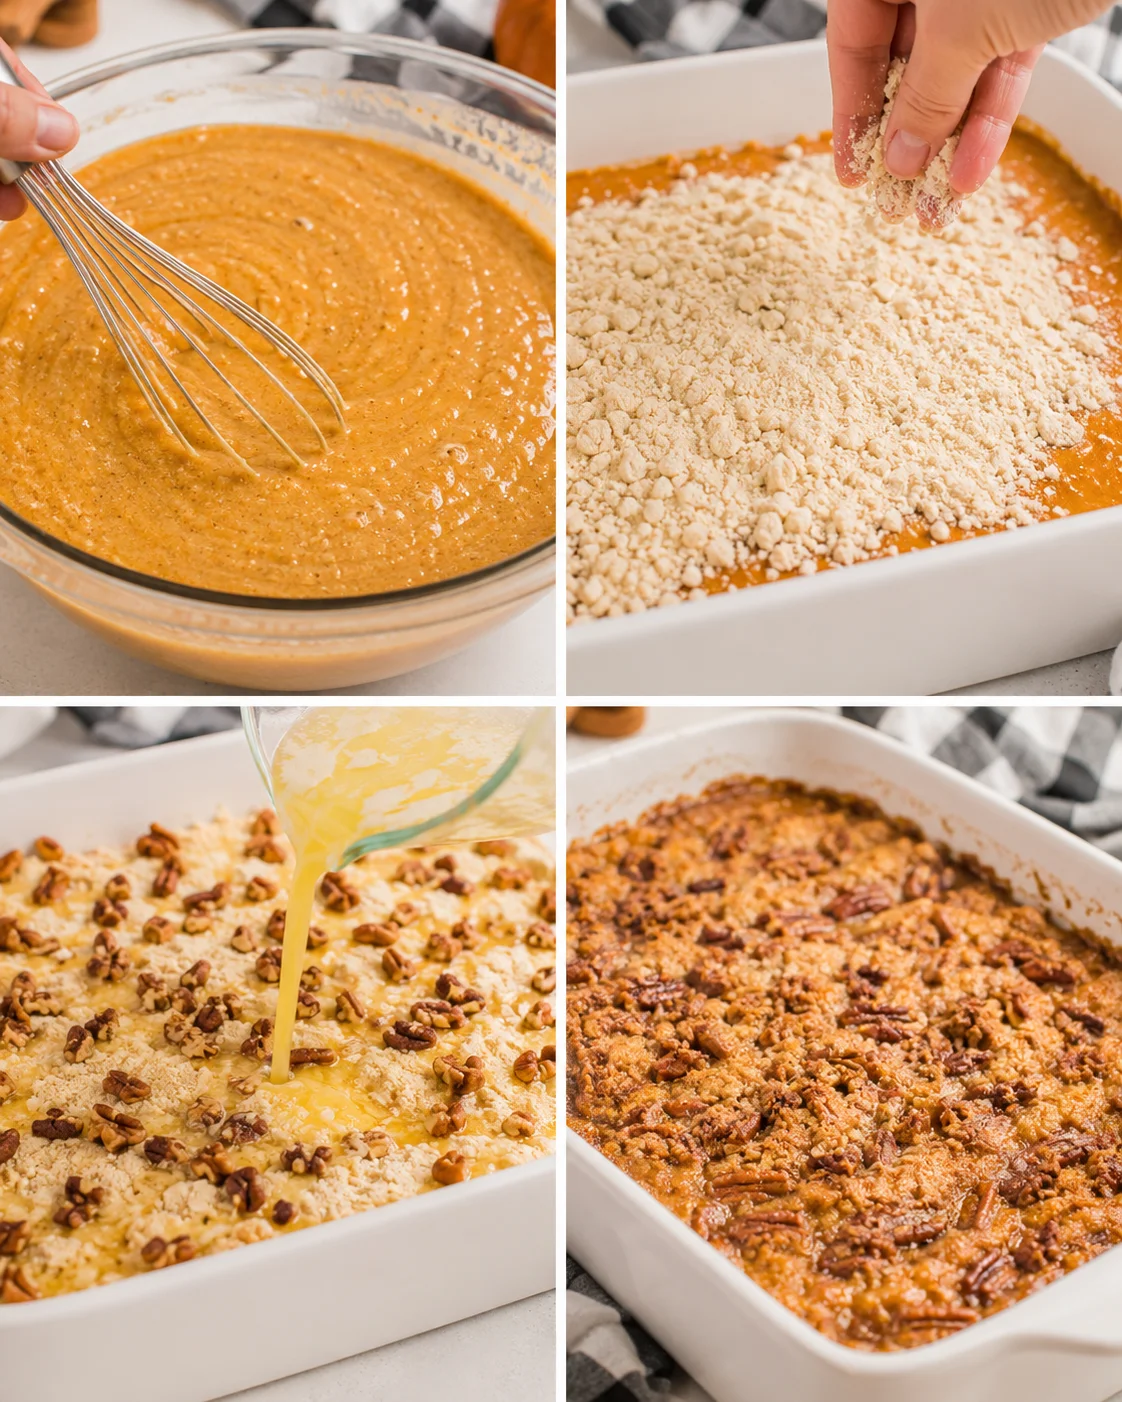
- Preheat oven to 350°F and spray a 9×13-inch baking dish.
- In a medium bowl whisk together pumpkin puree, evaporated milk, eggs, sugar, cinnamon, and pumpkin pie spice until smooth.
- Pour the pumpkin mixture evenly into the prepared baking dish.
- Evenly sprinkle the dry yellow cake mix over the pumpkin layer.
- Melt the butter completely and pour it slowly and evenly over the cake mix.
- Spread the chopped pecans or walnuts evenly over the top.
- Bake at 350°F for 1 hour, watching the nuts during the last 10–15 minutes and loosely tenting with foil if they begin to overbrown.
-
Check doneness: the edges should be bubbling and the custard center set (not jiggly).
Smart Tips and Shortcuts
- Always use canned pumpkin puree—not pumpkin pie filling—so your pumpkin dump cake has that pure pumpkin flavor without extra sugar or spices getting in the way.
- Whisk the pumpkin, evaporated milk, eggs, and sugar well until smooth. This helps your pumpkin layer be creamy and even before topping it with dry cake mix.
- When you sprinkle the dry cake mix over the pumpkin, try to distribute it evenly. Give the pan a gentle shake or tap to level it out so the topping bakes perfectly golden.
- Make sure the butter is fully melted and pour it evenly over the dry cake mix—this creates the beloved buttery crunch. If your butter is too cold, it may clump, so be patient melting it.
- Keep an eye on those nuts during the last 10-15 minutes of baking, especially if you’re making a pumpkin pecan dump cake. If they start to get too brown, loosely tent your pan with foil to prevent burning.
- To check doneness, look for bubbling along the edges and a custard layer that’s set in the center—not jiggly or liquidy—much like a properly baked pumpkin pie.
- If you want to make individual pumpkin dump cakes in ramekins or muffins, just reduce baking time and check for doneness starting at 20-30 minutes; cooking times vary by size.
- Make it your own! Try stirring in a teaspoon of vanilla extract for extra depth or use different cake mix flavors like butter pecan or spice cake for varied toppings.
- Serve it warm with a scoop of vanilla ice cream, a spoonful of spiced whipped cream, or a drizzle of caramel sauce for that extra cozy fall feeling.
Flavor Swaps and Add-Ins
- Switch up the cake mix: While yellow cake mix is classic here, feel free to swap in white, butter pecan, or spice cake mixes to tweak the topping flavor.
- Boost the flavor: Add a teaspoon of vanilla extract to the pumpkin mix for a little extra warmth and depth.
- Coconut crunch: Sprinkle shredded coconut on top of the cake mix before drizzling on the butter for a nutty, sweet twist.
- Dried fruit: Fold raisins, dried cranberries, or chopped apricots into the pumpkin mixture for added chew and sweetness.
- Spiced whipped cream: Whip up your own by mixing cinnamon and nutmeg right into your whipped cream—it’s a lovely topper.
- Chocolate chips: Don’t be shy—sprinkle some chocolate chips over the cake mix before drizzling the butter. Pumpkin and chocolate are a wonderful team—see our Chocolate Pumpkin Cheesecake Cake for another great way to pair them.
- Drizzle it on: After baking, add a caramel or butterscotch sauce drizzle over the warm pumpkin dump cake for a rich finish. Love that combo? Try these Pumpkin Cupcakes with Caramel Cream Cheese Frosting.
How to Store and Freeze
Since the pumpkin dump cake has eggs and a custard layer—much like a homemade fresh pumpkin pie—it’s best to keep leftovers in the fridge instead of leaving them out.
- In the fridge: Let the cake cool completely after baking, then cover the baking dish tightly with plastic wrap or place slices in an airtight container. It will keep well for 3 to 4 days.
- Freezing: This dump cake freezes nicely! Cool completely, then wrap the whole pan or individual slices in plastic wrap, followed by foil, or place them in freezer-safe containers. Freeze for up to 2 to 3 months. Thaw overnight in the fridge before warming.
- Reheating: For the best texture, reheat slices in a preheated oven at 325–350°F for about 10 to 20 minutes. If you want to keep those nuts from getting too dark, add foil loosely over the top. For quick reheats, microwave individual pieces for 20 to 45 seconds until warm.
- Make-ahead: You can mix the pumpkin filling up to 24 hours ahead and keep it covered in the fridge. If you’re preparing the whole unbaked cake, it’s best to bake it the same day to avoid the dry cake mix absorbing moisture and becoming soggy. Prefer a no-bake make-ahead dessert? Try these mini pumpkin pie cheesecakes that set in the fridge.
Common Questions Answered
Wondering if you can make this in smaller portions? Absolutely! Mini pumpkin dump cakes in ramekins or muffin trays are super cute and perfect for portion control. Just reduce baking time and watch closely. For another individually portioned pumpkin treat, try Mini Pumpkin Cheesecakes.
Can you use fresh pumpkin instead of canned? You can—roast fresh pumpkin first for puree—but canned pumpkin puree is a real time saver and ensures a smooth, consistent result. Make sure you’re using pure pumpkin puree, not the pumpkin pie filling that’s already sweetened and spiced.
Instructions
- Preheat oven to 350°F
- Spray a 9×13-inch baking dish and set aside.
-
In medium-sized mixing bowl, combine pumpkin, milk, eggs, sugar, cinnamon and pumpkin pie spice and mix to combine.
30 ounces pumpkin puree, 12 ounces evaporated milk, 4 eggs, 1 ½ cups sugar, 2 teaspoon cinnamon, 2 teaspoon pumpkin pie spice
- Pour into prepared baking dish.
-
Pour the dry yellow cake mix evenly over the top of the pumpkin puree mixture.
1 box yellow cake mix
-
Melt the butter and pour on top of the cake mix.
1 cup butter
-
Finally, spread the chopped nuts evenly over the top of the cake.
1 cup chopped pecans
-
Bake for 1 hour.
whipped cream for serving
Nutrition
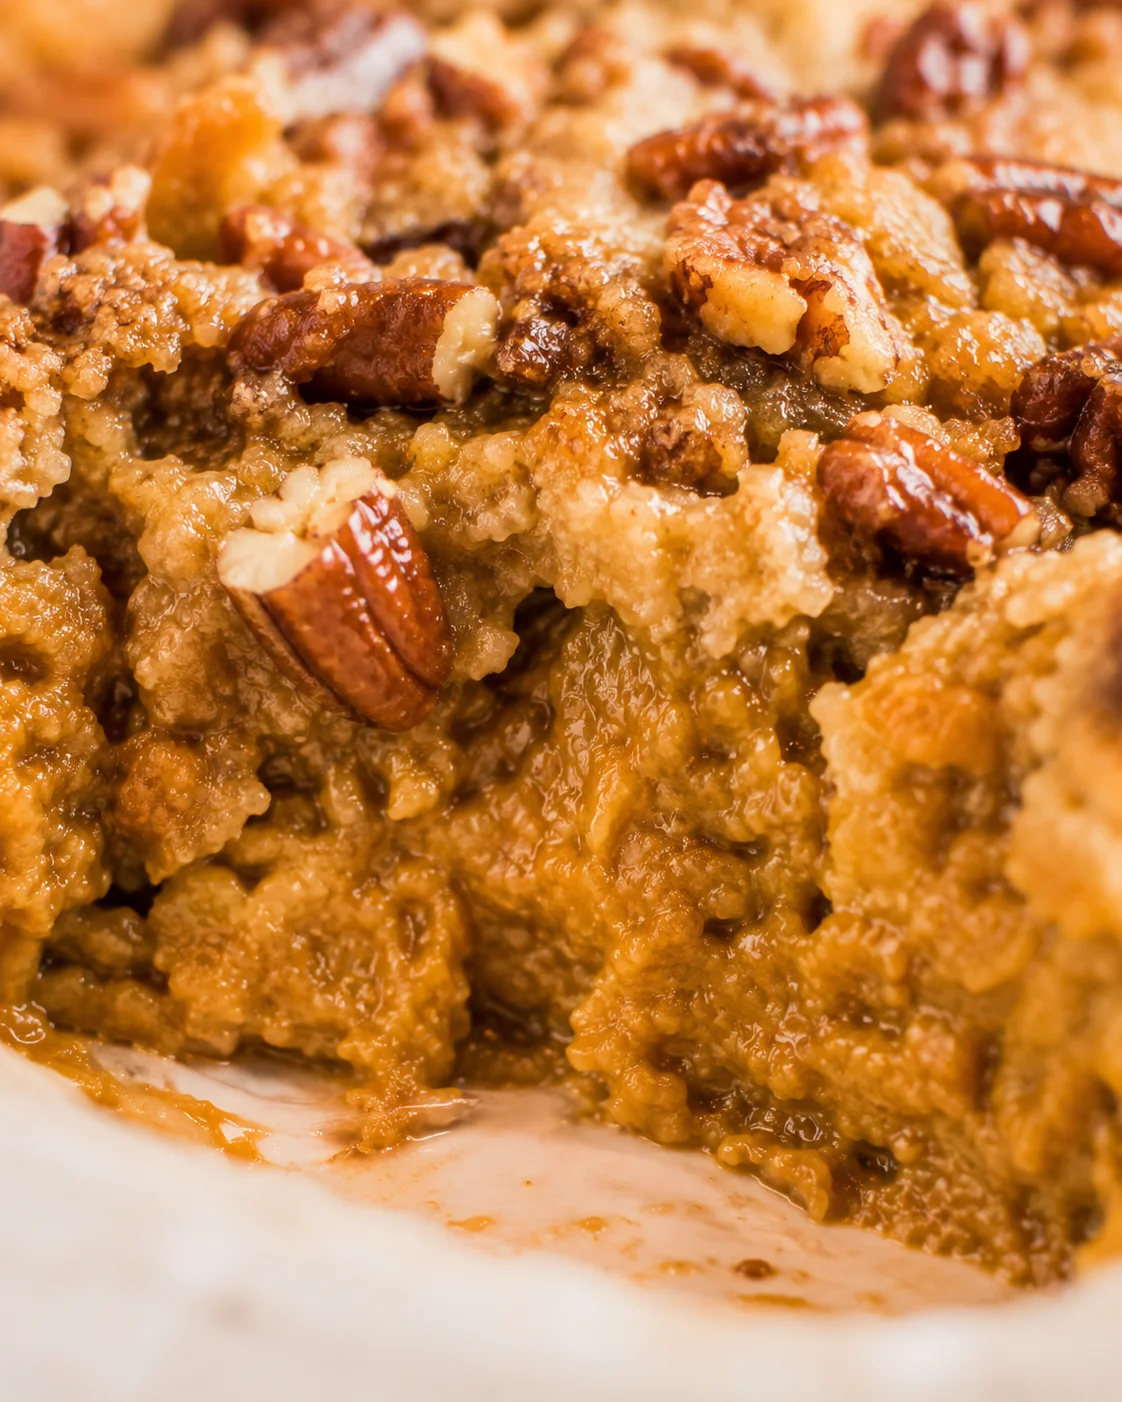
An easy and comforting pumpkin dump cake featuring a creamy pumpkin filling topped with a buttery, nut-studded crunchy cake layer. Perfect for fall and holiday gatherings.
- Prep Time: 5 minutes
- Cook Time: 1 hour
- Total Time: 1 hour 5 minutes
- Yield: 8 servings 1x
- Category: Dessert
- Cuisine: American
Ingredients
- 30 ounces pumpkin puree (not pumpkin pie filling)
- 12 ounces evaporated milk
- 4 eggs
- 1 ½ cups sugar
- 2 teaspoon cinnamon
- 2 teaspoon pumpkin pie spice
- 1 box yellow cake mix
- 1 cup butter (melted)
- 1 cup chopped pecans (can also use walnuts)
- Whipped cream for serving
Instructions
- Preheat oven to 350°F and spray a 9×13-inch baking dish with cooking spray.
- In a medium bowl, whisk together pumpkin puree, evaporated milk, eggs, sugar, cinnamon, and pumpkin pie spice until smooth.
- Pour the pumpkin mixture evenly into the prepared baking dish.
- Evenly sprinkle the dry yellow cake mix over the pumpkin layer.
- Melt the butter completely and pour it slowly and evenly over the cake mix.
- Spread the chopped pecans or walnuts evenly over the top.
- Bake at 350°F for 1 hour, watching the nuts during the last 10–15 minutes and loosely tenting with foil if they begin to overbrown.
- Check doneness: the edges should be bubbling and the custard center set (not jiggly).
- Serve warm, optionally topped with whipped cream or vanilla ice cream.
Notes
Always use canned pumpkin puree (not pumpkin pie filling) for best flavor and texture., Distribute the dry cake mix evenly and gently tap the pan to level for perfect topping., Pour fully melted butter evenly to create a buttery crunch; avoid clumpy butter., Watch nuts closely near the end of baking and cover with foil if overbrowning., Pumpkin filling can be mixed up to 24 hours ahead and refrigerated., For individual servings in ramekins or muffins, reduce baking time to 20-30 minutes and check frequently., Try flavor variations by adding vanilla extract, using different cake mix flavors, or including add-ins like shredded coconut, dried fruit, chocolate chips, or spiced whipped cream., Leftovers should be refrigerated and can be frozen for up to 2-3 months., Reheat in oven at 325–350°F for 10-20 minutes or microwave for 20-45 seconds.
Nutrition
- Serving Size: 1 slice
- Calories: 571 kcal
- Fat: 38 g
- Carbohydrates: 53 g
- Protein: 8 g
More in Uncategorized
Maple Pecan Muffins
Easy Plum Crumble Bars
Pumpkin Pie Bars (with Shortbread Crust!)