Pumpkin Pie Bars (with Shortbread Crust!)
Is the weather finally turning cool where you live? Here, we’re still battling the upper 80s most days, but the weekend promises a refreshing dip, and I’m here for it! Fall vibes are in full swing on my mind—nothing beats cozying up with comfort food and game day snacks. And let’s be honest, one of my absolute favorite parts of fall has to be all the pumpkin recipes, especially that classic Thanksgiving staple: pumpkin pie!
I’ve shared my love-hate story with pie crust more times than I can count—and you can even hear me spill all the messy details on a fun episode of the Dishing with Delishes Podcast. Truth be told, pie crusts intimidate a lot of us. That’s why when I set out to perfect a pumpkin bars recipe, I wanted to skip the crust drama entirely. Tons of you have told me you struggle with making pie crust too, which is exactly why this pumpkin bars recipe is such a lifesaver. It features a buttery shortbread base that doesn’t require prebaking. Seriously simple, and just as delicious!
Why You’ll Love These Bars
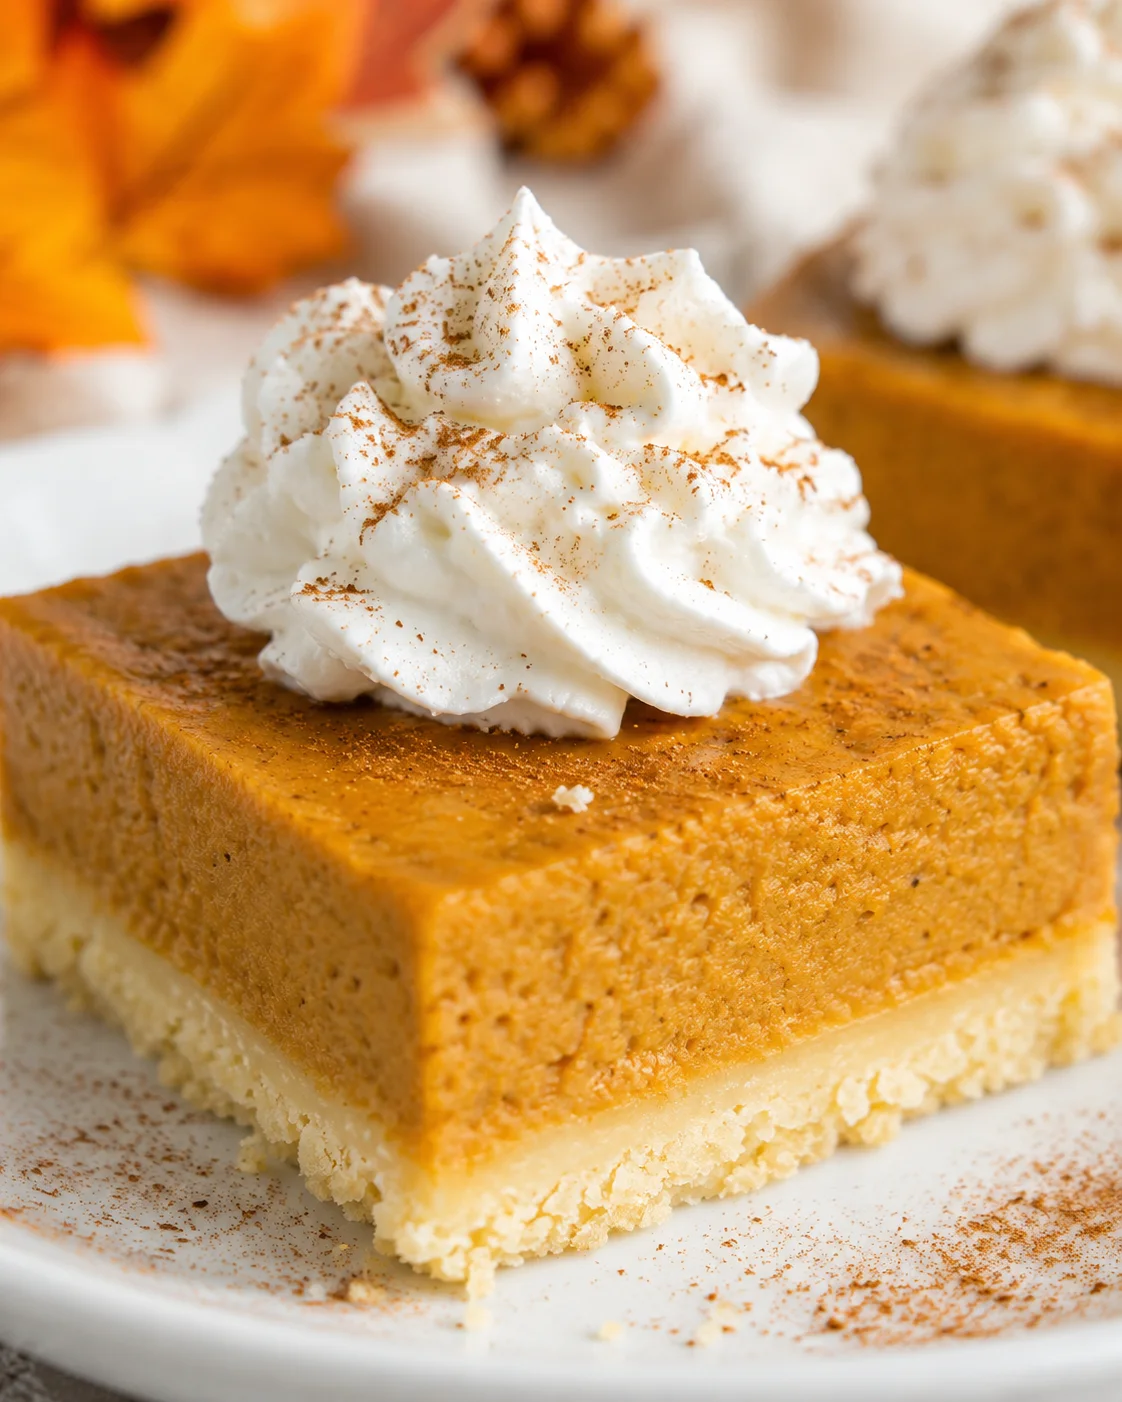
You get all the classic pumpkin pie flavors (like in our Pumpkin Pie Recipe) without the fuss of rolling out or shaping a pie crust. This pumpkin bars recipe uses a straightforward, no-prebake shortbread crust and a smooth pumpkin custard filling baked right in a 9×13″ dish. That means it’s super easy to slice and serve — ideal for feeding a crowd (it makes about 15 servings).
- Fast prep: just around 15 minutes to mix everything up, then bake and chill.
- Perfect texture: evaporated milk gives you that creamy, custard feel without heavy cream weight.
- Make-ahead magic: bake them a day early, refrigerate overnight, or pop them in the freezer for later.
- Flexible serving: these bars shine chilled, room temperature, or gently warmed with a dollop of whipped cream.
Crust and Filling Ingredients
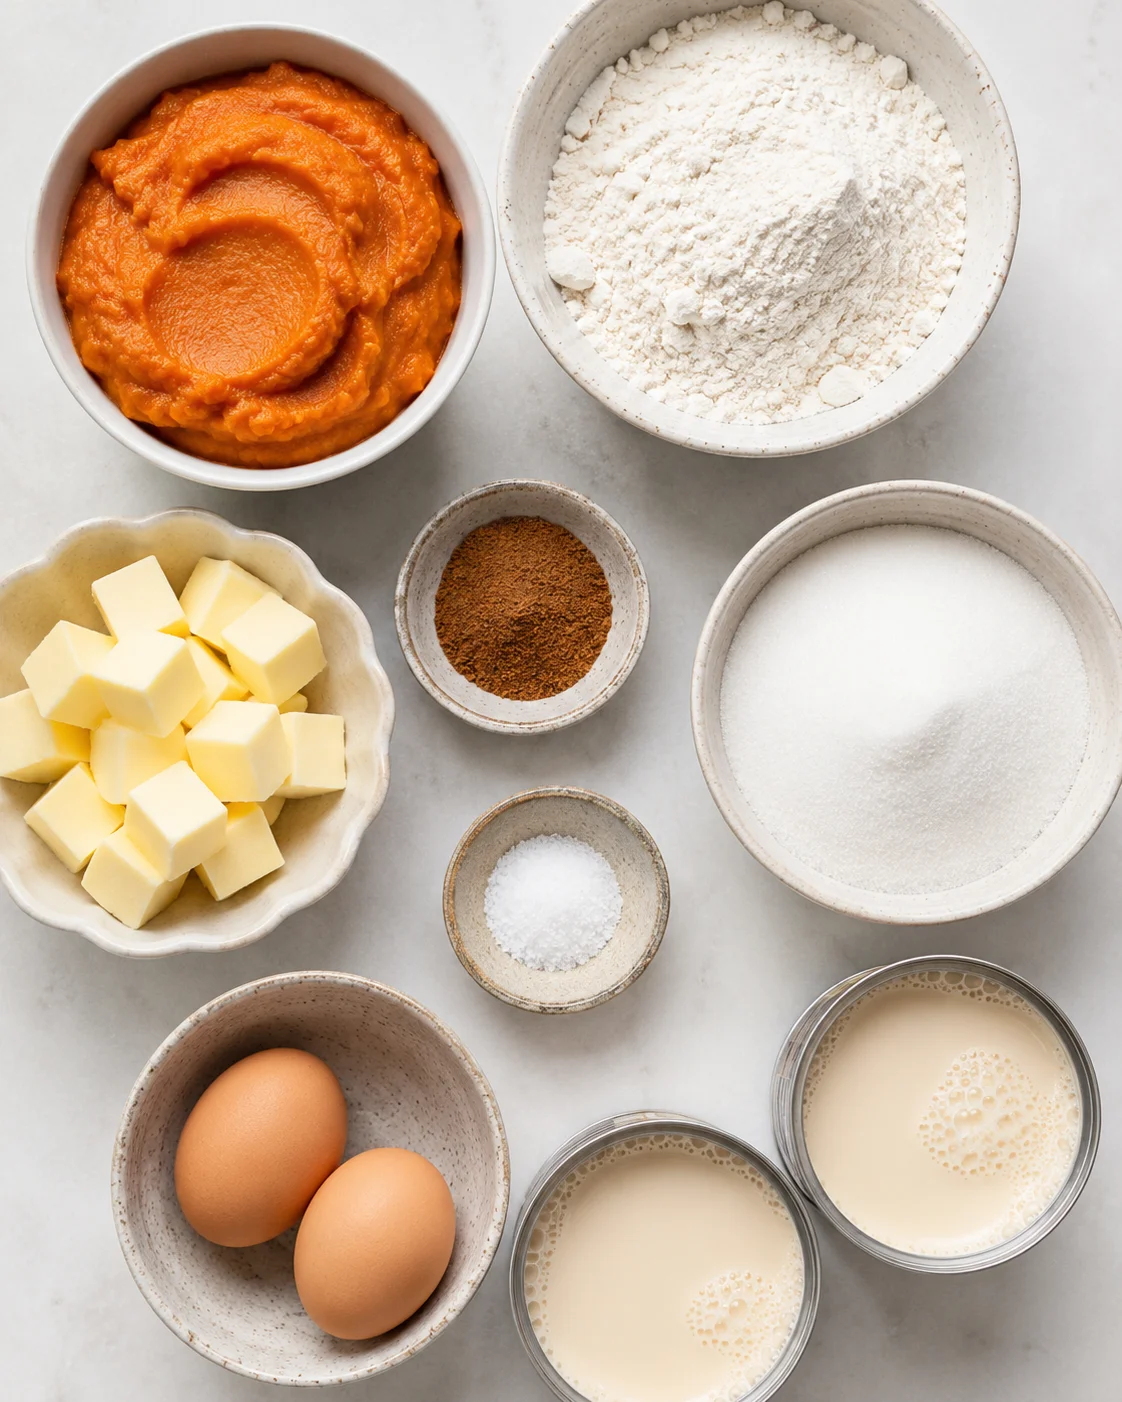
- 1 1/2 cups all purpose flour
- 1/4 cup granulated sugar
- 1/2 cup cold butter, cubed
- 29 oz can pumpkin puree (NOT pumpkin pie filling)
- 4 large eggs
- 1 tsp salt
- 2 1/2 tsp pumpkin pie spice
- 2 cups granulated sugar
- 2 (12 oz each) cans evaporated milk
How to Make the Bars
- Preheat oven to 425°F and line a 9×13″ baking dish with parchment paper or aluminum foil.
- In a small bowl, mix 1 1/2 cups all-purpose flour and 1/4 cup granulated sugar.
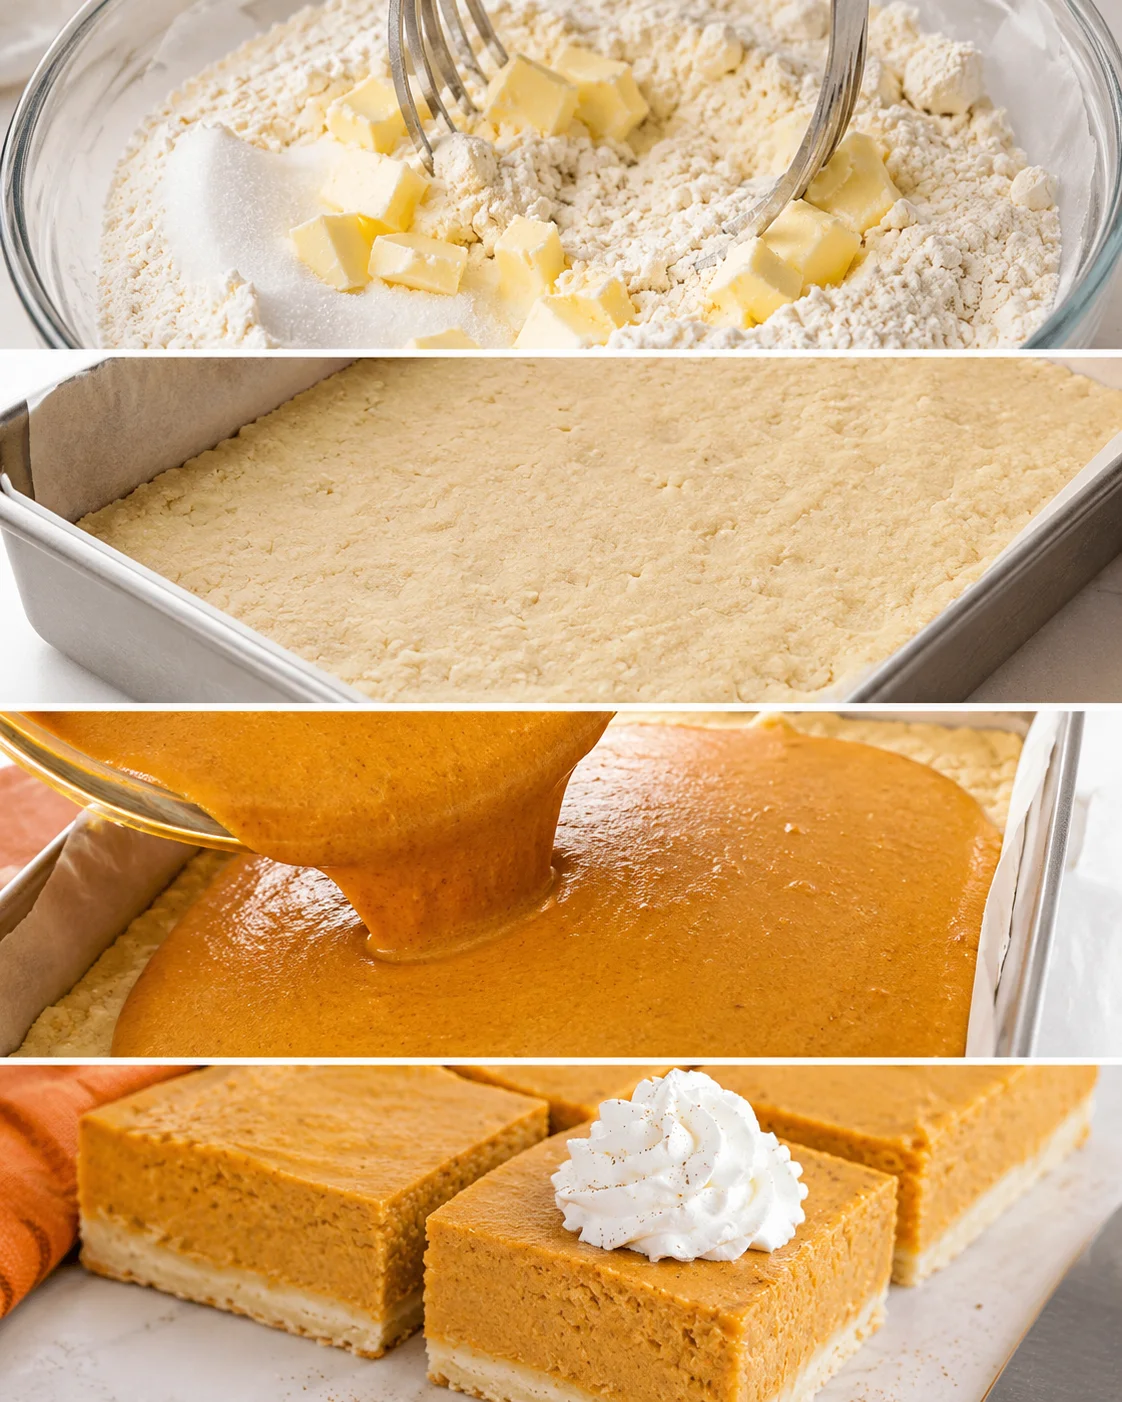
- Add 1/2 cup cold cubed butter and cut into the flour with a pastry cutter or pulse in a food processor until coarse, crumbly pieces form.
- Press the shortbread crust mixture firmly and evenly into the prepared 9×13″ pan.
- In a large bowl, whisk together 29 oz pumpkin puree, 4 large eggs, 1 tsp salt, 2 1/2 tsp pumpkin pie spice, and 2 cups granulated sugar until smooth.
- Stir in 2 (12 oz) cans evaporated milk until fully combined.
- Pour the pumpkin filling evenly over the pressed crust.
- Bake at 425°F for 15 minutes.
-
Without removing the pan, lower oven temperature to 350°F and bake an additional 50–55 minutes, until the filling is set and the center jiggles slightly but is not liquid.
- Remove the pan and cool completely on a wire rack.
- Cover and refrigerate at least 2 hours (or overnight) to chill and fully set the custard.
- Cut into squares.
Kitchen Tips and Shortcuts
- Always choose canned pumpkin puree — not the pie filling that already has added spices and sugars. Libby’s is my go-to for the best flavor and texture. If you’d prefer to start with a whole pumpkin, use this easy roasted pumpkin method to make your own puree.
- When mixing the cold butter into the flour for your shortbread crust, use a pastry cutter or food processor ‘til you get coarse, crumbly bits. It’ll be powdery — that’s exactly what you want.
- Press your crust into the pan firmly and evenly. There’s no need to roll or prebake since it bakes right along with the filling for convenience.
- Keep an eye on baking time starting around 65 minutes. The center should still jiggle just a bit but shouldn’t be wet or liquidy. Overcooking will dry out the filling, and undercooking leaves it too soft.
- Patience is key! Let your bars cool completely, then chill at least 2 hours (overnight is even better) so the custard fully sets before slicing.
- If you notice any condensation on top after refrigeration, just gently blot it off with a paper towel before serving.
- To freeze: cool thoroughly, wrap tightly with plastic wrap and then foil. They keep well for 1–2 months frozen. Thaw them slowly in the fridge for about 24 hours before enjoying.
- If you try swapping sweetened condensed milk for evaporated milk, remember to cut down on the sugar in the filling or your bars will be way too sweet.
- For neat slices, clean your knife between cuts or dip it in hot water and dry before each slice. It really helps for perfect edges!
Mix-Ins and Substitution Ideas
I love using evaporated milk here because it’s thicker than regular milk and delivers a creamy, rich texture that tastes like cream but with less fat and calories. That said, let’s be real—this pumpkin bars recipe isn’t a health food, but every bit helps, especially around the holidays!
Some recipes use sweetened condensed milk, which is deliciously rich, but if you’re going that route, don’t forget to reduce the sugar to avoid making them overly sweet — for a specific example, see Pumpkin Better Than Sex Cake.
- Plan ahead. These pumpkin bars need several hours of chilling to set the custard properly, so get them in the fridge early enough.
- Use quality canned pumpkin. Libby’s brand has been my longtime favorite for consistent flavor. Store brands can be hit or miss.
- The crust mixture will seem dry and a bit powdery when you press it into the pan. That’s exactly right — it bakes up beautifully once in the oven.
- When baking finishes, your pumpkin bars may look puffy and full. Don’t worry—the filling will settle down as they cool, just like classic pumpkin pie.
-
Serve these bars cold, at room temperature, or lightly warmed — whatever you prefer. I often enjoy them straight from the fridge or just cooled.
Nutrition Disclaimer
I’m not a nutritionist, so all the nutrition info here is just an estimate. If calories or specific details matter to you, it’s best to check the exact ingredients you use in your favorite online nutrition calculator. Brands and products vary, so your results might too!
Storage and Make-Ahead Instructions
Since these pumpkin bars are homemade with fresh dairy and eggs — no preservatives here — they need to be kept in the fridge. Simply cover the baking pan tightly with foil, and they’ll stay fresh for 3 to 5 days. You might see a bit of moisture on top when you pull them out of the fridge; that’s totally normal from temperature changes. Just gently blot it away with a clean paper towel, and you’re good to go!
Want to make these bars ahead of time? Bake as usual, let them cool completely, then wrap the pan tightly with plastic wrap followed by aluminum foil. They freeze wonderfully for up to 1-2 months. When you’re ready to enjoy, thaw them in the fridge for about 24 hours and serve as you like! If oven space is tight, a no-bake, make-ahead alternative is Mini Pumpkin Pie Cheesecakes (No Bake).
Common Questions and Troubleshooting
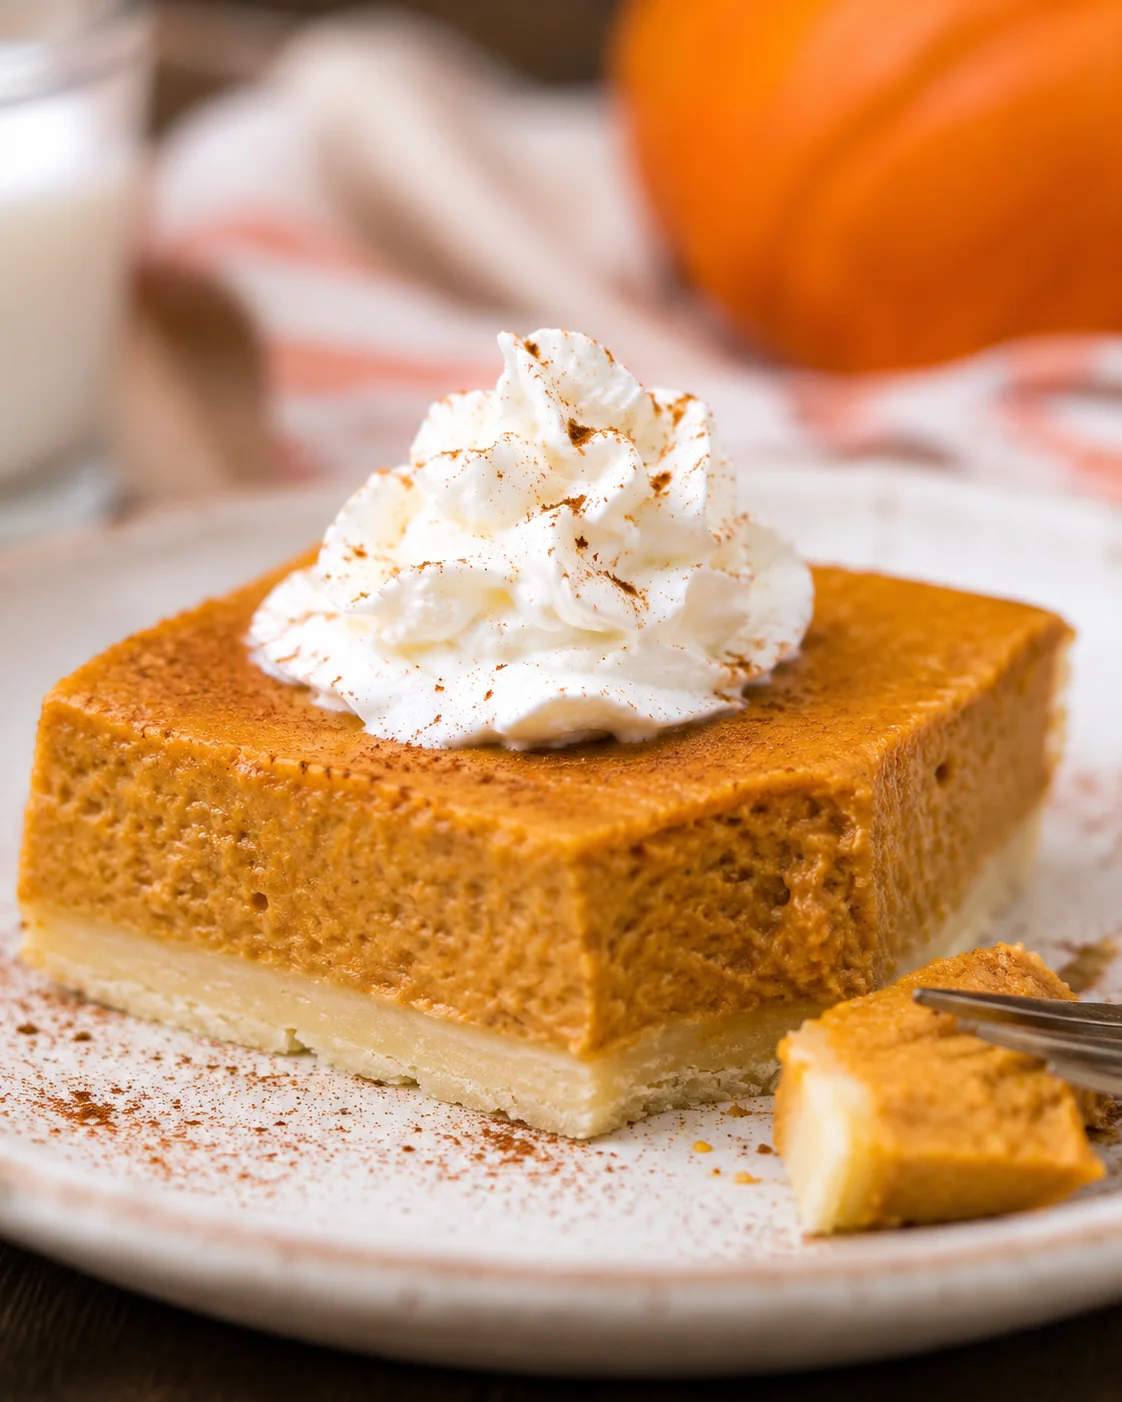
These pumpkin bars can be a little tricky the first time you make them, but I’m here to help you get it right. Start peeking at them at about 65 minutes into baking. Grab an oven mitt and gently give the pan a little shake—the filling should wiggle slightly in the center but not be loose or wet everywhere. Don’t slice into these bars right away! Pumpkin pie filling needs time to firm up, which happens as they cool and chill. If you prefer a pumpkin dessert that skips the chill time, try our easy pumpkin dump cake. It’s so tempting to dig in early, but trust me, the wait is totally worth it.
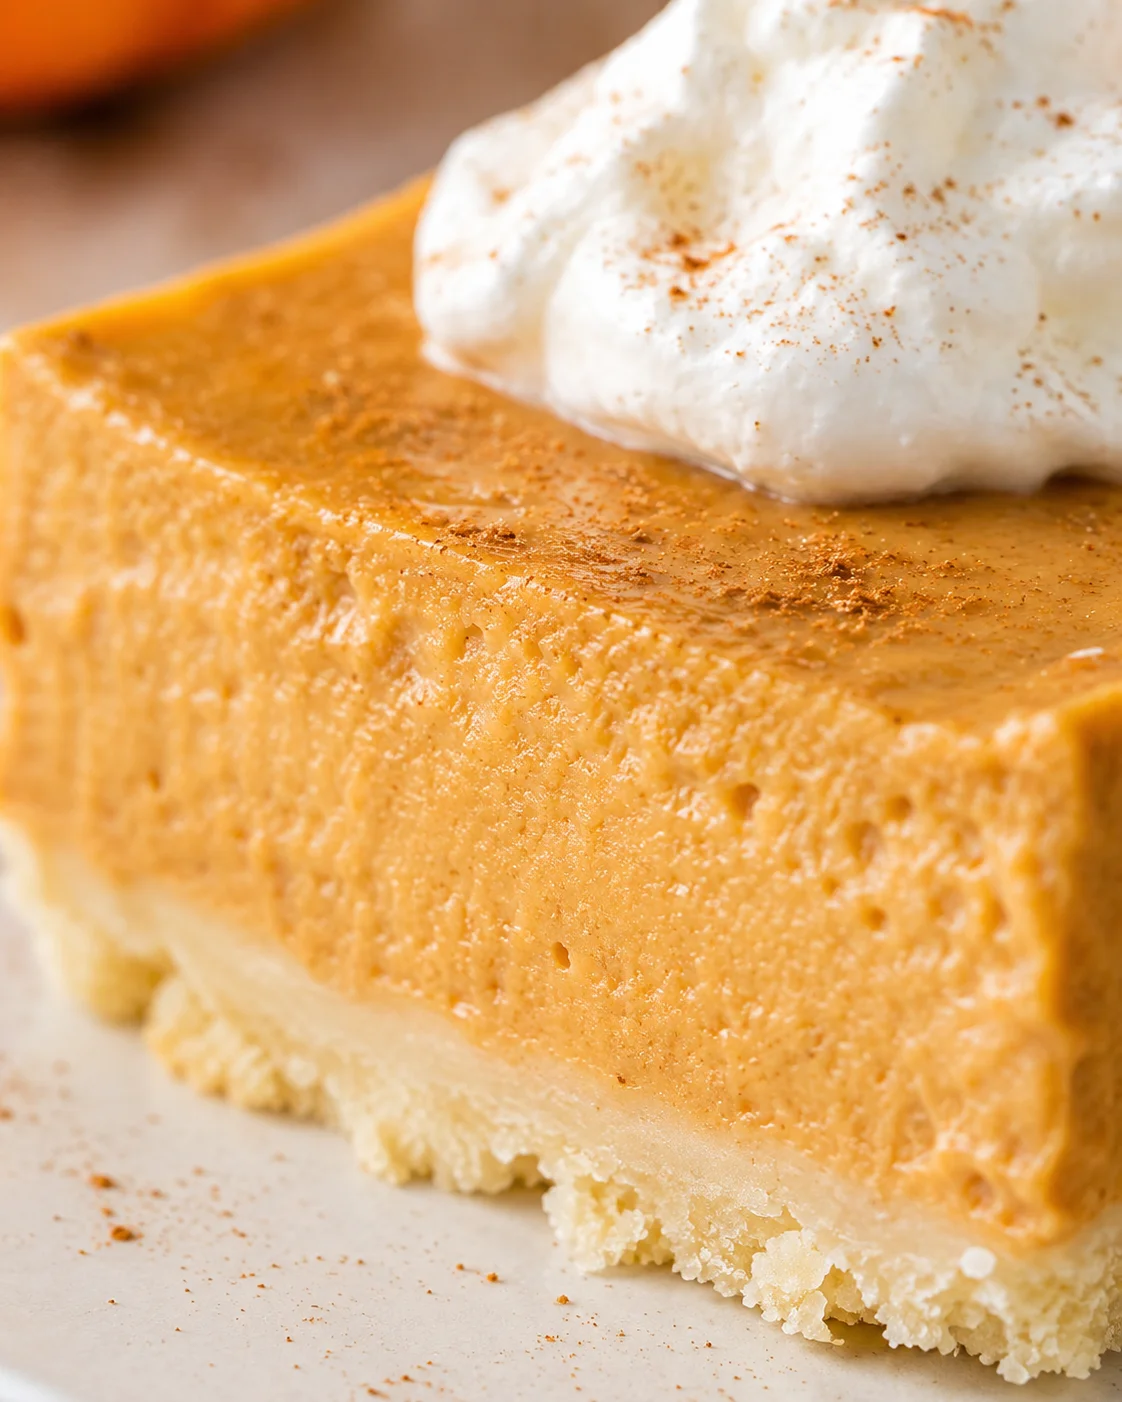
Classic pumpkin pie flavors in an easy-to-make bar form with a buttery shortbread crust that requires no prebaking, featuring a creamy pumpkin custard filling baked in a 9×13″ pan.
- Prep Time: 15 minutes
- Cook Time: 1 hour 5 minutes
- Total Time: 1 hour 20 minutes
- Yield: 15 servings 1x
- Category: Dessert
- Cuisine: American
Ingredients
- 1 1/2 cups all purpose flour
- 1/4 cup granulated sugar (for crust)
- 1/2 cup cold butter, cubed
- 29 oz can pumpkin puree (NOT pumpkin pie filling)
- 4 large eggs
- 1 tsp salt
- 2 1/2 tsp pumpkin pie spice
- 2 cups granulated sugar (for filling)
- 2 (12 oz each) cans evaporated milk
Instructions
- Preheat oven to 425°F and line a 9×13″ baking dish with parchment paper or aluminum foil.
- In a small bowl, mix 1 1/2 cups all-purpose flour and 1/4 cup granulated sugar.
- Add 1/2 cup cold cubed butter and cut into the flour with a pastry cutter or pulse in a food processor until coarse, crumbly pieces form.
- Press the shortbread crust mixture firmly and evenly into the prepared 9×13″ pan.
- In a large bowl, whisk together 29 oz pumpkin puree, 4 large eggs, 1 tsp salt, 2 1/2 tsp pumpkin pie spice, and 2 cups granulated sugar until smooth.
- Stir in 2 (12 oz) cans evaporated milk until fully combined.
- Pour the pumpkin filling evenly over the pressed crust.
- Bake at 425°F for 15 minutes.
- Without removing the pan, lower oven temperature to 350°F and bake an additional 50–55 minutes, until the filling is set and the center jiggles slightly but is not liquid.
- Remove the pan and cool completely on a wire rack.
- Cover and refrigerate at least 2 hours (or overnight) to chill and fully set the custard.
- Cut into squares and serve.
Notes
Choose canned pumpkin puree and not pumpkin pie filling that may have added sugars and spices., Use a pastry cutter or food processor to get coarse, crumbly crust texture before pressing into pan., No need to prebake crust as it bakes with filling., Check doneness starting around 65 minutes; filling should jiggle slightly but not be liquid., Chill at least 2 hours or overnight for best custard set., Gently blot moisture from bars if condensation forms after refrigeration., Freeze cooled bars tightly wrapped for 1-2 months; thaw in fridge 24 hours before serving., To reduce over sweetness when using sweetened condensed milk instead of evaporated milk, reduce sugar in filling., Clean or warm knife between slices for neat edges.
Nutrition
- Serving Size: 1 bar (approximate)
- Calories: 254
- Fat: 8 g
- Carbohydrates: 38 g
- Protein: 5 g
More in Uncategorized
Apple Crisp Cookies
Caramel Apple Cinnamon Roll Lasagna
Peach Crumb Bars