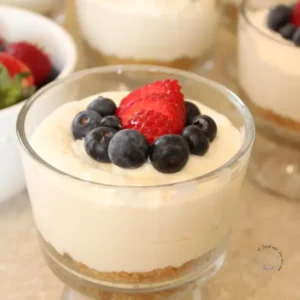
Individual No-Bake Cheesecake Cups

I have this funny habit of grabbing pretty or one-of-a-kind serving dishes whenever I spot them!
So this Easter, with dessert duties landing on me at my parents’ place, I thought it was the perfect moment to finally use a few of those special pieces — with some cute little no-bake cheesecakes.
My dad is a total chocolate fan — yep, definitely runs in the family — but Easter just whispers “fresh fruit” to me instead.
So cheesecake seemed like the sweet spot for this dessert.
Share the love! Pin Me For Later!!
And since you can’t exactly bake in a glass trifle bowl (lesson learned), I went the no-bake route.
I’m totally guilty of picking up pretty or unusual serving dishes whenever I find them. So, when it was my turn to bring dessert this Easter at my folks’ house, I figured it was finally time to show off a few of those little gems. Because baking isn’t an option in a glass trifle bowl (seriously, who knew?), these turned into adorable no-bake cheesecake cups. They’re super simple to put together, look charming, and I topped them with fresh, bright berries — just what spring calls for.
In this post, I’ll walk you through an easy no-bake cheesecake recipe that uses just a handful of pantry essentials: a full sleeve of graham crackers, two 8-ounce packs of cream cheese, powdered sugar, heavy cream, and vanilla. You’ll also see step-by-step photos and tips on making about eight individual portions. I keep directions straightforward — from crushing the crust to whipping up a smooth filling and chilling until firm (expect at least 3 hours). Plus, stick around for my troubleshooting tips, flavor twists, and storage ideas so you can customize these for any gathering, holiday, or warm-weather event.
Fast, Fuss-Free Dessert for Gatherings
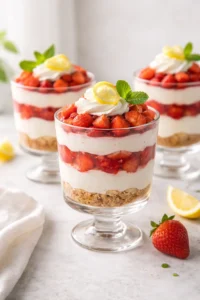
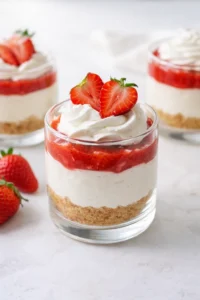
This no-bake cheesecake comes together quickly, needs very few ingredients, and requires zero oven time — perfect for when you want festive but fuss-free desserts for holidays, potlucks, or summertime get-togethers. Serving them individually adds a special touch, makes portioning a breeze, and topping with fresh berries brings a pop of seasonal color and bright flavor. The filling has a creamy, light texture, while the graham cracker crust adds just the right hint of crunchy contrast to balance every bite.
Crust, Filling, and Toppings

- 1 sleeve graham crackers
- 1/4 cup sugar
- 5 tablespoons butter, melted
- 2 packages (8 oz each) cream cheese, softened
- 2 cups powdered sugar
- 2 cups heavy whipping cream
- 2 teaspoons vanilla extract
- Fresh berries of your choice
Assemble the Cheesecake Cups
- Place one full sleeve of graham crackers into a gallon-size freezer bag and seal.
- Crush the crackers into fine crumbs using a rolling pin, meat mallet, or food processor.
- Stir the graham cracker crumbs with 1/4 cup sugar and 5 tablespoons melted butter until evenly combined.
-
Spoon 2 to 3 tablespoons of the crust mixture into the bottom of each serving cup or dish.

- Press the crust firmly into the bottoms of the cups using a tart tamper or the bottom of a small glass.
- Beat two softened 8-ounce packages of cream cheese with 2 cups powdered sugar until smooth and lump-free.
- Slowly add 2 cups heavy whipping cream and 2 teaspoons vanilla extract while beating until the mixture thickens and holds soft peaks.
-
Evenly divide the cheesecake filling among the crust-lined cups and smooth the tops if needed.

- Cover the cups with plastic wrap and refrigerate for at least 3 hours (or overnight) to set.
-
Top each cheesecake cup with fresh berries just before serving.

Pro Tips for Silky Filling
- Make sure your cream cheese is fully softened — let it sit out at room temperature for 30 to 60 minutes before mixing to avoid any lumps.
- Beat the cream cheese with the powdered sugar really well first; this helps create a smooth, silky cheesecake filling.
- Avoid overwhipping the heavy cream; stop as soon as the mixture holds soft to medium peaks to keep your filling light and airy.
- For nice, even portions, consider using a cookie scoop or piping bag to fill each cup.
- Press the crust mixture firmly into the dishes so it won’t crumble apart when you eat; a compact crust also gives a better mouthfeel.
- If your filled cups seem loose or soft after chilling, they probably just need a bit more time in the fridge — an overnight chill usually guarantees a nice firm set.
Flavor Swaps and Add-Ins

- If you love chocolate, swap half of the graham cracker crumbs for crushed chocolate cookies to make a cocoa crust, or stir in about 1/3 cup unsweetened cocoa powder directly into the cream cheese filling for a mocha twist.
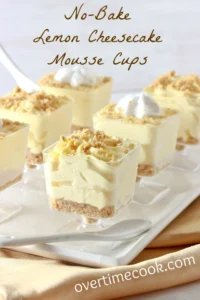
- Give it a citrus pop by adding 1 to 2 teaspoons of fresh lemon or lime zest to the filling mixture.
- Swirl in fruit! Spoon some berry compote — strawberry, raspberry, or blueberry — into the bottom of each cup before the filling or gently swirl a tablespoon into the filling itself for a pretty marbled effect.
- Get creative with cookie swaps: try crushed Oreos, buttery shortbread, or spicy gingersnaps instead of graham crackers for different flavors.
- For a lighter version, swap out half of the heavy cream with thawed whipped topping like Cool Whip and slightly reduce the powdered sugar, though this will change the texture and flavor a bit.
Storage and Make-Ahead Advice
- Refrigerator: Store your assembled cheesecakes (without the fresh berries) tightly covered with plastic wrap or in an airtight container for up to three days. Add the berries just before serving so they stay fresh and vibrant.
- Freezing: If you want to keep them longer, skip the fresh berries and freeze the cheesecake cups tightly covered for up to one month. Defrost them overnight in the fridge before serving, though the texture may be a little softer once thawed.
- Make-ahead: You can prep the crust and filling a day ahead, assemble everything, and chill overnight so dessert is ready to go when your guests arrive.
- Reheating: These are best served cold, so don’t reheat them. If the filling softens a bit after handling, just pop them back in the fridge to firm up before serving.

Answers to Common Questions
- How many servings does this make? This recipe makes about eight individual servings when you use two 8-ounce packages of cream cheese and a full sleeve of graham crackers.
- Can I use low-fat cream cheese or milk instead of heavy cream? You can, but keep in mind the texture and richness won’t be quite the same. Lower-fat versions tend to make a softer, less stable cheesecake filling.
- Why is my filling runny? That often happens if the heavy cream isn’t whipped enough, if the cakes didn’t chill long enough, or if ingredients are too warm. Give them more chill time and be sure to whip the cream to soft or medium peaks while mixing.
- Do I need to add gelatin to make the filling set? Nope! This recipe sets up perfectly just by chilling thanks to the whipped cream and cream cheese. If you want a firmer texture, you could dissolve 1 teaspoon powdered gelatin in 2 tablespoons warm water, let it cool, and mix it into the filling before portioning.
- Can I make this in a larger pan instead of individual cups? Absolutely! Just press the crust into an 8- or 9-inch dish or a springform pan, pour the filling over, and chill until firm. Slice as needed — easy and crowd-friendly.

Individual No-Bake Cheesecake Cups with graham cracker crust and fresh berry topping, a quick and easy dessert perfect for gatherings and holidays.
- Prep Time: 20 minutes
- Cook Time: 3 hours (chilling)
- Total Time: 3 hours 20 minutes
- Yield: 8 individual servings 1x
- Category: Dessert
Ingredients
- 1 sleeve graham crackers
- 1/4 cup sugar
- 5 tablespoons butter, melted
- 2 packages (8 oz each) cream cheese, softened
- 2 cups powdered sugar
- 2 cups heavy whipping cream
- 2 teaspoons vanilla extract
- Fresh berries of your choice
Instructions
- Place one full sleeve of graham crackers into a gallon-size freezer bag and seal.
- Crush the crackers into fine crumbs using a rolling pin, meat mallet, or food processor.
- Stir the graham cracker crumbs with 1/4 cup sugar and 5 tablespoons melted butter until evenly combined.
- Spoon 2 to 3 tablespoons of the crust mixture into the bottom of each serving cup or dish.
- Press the crust firmly into the bottoms of the cups using a tart tamper or the bottom of a small glass.
- Beat two softened 8-ounce packages of cream cheese with 2 cups powdered sugar until smooth and lump-free.
- Slowly add 2 cups heavy whipping cream and 2 teaspoons vanilla extract while beating until the mixture thickens and holds soft peaks.
- Evenly divide the cheesecake filling among the crust-lined cups and smooth the tops if needed.
- Cover the cups with plastic wrap and refrigerate for at least 3 hours (or overnight) to set.
- Top each cheesecake cup with fresh berries just before serving.
Notes
Make sure your cream cheese is fully softened before mixing to avoid lumps., Beat cream cheese and powdered sugar well for a smooth filling., Avoid overwhipping the heavy cream; stop at soft to medium peaks., Use a cookie scoop or piping bag for even portions., Press crust firmly into cups to prevent crumbling., If cups seem loose after chilling, refrigerate overnight for a firmer set., For chocolate variation, swap half graham crumbs with chocolate cookies or add cocoa powder to filling., Add citrus zest or swirl in fruit compote for flavor twists., Try different cookie crusts like Oreos, shortbread, or gingersnaps., For lighter filling, replace half heavy cream with whipped topping and reduce sugar slightly., Store assembled cheesecakes without berries up to 3 days refrigerated., Freeze cheesecakes without berries up to 1 month; thaw overnight in fridge., Make-ahead: prepare crust and filling day before; assemble and chill., Serve cold; re-chill if filling softens after handling.
Nutrition
- Serving Size: 1 cheesecake cup
- Calories: Approximately 400 calories per serving
- Fat: 28 grams per serving
- Carbohydrates: 38 grams per serving
- Protein: 6 grams per serving
More in Cupcakes