Chocolate Chip Cookie Dough Cups

Please share this post with your friends 🤗
There’s something completely irresistible about mixing chocolate with cookie dough, don’t you think? The creamy, sweet cookie dough combined with rich, smooth chocolate makes for a dessert that’s pure joy. Chocolate chip cookie dough cups are the perfect no-bake treat—simple to make, layered with flavor, and totally satisfying.
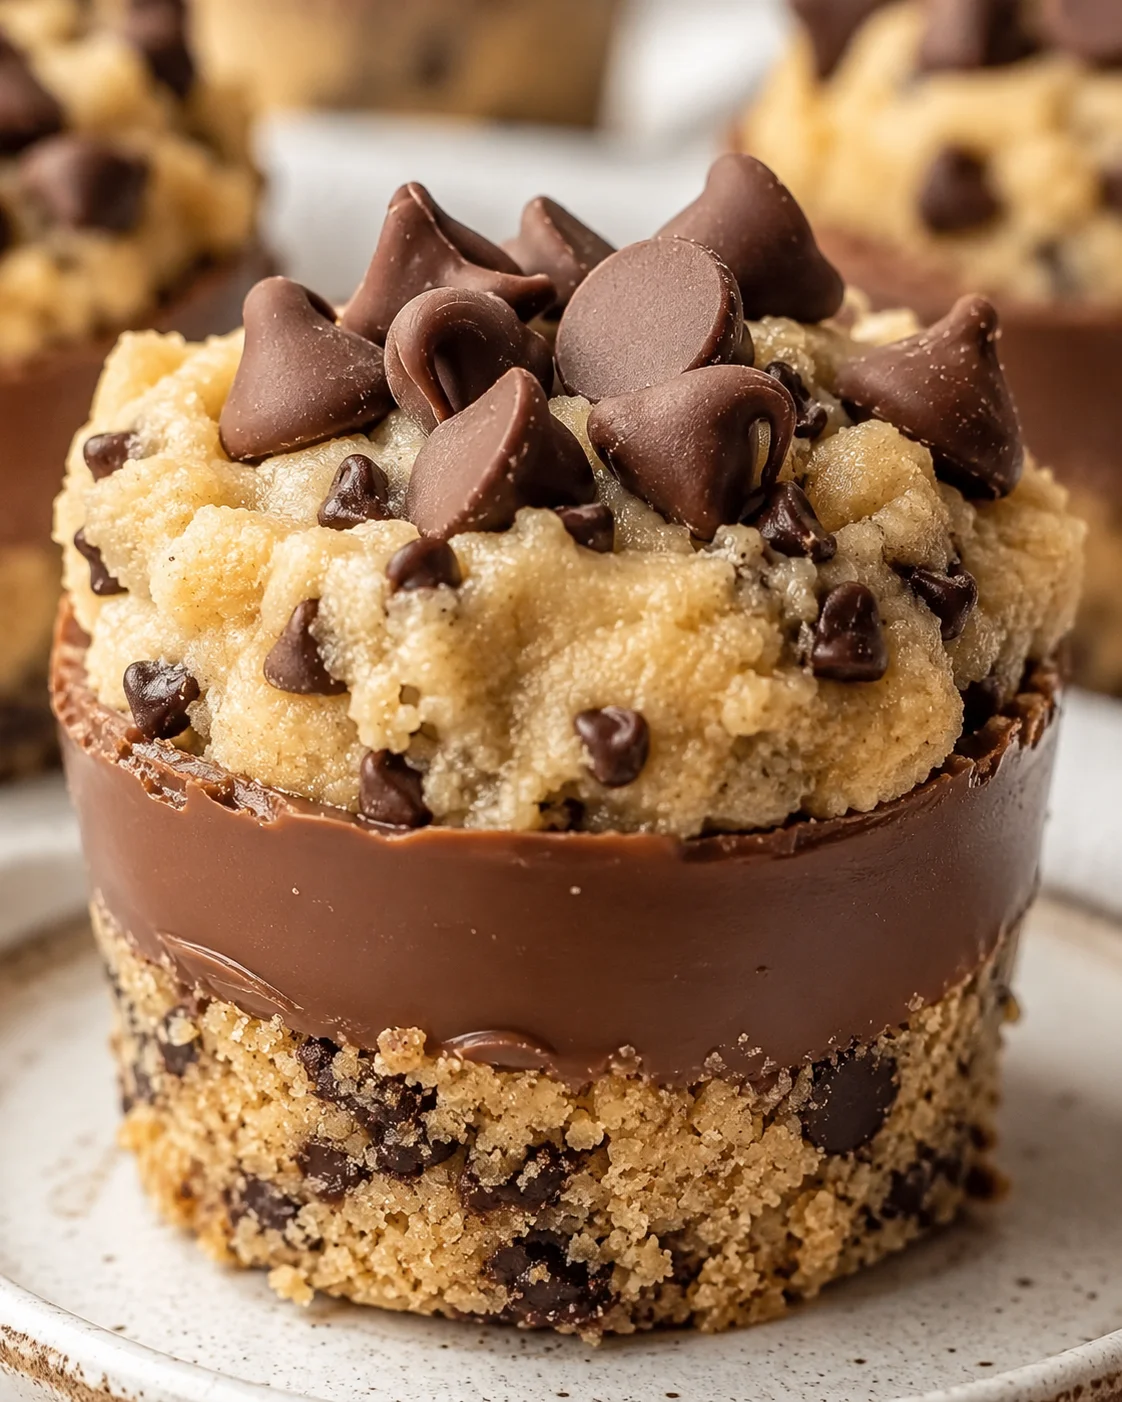
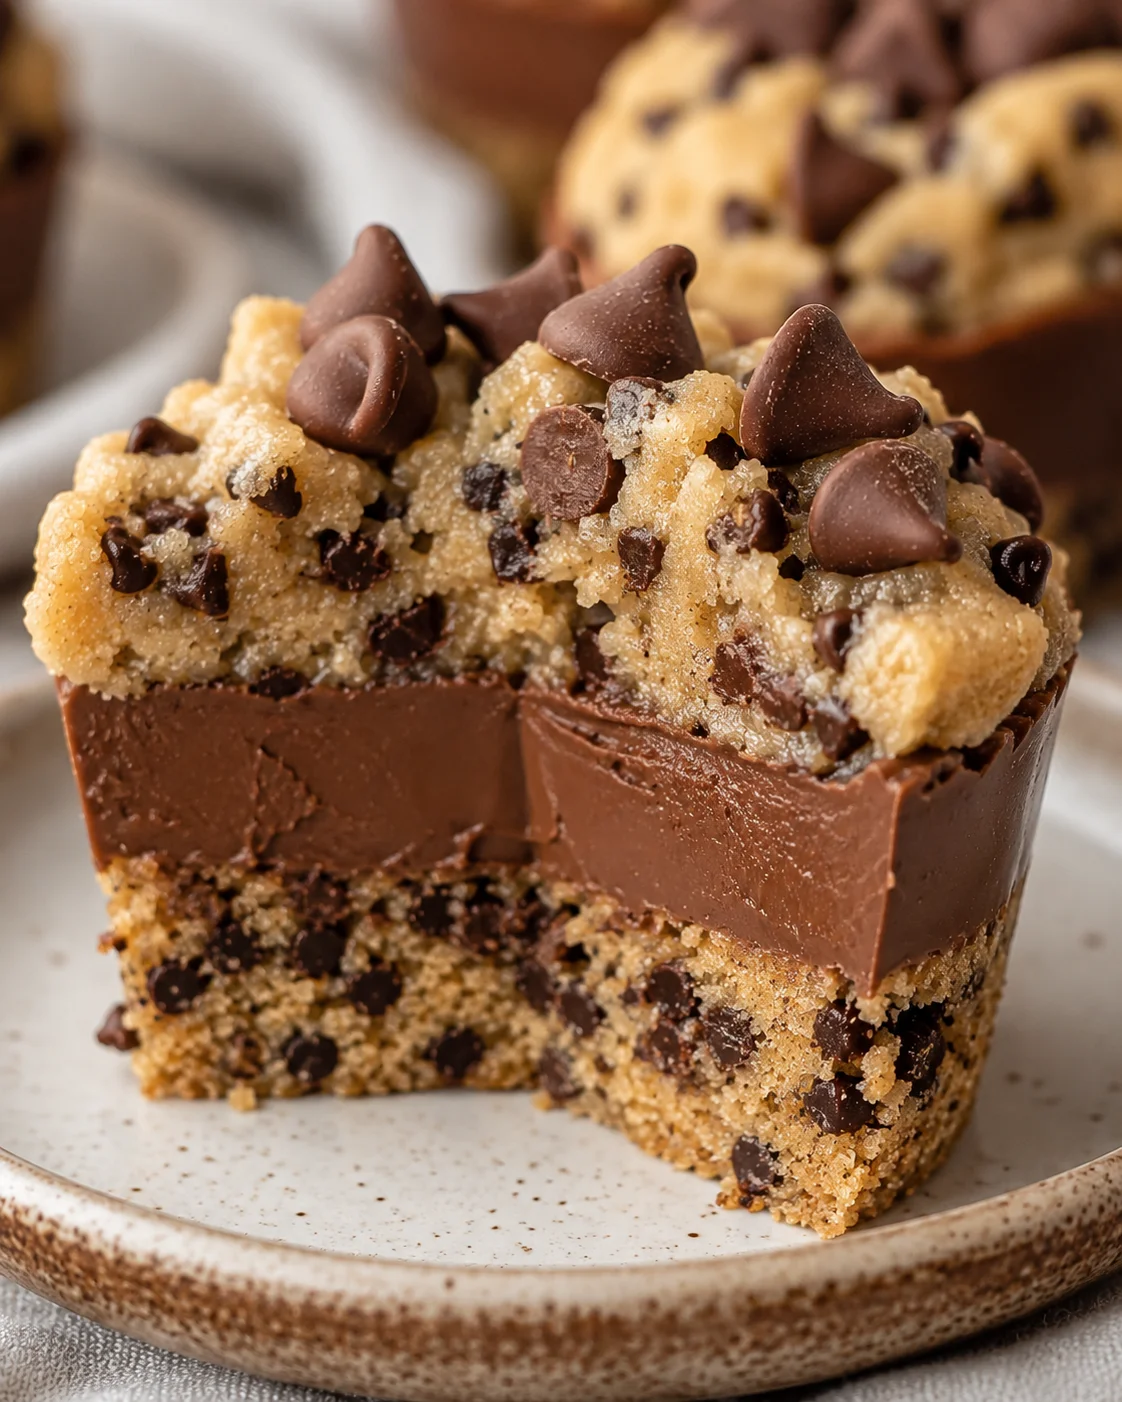
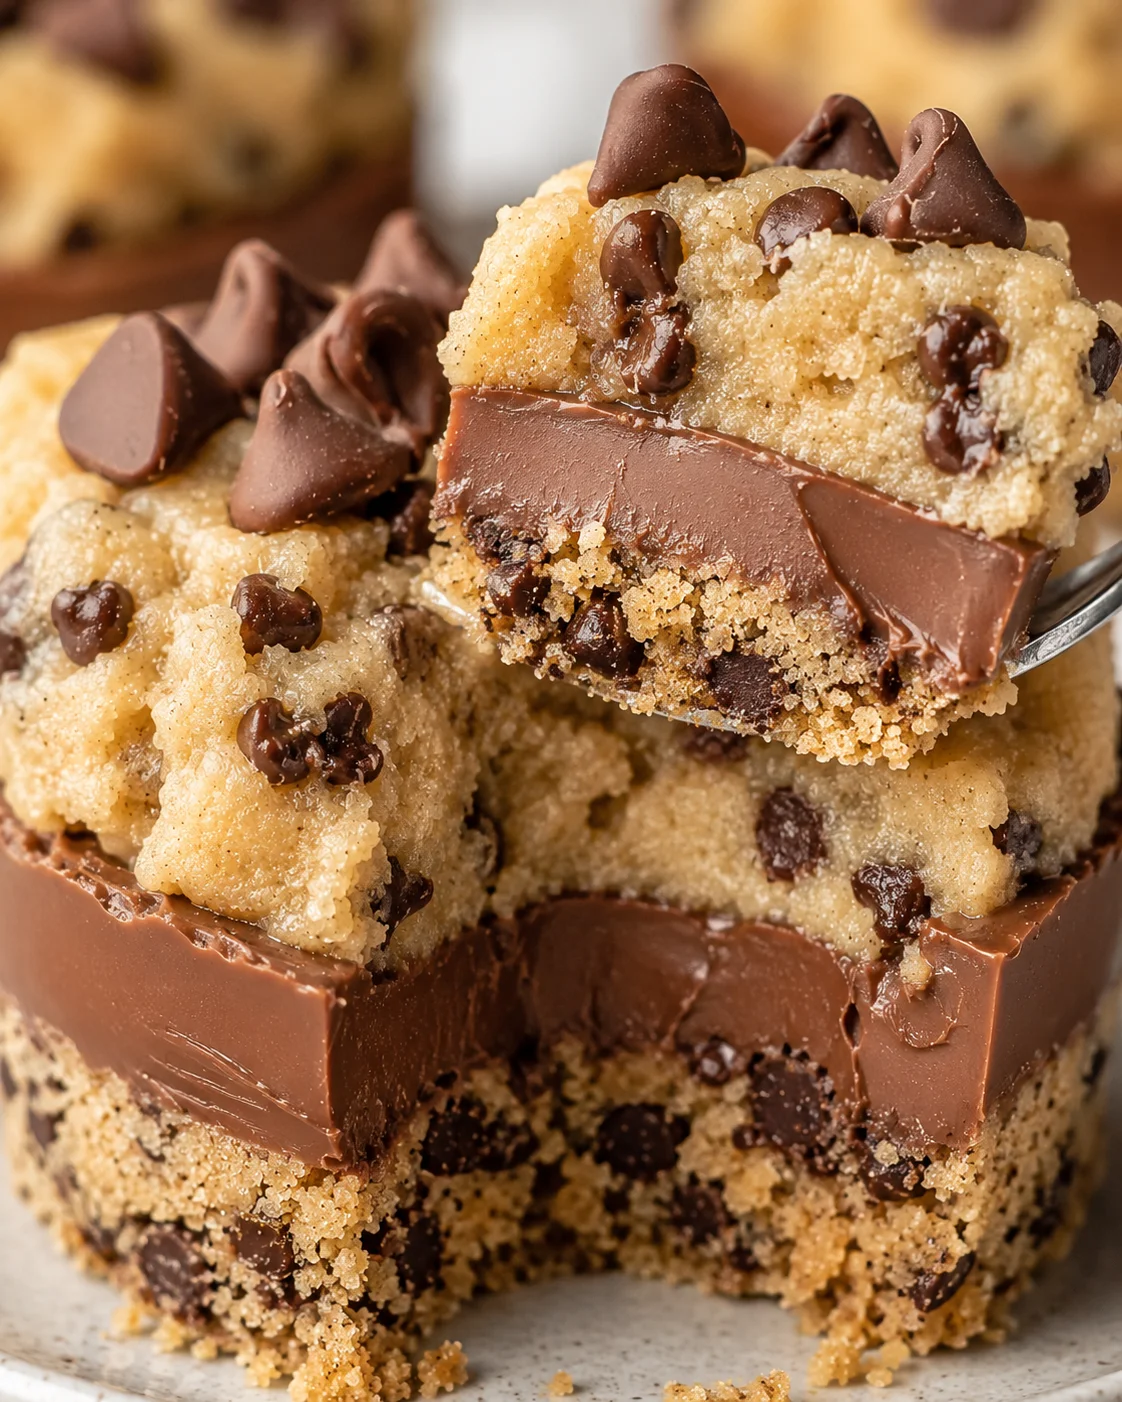
Picture this: a crunchy cookie crust at the bottom, topped with a silky chocolate layer, and finished off with soft, edible cookie dough dotted with mini chocolate chips. These cups work for any occasion, whether it’s a party, a weekend treat, or just because you deserve it. And the best part? They’re egg-free and totally safe to eat, making them a family-friendly dessert.
Whether you’re a baking pro or just getting comfortable in the kitchen, this recipe is a fun and easy way to impress everyone. Ready to get your hands a little sweet? Let’s jump right in!
What Are Chocolate Chip Cookie Dough Cups?
Chocolate chip cookie dough cups are a heavenly mix of flavors and textures. Here’s what makes them so special:
- A crunchy cookie crumb crust as the sturdy base.
- A smooth, rich chocolate layer that adds a touch of indulgence.
- Edible cookie dough that’s buttery, sweet, and chock-full of mini chocolate chips.
Every bite brings creamy, crunchy, and chocolatey goodness together. Best of all, these no-bake cups come together quickly and are a huge hit whether you’re serving guests or enjoying a cozy night in.
Hey there! You’re about to whip up one of the easiest and most delicious no-bake desserts ever: chocolate chip cookie dough cups. These layered treats start with a crisp cookie crumb crust, followed by a shiny chocolate layer, then topped with egg-free, heat-treated edible cookie dough that’s safe and creamy. They’re perfect for parties, thoughtful gifts, or just a little sweet pick-me-up after dinner.
This recipe yields 6 generous cups, and the hands-on work takes about 20 minutes, plus chilling time. We’ll go step-by-step: press the crumbly cookie crust into molds, pour melted chocolate, mix a quick edible cookie dough, assemble it all, and chill until firm. You only need basic kitchen tools like a food processor (or a zip-top bag and rolling pin) and silicone muffin molds to keep things easy.
Stick around because I’m sharing my top tips for perfect results—like heat-treating your flour and letting layers chill properly—plus fun ways to customize, and tricks to keep these treats fresh for days. Ready to make a dessert that’s as simple as it is scrumptious? Let’s go!
Why These Are Irresistible
Chocolate chip cookie dough cups hit all the right notes for anyone who adores creamy cookie dough paired with rich chocolate. They’re super easy to make, completely customizable to suit your tastes, and always a big crowd-pleaser. Whether it’s a special occasion or just a regular day, these little cups bring joy every time. Craving an ultra-chocolatey alternative? Try our Chocolate Mousse Cups.
So, why wait? Gather your ingredients, have fun experimenting, and enjoy the happiness that comes from making—and eating—these dreamy no-bake chocolate chip cookie dough cups. And hey, don’t forget to share! Friends and family will love them almost as much as you do.
Description
Chocolate chip cookie dough cups are the ultimate quick no-bake dessert! These layered beauties—much like these gorgeous dessert cups—feature a crisp cookie crust, a decadent chocolate layer, and a creamy, mini chocolate chip-filled edible cookie dough topping. They’re perfect whether you need a crowd-pleasing party dessert or a sweet treat for yourself.
Ingredients
- 1 cup crushed chocolate chip cookies
- 2 tablespoons melted butter
- 1 cup semi-sweet chocolate chips
- 1 tablespoon coconut oil or butter
- 1/2 cup unsalted butter, softened
- 1/3 cup brown sugar
- 2 tablespoons granulated sugar
- 1 teaspoon vanilla extract
- 3/4 cup heat-treated all-purpose flour
- 2 tablespoons milk
- 1/2 cup mini chocolate chips
- Extra chocolate chips for garnish
Instructions
- Crush the chocolate chip cookies into fine crumbs using a food processor. Don’t have one? No worries—pop the cookies in a zip-top bag and crush them gently with a rolling pin.
- Mix those cookie crumbs with the melted butter until the texture feels like damp sand.
- Press the crumb mixture firmly into 6 silicone muffin molds to form the crust.
- Pop those crusts into the freezer for 10-15 minutes so they firm up nicely.
- Melt the chocolate chips and coconut oil (or butter) together in the microwave, heating in 20-second bursts and stirring until silky smooth.
- Pour the melted chocolate evenly over the chilled crusts, smoothing the tops gently.
- Freeze again for 10-15 minutes to let the chocolate layer set up.
- In a separate bowl, beat the softened butter with the brown and granulated sugars until fluffy and light.
- Stir in the vanilla extract and milk until it’s all smooth and creamy.
- Gradually mix in the heat-treated flour and combine well.
- Fold in the mini chocolate chips so every bite has little chocolate bursts.
- Top each set chocolate layer with a scoop of cookie dough, spreading it evenly with a spoon or spatula.
- Sprinkle some extra chocolate chips on top for a pretty, chocolatey finish.
- Chill the assembled cups in the refrigerator for at least 20 minutes so everything can set perfectly before serving.
Notes
Keep your chocolate chip cookie dough cups fresh in an airtight container in the fridge for up to 7 days. If you’d like to save them longer, they freeze beautifully for up to 3 months. Just remember to serve them chilled for the best texture and flavor!
Nutrition
- Serving Size: 1 cup
- Calories: 320
- Sugar: 22g
- Sodium: 80mg
- Fat: 18g
- Saturated Fat: 10g
- Unsaturated Fat: 6g
- Trans Fat: 0g
- Carbohydrates: 38g
- Fiber: 2g
- Protein: 3g
- Cholesterol: 25mg
Keywords: chocolate chip, cookie dough, no-bake, dessert
Please share this post with your friends 🤗
Ingredients for 6 Cups
- 1 cup crushed chocolate chip cookies
- 2 tablespoons melted butter
- 1 cup semi-sweet chocolate chips
- 1 tablespoon coconut oil or butter
- 1/2 cup unsalted butter, softened
- 1/3 cup brown sugar
- 2 tablespoons granulated sugar
- 1 teaspoon vanilla extract
- 3/4 cup heat-treated all-purpose flour
- 2 tablespoons milk
- 1/2 cup mini chocolate chips
- Extra chocolate chips for garnish
Step-by-Step Directions
- Crush chocolate chip cookies into fine crumbs using a food processor or place in a zip-top bag and crush with a rolling pin.
- Mix cookie crumbs with melted butter until the mixture feels like damp sand.
-
Divide and press the crumb mixture firmly into 6 silicone muffin molds or paper-lined tins to form crusts.
- Freeze the crusts for 10–15 minutes to firm up.
- Combine semi-sweet chocolate chips and coconut oil or butter in a microwave-safe bowl and heat in 20-second bursts, stirring until smooth and glossy.
- Pour the melted chocolate evenly over the chilled crusts and smooth the tops.
- Return the molds to the freezer for another 10–15 minutes to set the chocolate layer.
- Heat-treat the flour by spreading it on a baking sheet and baking at 350°F for 5 minutes or microwaving in a bowl for 1–2 minutes, stirring halfway; cool before using.
- Beat the softened unsalted butter with brown sugar and granulated sugar until light and fluffy.
- Stir in vanilla extract and milk until the mixture is smooth and creamy.
- Gradually add the cooled heat-treated flour and mix until combined and no lumps remain.
- Fold in the mini chocolate chips.
- Scoop a generous dollop of cookie dough onto the set chocolate layer in each mold and spread evenly with a spoon or spatula.
- Sprinkle extra chocolate chips on top of each cup.
- Chill the assembled cups in the refrigerator for at least 20 minutes to set completely.
- Carefully remove the firm cups from their molds or liners before serving.
Tips for Perfect Cups
- Go for Silicone Molds
Silicone muffin molds make it super simple to pop your cups out without breaking them. If you only have metal tins, use paper liners to protect your dessert. - Heat-Treat the Flour
Raw flour can carry germs, so baking or microwaving it to heat-treat is important for safe cookie dough. Spread it on a baking sheet and bake at 350°F for 5 minutes or microwave in a bowl for 1-2 minutes, stirring halfway. - Chill Between Layers
Give each layer enough time to firm up before adding the next. This keeps your layers sharp and prevents mixing—see how distinct layers depend on chilling in our No Bake Oreo Cheesecake recipe. - Customize Your Chocolate
Use whatever chocolate you prefer—dark, milk, or white chocolate all work wonderfully here. - Be Quick When Handling Chocolate
Chocolate melts fast but also hardens quickly. Have your molds ready and pour quickly once melted to get a perfect layer.
Flavor and Mix-In Ideas
Want to switch things up? These chocolate chip cookie dough cups are super versatile. Here are some easy ideas to make them your own:
Peanut Butter Fans
Try swapping the cookie dough for a peanut butter-flavored version or add a smooth peanut butter layer right between the chocolate and cookie dough layers.
Gluten-Free Option
Use gluten-free cookies for your crust and substitute the all-purpose flour with almond or oat flour that you’ve heat-treated. Perfect if you’re feeding a gluten-free crowd!
Add a Little Crunch
Mix chopped nuts, crushed pretzels, or toffee pieces right into your cookie dough for extra texture and flavor. For a fruity crunch, fold in strawberry shortcake–style crumbs—see how the strawberry crunch crumb comes together in the Strawberry Crunch Cake tutorial.
Festive Fun
Toss in colorful sprinkles or themed candy bits to make these cups perfect for holidays, birthdays, or special celebrations. For cozy fall vibes, channel apple‑pie flavors—cinnamon, brown sugar, and tender apples—using the Easy Homemade Apple Pie recipe as a flavor guide.
How to Store and Serve
Serving Suggestions
- These cups are best served chilled to keep each layer firm and delicious. If you enjoy chilled, layered desserts, try our Individual No-Bake Cheesecake Cups.
- Pair them with a scoop of vanilla ice cream or a little whipped cream for a truly decadent dessert experience.
Storage Tips
- In the Fridge: Keep your chocolate chip cookie dough cups in an airtight container and they’ll stay fresh for up to a week.
- In the Freezer: Wrap each cup snugly in plastic wrap, then store in a freezer bag for up to 3 months. Thaw them overnight in the fridge before enjoying.
Answers to Common Questions
Q: Are these cookie dough cups safe to eat raw? A: Absolutely! This recipe skips the eggs and uses heat-treated flour, so your edible cookie dough is totally safe. To heat-treat flour, spread it thinly on a baking sheet and bake at 350°F for 5 minutes or microwave in a microwave-safe bowl for 1–2 minutes, stirring midway. Cool before using.
Q: How long do chocolate chip cookie dough cups keep? A: They stay great in the fridge, sealed tight, for up to 7 days. For longer storage, freeze them individually wrapped for up to 3 months and thaw overnight in the fridge before serving.
Q: Can I make these ahead of time? A: Yes! You can make and assemble these cups days ahead and store them in the fridge, or freeze assembled cups for months. It also works to prep the crust and chocolate layers in advance and add fresh cookie dough just before serving.
Q: Can I make gluten-free or vegan versions? A: For gluten-free, swap the cookie crust with gluten-free cookies and use a gluten-free flour like almond or oat flour for heat-treating. For vegan, pick dairy-free chocolate, vegan butter or coconut oil, and plant-based milk. Keep in mind the texture and taste may shift a bit with these changes.
Q: How do I remove the cups from molds without breaking them? A: Silicone molds are a lifesaver here—just gently push the bottom to pop the cups out. With paper liners, run a small knife around the edge first. Make sure the cups are well chilled before removal to keep everything intact.
Q: My melted chocolate is thick or streaky—any tips? A: Melt your chocolate slowly in short, 15–20 second bursts in the microwave, stirring between each. Add a teaspoon of coconut oil or butter at a time to thin it out and get that pretty glossy shine. Be ready to pour quickly before it starts to harden.
Q: Can I scale this recipe or make mini versions? A: For sure! Just multiply ingredients for bigger batches. For mini cups, use smaller molds and watch the chilling time—it might be shorter. Test one to make sure the layers set nicely.
Q: What other crusts or flavor twists work well? A: Try swapping the cookie crust for a graham cracker crust (see our easy graham cracker crust recipe), Oreos without filling, or other cookies. You can add peanut butter layers, nuts, or toffee into your cookie dough, or use different chocolates like dark, milk, or white for fun flavor changes.
Q: Do I really need to heat-treat the flour? A: Unless your flour is labeled as safe to eat raw, it’s a good idea to heat-treat it to avoid any risk of germs. If it’s been pasteurized or specially treated, you might skip this step. Otherwise, take a few minutes to heat-treat for peace of mind.
PrintNo-bake dessert cups featuring a crunchy cookie crumb crust, a rich chocolate layer, and a creamy, mini chocolate chip-filled edible cookie dough topping, perfect for parties or a sweet treat.
- Prep Time: 20 minutes
- Cook Time: 0 minutes
- Total Time: 20 minutes plus chilling time
- Yield: 6 generous cups 1x
- Category: Dessert
- Cuisine: American
Ingredients
- 1 cup crushed chocolate chip cookies
- 2 tablespoons melted butter
- 1 cup semi-sweet chocolate chips
- 1 tablespoon coconut oil or butter
- 1/2 cup unsalted butter, softened
- 1/3 cup brown sugar
- 2 tablespoons granulated sugar
- 1 teaspoon vanilla extract
- 3/4 cup heat-treated all-purpose flour
- 2 tablespoons milk
- 1/2 cup mini chocolate chips
- Extra chocolate chips for garnish
Instructions
- Crush chocolate chip cookies into fine crumbs using a food processor or place in a zip-top bag and crush with a rolling pin.
- Mix cookie crumbs with melted butter until the mixture feels like damp sand.
- Divide and press the crumb mixture firmly into 6 silicone muffin molds or paper-lined tins to form crusts.
- Freeze the crusts for 10–15 minutes to firm up.
- Combine semi-sweet chocolate chips and coconut oil or butter in a microwave-safe bowl and heat in 20-second bursts, stirring until smooth and glossy.
- Pour the melted chocolate evenly over the chilled crusts and smooth the tops.
- Return the molds to the freezer for another 10–15 minutes to set the chocolate layer.
- Heat-treat the flour by spreading it on a baking sheet and baking at 350°F for 5 minutes or microwaving in a bowl for 1–2 minutes, stirring halfway; cool before using.
- Beat the softened unsalted butter with brown sugar and granulated sugar until light and fluffy.
- Stir in vanilla extract and milk until the mixture is smooth and creamy.
- Gradually add the cooled heat-treated flour and mix until combined and no lumps remain.
- Fold in the mini chocolate chips.
- Scoop a generous dollop of cookie dough onto the set chocolate layer in each mold and spread evenly with a spoon or spatula.
- Sprinkle extra chocolate chips on top of each cup.
- Chill the assembled cups in the refrigerator for at least 20 minutes to set completely.
- Carefully remove the firm cups from their molds or liners before serving.
Notes
Keep your chocolate chip cookie dough cups fresh in an airtight container in the fridge for up to 7 days., They freeze beautifully for up to 3 months. Serve chilled for best texture and flavor.
Nutrition
- Serving Size: 1 cup
- Calories: 320
- Fat: 18g
- Carbohydrates: 38g
- Protein: 3g
More in Baking & Desserts
Apple Fritter Cinnamon Roll Bake
Apple Pie Cookies Recipe
Cinnamon Apple Bread