Caramel Apple Dump Cake

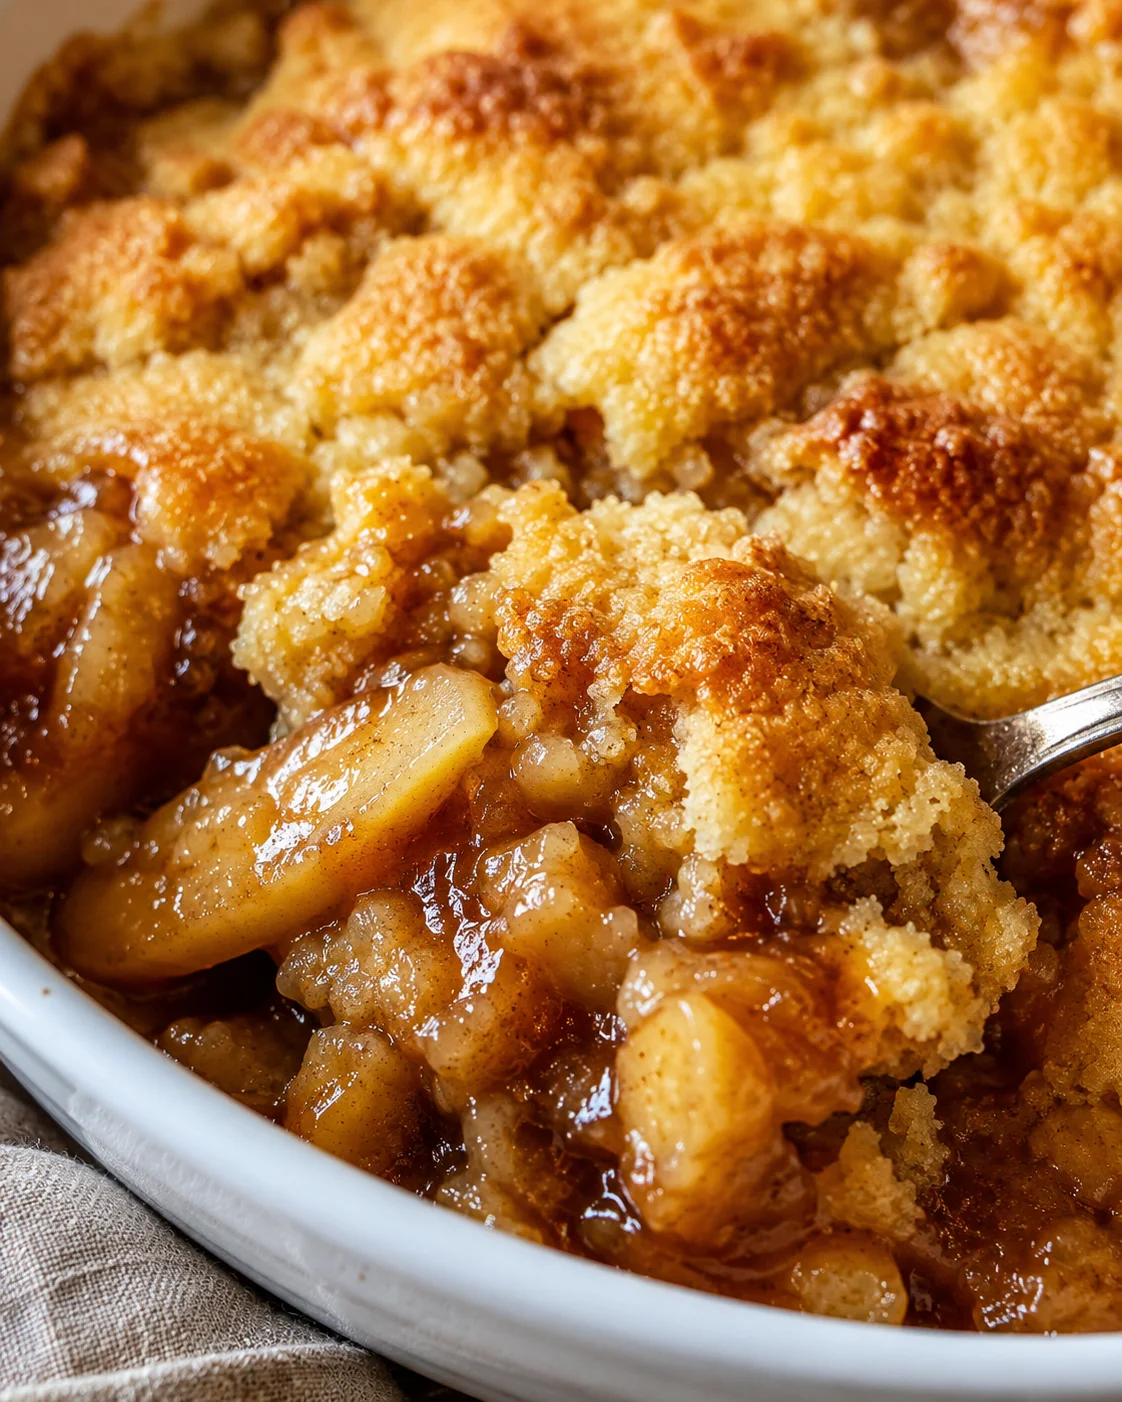
This Caramel Apple Dump Cake is such an easy and delicious shortcut dessert that captures the heart of Fall. Using just 6 simple ingredients — apple pie filling, cinnamon, nutmeg, yellow cake mix, caramel candies, and butter — you simply layer them in a baking dish, bake, and end up with a comforting treat that’s bursting with flavor.
If you’re new to dump cakes, here’s the deal: you literally dump your ingredients one on top of the other in your pan, no stirring required! Usually, this type of cake uses canned fruit as a base topped with dry cake mix and melted butter. It means very little hassle, while still giving you that homey, fruity dessert vibe. If you love this idea, be sure to check out more of our favorite dump cake recipes that are just as quick and satisfying.
Hey there! If you adore the cozy, familiar flavors of apple pie but dread the complicated prep, you’re going to love this Caramel Apple Dump Cake. It’s basically apple pie magic stirred up without any stirring—just layers of apple pie filling, soft caramel chunks, dry cake mix, and buttery pats all baked together into a dreamy, bubbling dessert with a crunchy golden top.
This recipe is perfect for busy weeknights or casual gatherings. No extra bowls, no whisking, just dump and bake — which means less mess and stress in your kitchen. And trust me, the flavors come together beautifully, tasting like you spent hours in the kitchen.
Below you’ll find the fully detailed recipe with exact ingredients, step-by-step directions, and pictures to make it as foolproof as possible. Plus, I’m sharing my favorite tips for getting the perfect topping, ideas for mixing things up, plus how to store leftovers, reheat, and answer the most common questions about this dessert. Ready to get baking? Let’s dive in!
- A quick rundown of the 6 pantry staples that make this dessert so easy.
- Simple, photo-guided steps to assembling your dump cake effortlessly.
- Expert tips to get an even golden crust and gooey caramel pockets.
- Fun serving ideas like ice cream, warm caramel, and nuts to take it over the top.
- Helpful advice on storing, reheating, plus answers to FAQs for smooth planning.
Why This Is a Crowd-Pleaser
- Quick: Dump cakes are the ultimate go-to when you want a ridiculously fast dessert without cutting corners on flavor—try Magic Lemon Cobbler for another lightning-quick bake.
- Simple: Only six easy pantry ingredients, no special skills needed. Plus, all those ingredients are probably already sitting in your kitchen right now! If you want another ultra-simple fall treat, Ina’s Apple Pie Bars are easier than apple pie.
- Crowd Favorite: Every time I make this, it disappears fast! It’s the kind of recipe that gets all the compliments but keeps you looking like a total rockstar without the fuss.
Pantry Ingredients You’ll Need
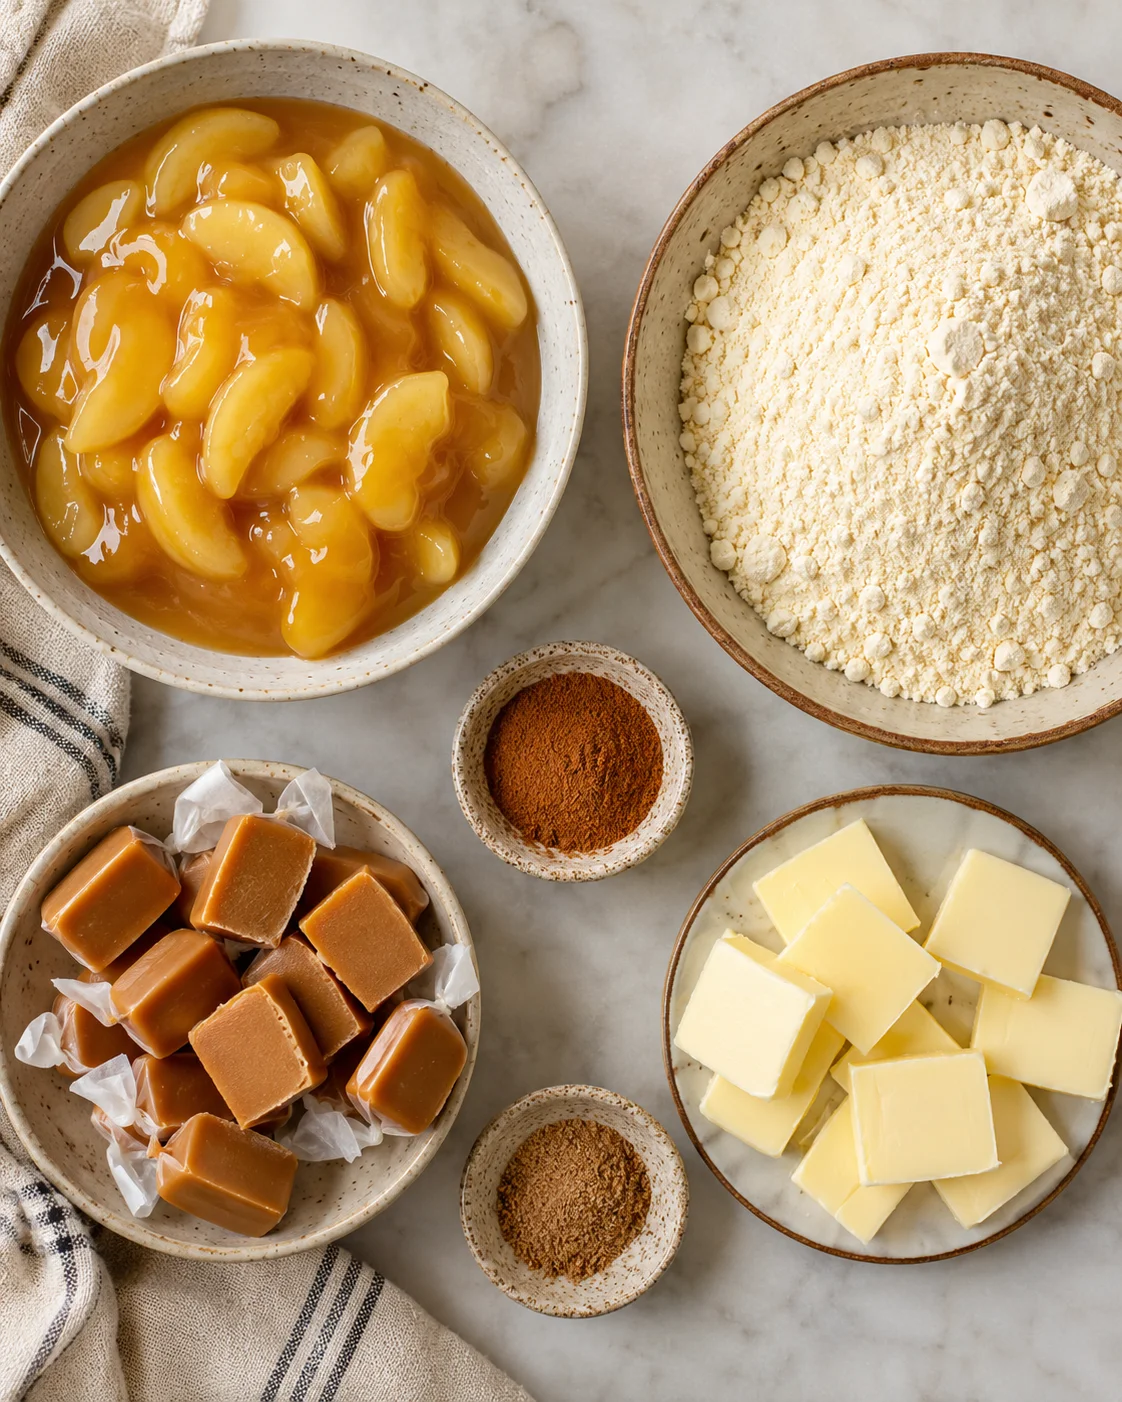
- Apple pie filling – either your favorite canned brand or homemade if you want to get fancy.
- Ground cinnamon
- Ground nutmeg – just a pinch gives warmth and depth to the flavor.
- Caramels – unwrap them and cut each piece in half to help them melt evenly.
- Yellow cake mix – don’t mix it with anything, just the dry box mix straight from the bag.
- Butter – sliced into ¼ inch pats, preferably salted butter for best taste and browning.
How to Assemble and Bake
- Preheat oven to 350°F.
- Unwrap caramels and cut each piece in half; if very firm, microwave 5–8 seconds to soften before cutting.
- Slice butter into 1/4-inch pats.
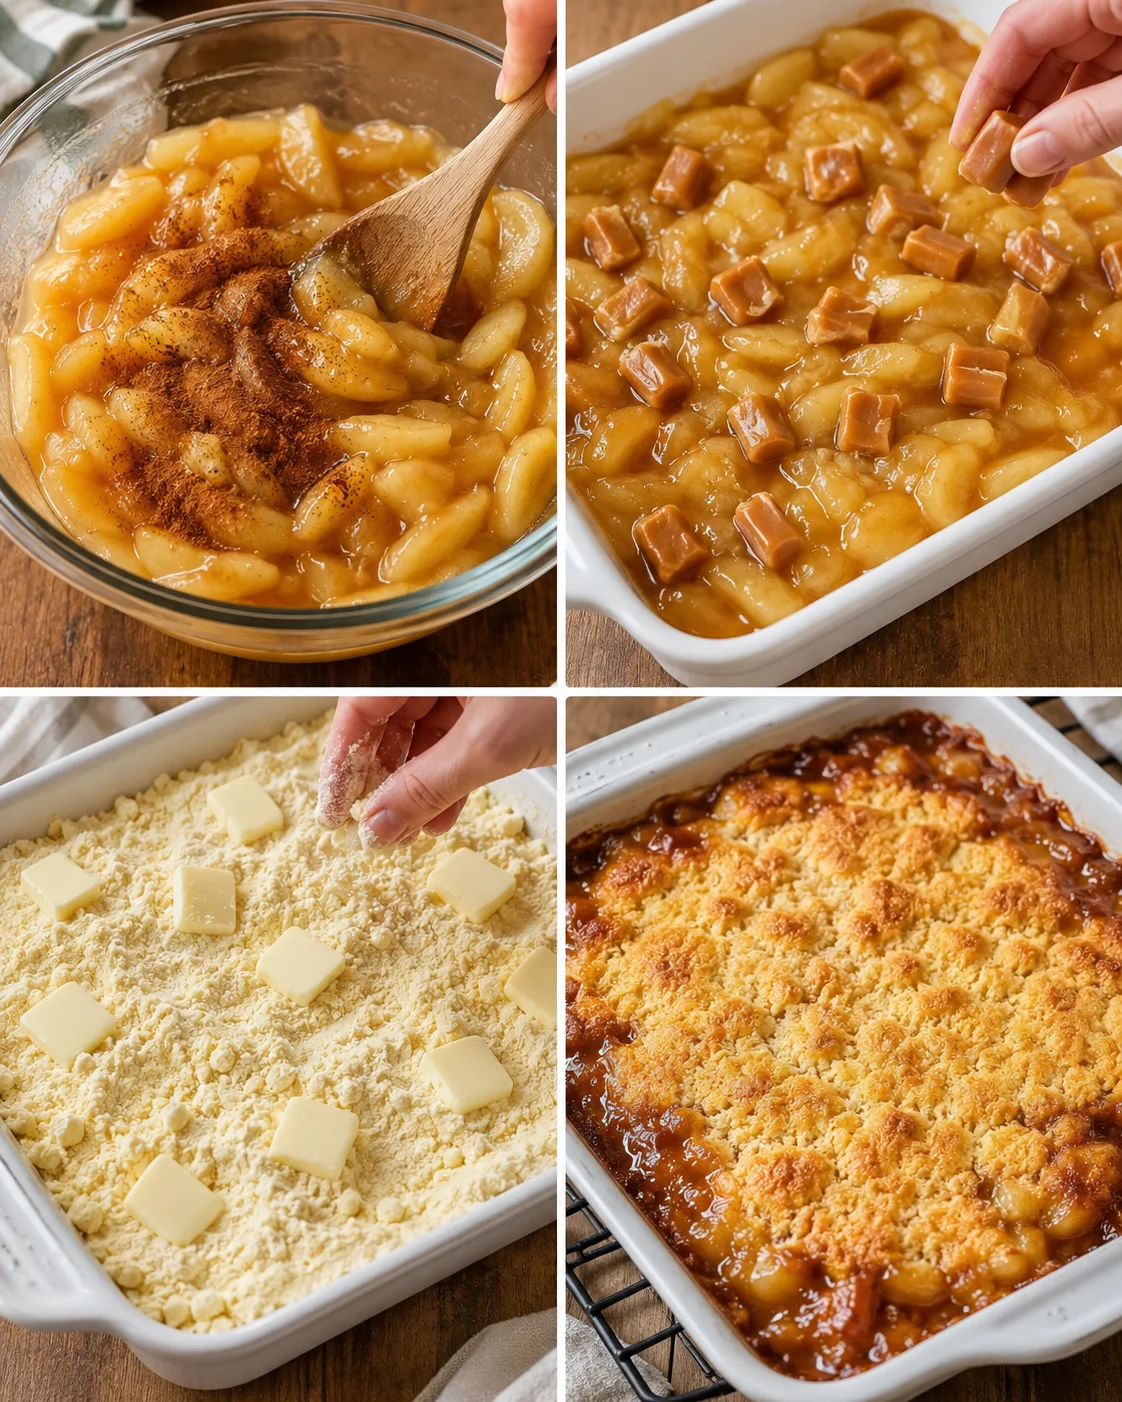
- Stir apple pie filling with ground cinnamon and ground nutmeg in a medium bowl.
- Pour the spiced apple mixture evenly into a 13×9-inch baking dish.
- Scatter the halved caramels evenly over the apples.
- Sprinkle the dry yellow cake mix evenly over the caramels.
- Dot the cake mix with the butter pats, spacing them evenly.
-
Bake at 350°F for 45 minutes until the top is lightly golden and the edges are bubbling.
- If the top browns too quickly but the center isn’t bubbly, loosely cover with foil and finish baking.
- Let the cake cool for several minutes before serving to allow the caramel to set.
Baking Tips for Best Results
- Keep the cake mix dry — do not mix with eggs, water, or oil. This helps create a crisp, cookie-like topping.
- Always use real salted butter cut into pats about ¼ inch thick for the best browning and flavor. Margarine won’t give that texture or taste we’re after.
- Halve the caramels before adding them so they melt nicely and spread throughout instead of bunching up in one spot.
- If your caramels are very firm, pop them in the microwave for 5 to 8 seconds to soften just enough to cut easily — don’t melt them!
- Scatter the butter pats evenly across the top of the cake mix. This ensures every bite gets that golden, buttery crust we love.
- Keep a close eye on the cake during the last 10 minutes of baking. If it starts browning too much but isn’t bubbly in the center, loosely cover with foil to avoid burning and finish baking.
- Let the cake cool for several minutes before serving so the caramel has a chance to set up a bit, making it easier to scoop.
- For the best experience, serve warm with a scoop of vanilla ice cream or drizzle with warm caramel sauce, and sprinkle a handful of chopped pecans or walnuts on top for crunch.
Toppings, Mix-Ins, and Swaps
- A big scoop of creamy vanilla ice cream makes this dessert irresistible.
- A drizzle of warm caramel sauce—or a dollop of salted caramel cream cheese frosting—adds even more gooey sweetness.
- Extra cinnamon sprinkled on top amps up the Fall spice vibe.
- Classic whipped cream is perfect for a light, fluffy finish.
- Chopped nuts like pecans or walnuts add wonderful texture and flavor contrast.
Storing and Reheating Leftovers
Got leftovers? No problem — just cover your cake tightly with plastic wrap or transfer into an airtight container. You can keep it at room temperature or pop it in the fridge for up to five days. When you’re ready to enjoy it again, reheat single portions in the microwave for about 20 to 40 seconds, or warm the entire dish covered at 325 to 350°F for 10 to 15 minutes until heated through. Adding fresh ice cream on top after reheating is pure bliss.
Variations
- Turn up the spice – Spice things up by mixing a little extra cinnamon, or pinch of nutmeg and allspice into your apple pie filling to bring out even more warm Fall flavor.
- Mix up the cake mix – While yellow is classic, white or spice cake mixes are fantastic alternatives that offer a delicious twist to the top layer.
Answers to Common Questions
-
Can I assemble this ahead of time?
Absolutely! You can put all the layers together, cover it tightly, and keep it in the fridge for up to 24 hours before baking. Just add a few extra minutes to the bake time to make sure it’s hot and bubbly all the way through.
-
How should I reheat leftovers?
For quick reheating, microwave individual portions for 20–40 seconds. Or for a bigger batch, cover and warm in a 325–350°F oven for 10–15 minutes so it heats evenly. Don’t forget to top with fresh ice cream after reheating for extra indulgence.
-
Can I use fresh apples instead of canned apple pie filling?
Yes! Use about 6 to 7 cups of peeled, sliced apples and cook them briefly with sugar and a little cornstarch or flour until they soften a bit. For seasoning, thickening, and apple variety tips, see our Easy Homemade Apple Pie recipe. This fresh approach is delicious but canned filling is a great shortcut.
-
Can I use caramel sauce or caramel bits instead of wrapped caramels?
Caramel bits or a light drizzle of caramel sauce can work just fine. If you’re using sauce, go easy on it to avoid making the cake soggy or too runny.
-
Can I make this gluten-free or use different cake mix flavors?
Definitely! Swap in a gluten-free boxed cake mix for a gluten-free treat. Also, spice cake or white cake mixes work beautifully if you want to switch things up.
-
Is it possible to freeze this dump cake?
You can freeze baked leftovers in a sealed container for 2 to 3 months. Thaw overnight in the fridge and warm gently before serving. Freezing the unbaked dessert is possible but may change the texture slightly.
-
What size pan should I use? Can I adjust the pan size?
This is written for a 13×9-inch pan. You can use smaller pans or even individual ramekins, but keep in mind that smaller or shallower pans bake faster, so start checking the bake a bit earlier, about 5 to 10 minutes sooner.
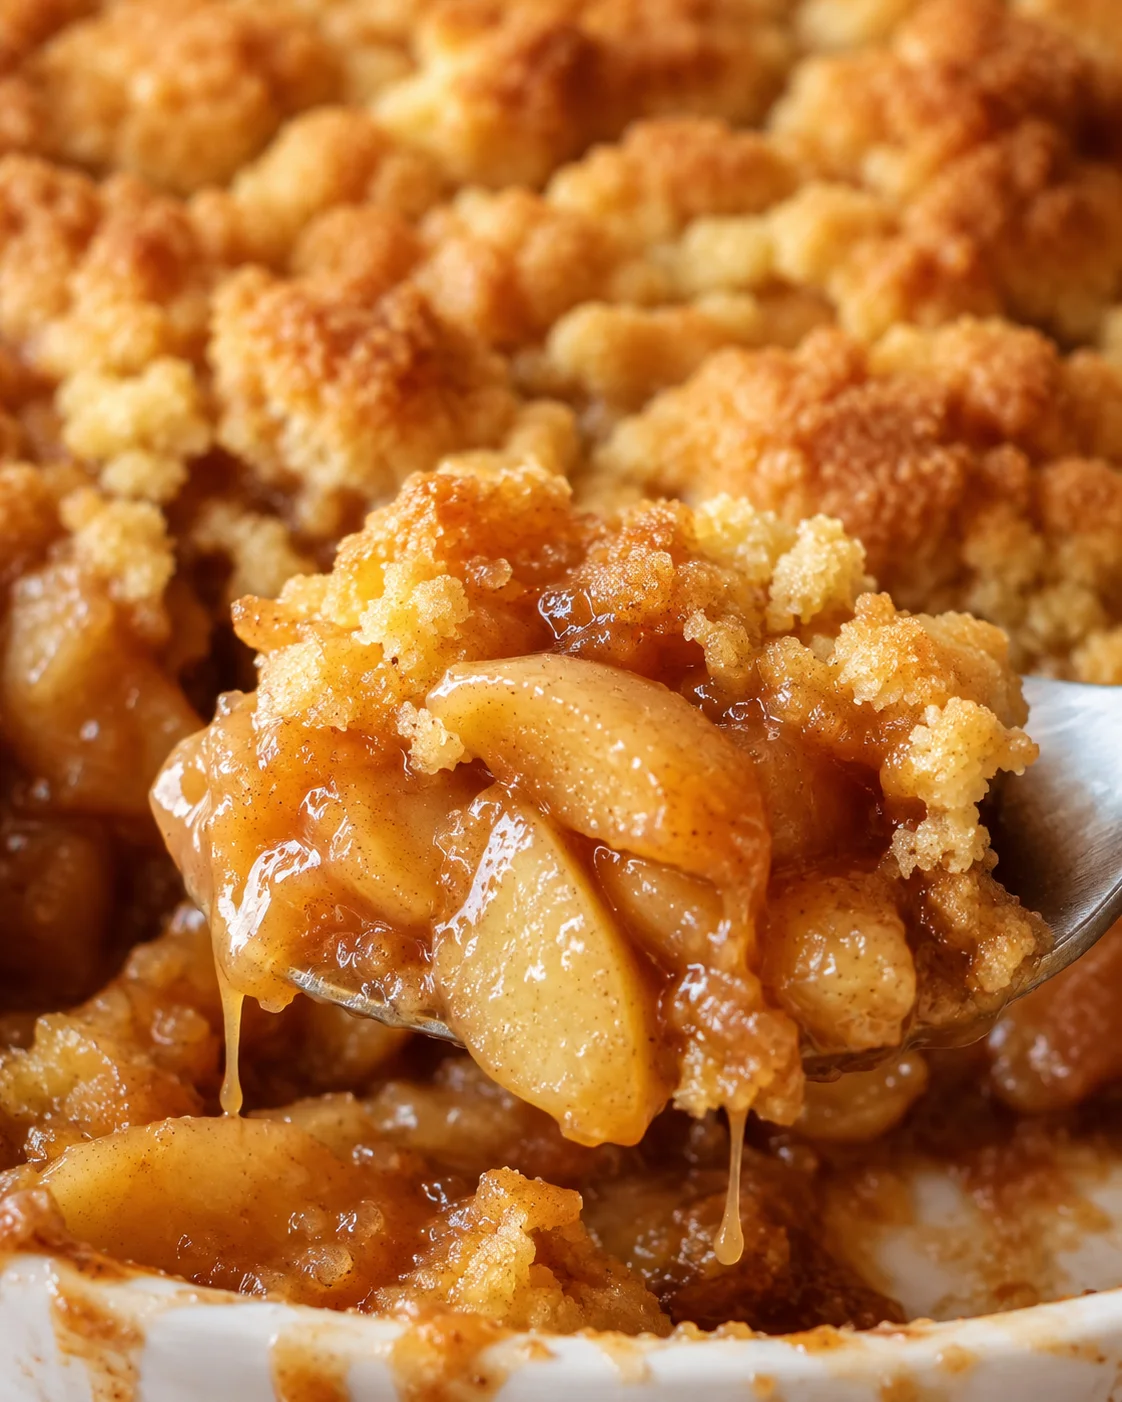
An easy and delicious Fall dessert made by layering apple pie filling, caramel candies, dry yellow cake mix, and butter, baked to a golden, bubbly finish.
- Prep Time: 10 minutes
- Cook Time: 45 minutes
- Total Time: 55 minutes
- Yield: 8 servings 1x
- Category: Dessert
Ingredients
- 21 oz canned apple pie filling (or equivalent homemade)
- 1/2 tsp ground cinnamon
- 1/4 tsp ground nutmeg
- 16 wrapped caramel candies, unwrapped and each cut in half
- 1 box (about 15.25 oz) yellow cake mix (dry, no additional ingredients)
- 1/2 cup (1 stick) salted butter, sliced into 1/4-inch pats
Instructions
- Preheat oven to 350°F.
- Unwrap caramel candies and cut each piece in half; if firm, microwave 5–8 seconds to soften before cutting.
- Slice butter into 1/4-inch pats.
- Stir apple pie filling with ground cinnamon and ground nutmeg in a medium bowl.
- Pour the spiced apple mixture evenly into a 13×9-inch baking dish.
- Scatter the halved caramels evenly over the apples.
- Sprinkle the dry yellow cake mix evenly over the caramels.
- Dot the cake mix with the butter pats, spacing them evenly.
- Bake at 350°F for 45 minutes until the top is lightly golden and the edges are bubbling.
- If the top browns too quickly but the center isn’t bubbly, loosely cover with foil and finish baking.
- Let the cake cool for several minutes before serving to allow the caramel to set.
Notes
Keep the cake mix dry; do not add eggs, water, or oil to maintain a crisp, cookie-like topping., Use real salted butter for best flavor and browning; margarine is not recommended., Halve caramels before adding to help them melt evenly and spread throughout., If caramels are very firm, soften by microwaving briefly before cutting., Scatter butter pats evenly to ensure golden, buttery crust., Monitor baking closely toward the end to prevent burning; cover with foil if necessary., Allow cake to cool before serving to help caramel set for easier scooping., Serve warm with vanilla ice cream, warm caramel sauce, whipped cream, or chopped nuts like pecans or walnuts for added texture and flavor., This dessert can be assembled up to 24 hours ahead and refrigerated before baking; add extra baking time if chilled., Leftovers can be stored covered at room temperature or refrigerated up to five days., Reheat individual portions in microwave for 20–40 seconds or whole dish in oven at 325–350°F for 10–15 minutes., Gluten-free variations possible by substituting gluten-free cake mix., Alternative cake mix flavors like spice or white cake can be used., Fresh apples can replace canned filling if pre-cooked with sugar and a thickener like cornstarch or flour., Caramel bits or light caramel sauce can substitute wrapped caramels but use sparingly to avoid sogginess., Baked leftovers can be frozen for 2-3 months; thaw in fridge before reheating., Smaller pans or individual ramekins may reduce baking time by 5–10 minutes.
Nutrition
- Serving Size: 1 serving
- Calories: Approximately 320 calories per serving
- Fat: 12 g per serving
- Carbohydrates: 45 g per serving
- Protein: 3 g per serving
More in Uncategorized
Apple Cider Cheesecake

Baked Potato Soup