Rhubarb Dream Bars
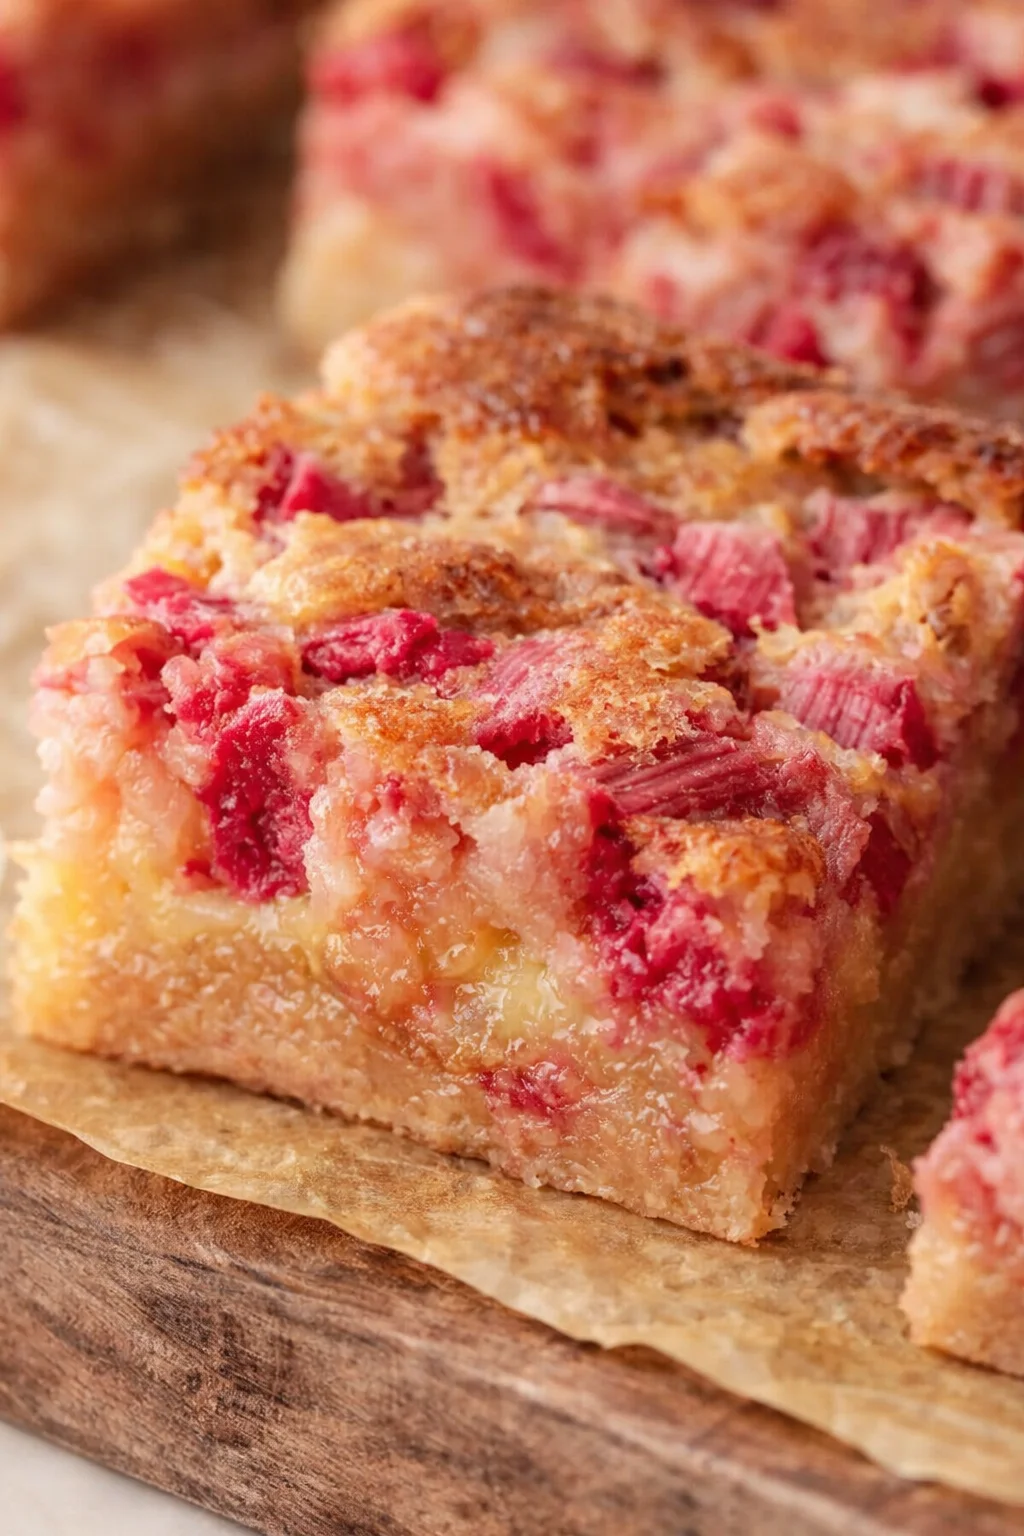
These creamy rhubarb squares are a bright and delightful dessert that’s perfect for spring and summer gatherings!
Instructions
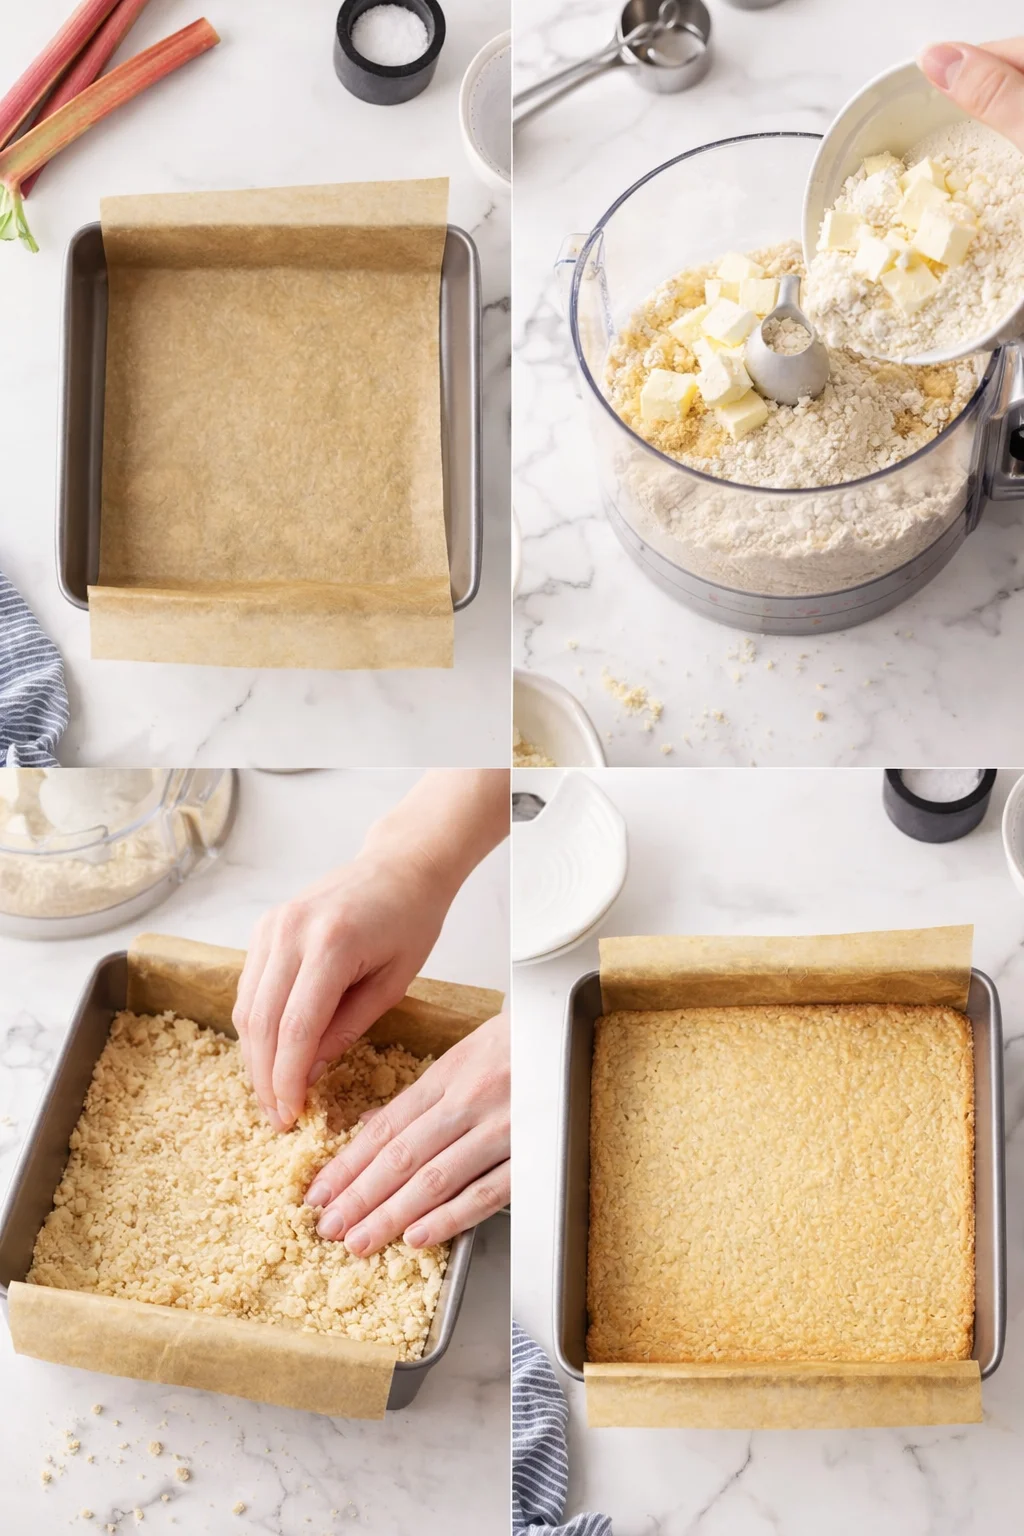
- Heat your oven to 350°F. Line an 8×8″ baking pan with parchment paper, making sure to pull it up the sides to help lift the bars out easily once they’re baked. Toss the crust ingredients in a food processor until evenly combined, then press the mixture firmly into the pan. Bake the crust for 15 minutes – it should stay pale and tender.
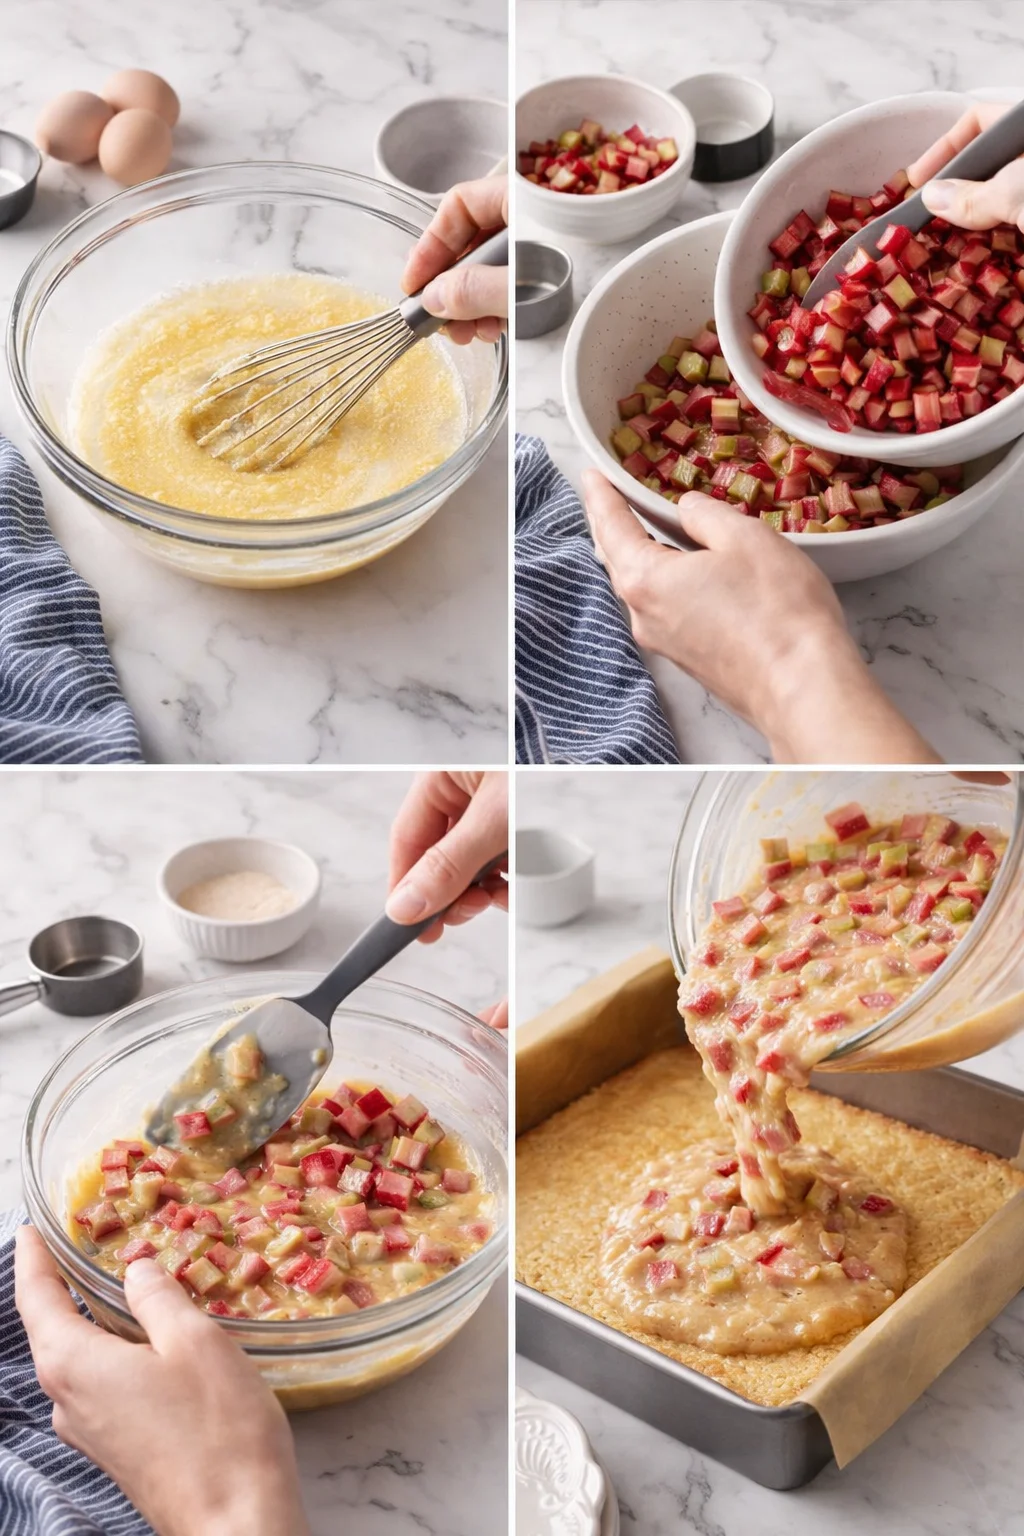
- While the crust bakes, whisk together the eggs, sugar, flour, and salt in a medium bowl for about a minute – no more, so you don’t overwork it. Gently fold the diced rhubarb into the mixture. Pour this filling over the warm crust and bake for another 40 to 45 minutes until set.
- Let the bars cool completely in the pan. Then lift them out by the parchment, slice into squares, and enjoy. A little dusting of powdered sugar on top is a lovely touch.
Notes
For more handy tips and tricks, check out the full post above. These bars are forgiving, but a few tweaks will guarantee a perfect bake every time.
Nutrition
Serving: 1Calories: 171kcalCarbohydrates: 27gProtein: 2gFat: 6gSaturated Fat: 4gPolyunsaturated Fat: 2gCholesterol: 39mgSodium: 92mgFiber: 1gSugar: 19g
Nutrition info is an estimate only. If you need precise details for medical reasons, be sure to consult a trusted source.
Recipe adapted from Food.com.
If you want an easy dessert that brings out rhubarb’s wonderful tartness balanced by a creamy custard filling, these Rhubarb Dream Bars are your new go-to. Made with simple pantry staples—flour, sugar, butter, eggs—they bake into lovely pink squares that slice up easily and spread the happiness.
Thanks to being straightforward and forgiving, this recipe fits busy lives. You can whip the crust up in a food processor or by hand, mix the filling in one bowl, and bake everything in an 8×8″ pan. The whole process takes just over an hour and yields about 16 small squares — great for sharing at potlucks, picnics, or anytime you want a fuss-free sweet treat.
- Timing: About 20 minutes prepping, 45 minutes baking (roughly 1 hour 5 minutes total).
- Yield & equipment: About 16 squares from an 8×8″ pan, lined with parchment for easy removal.
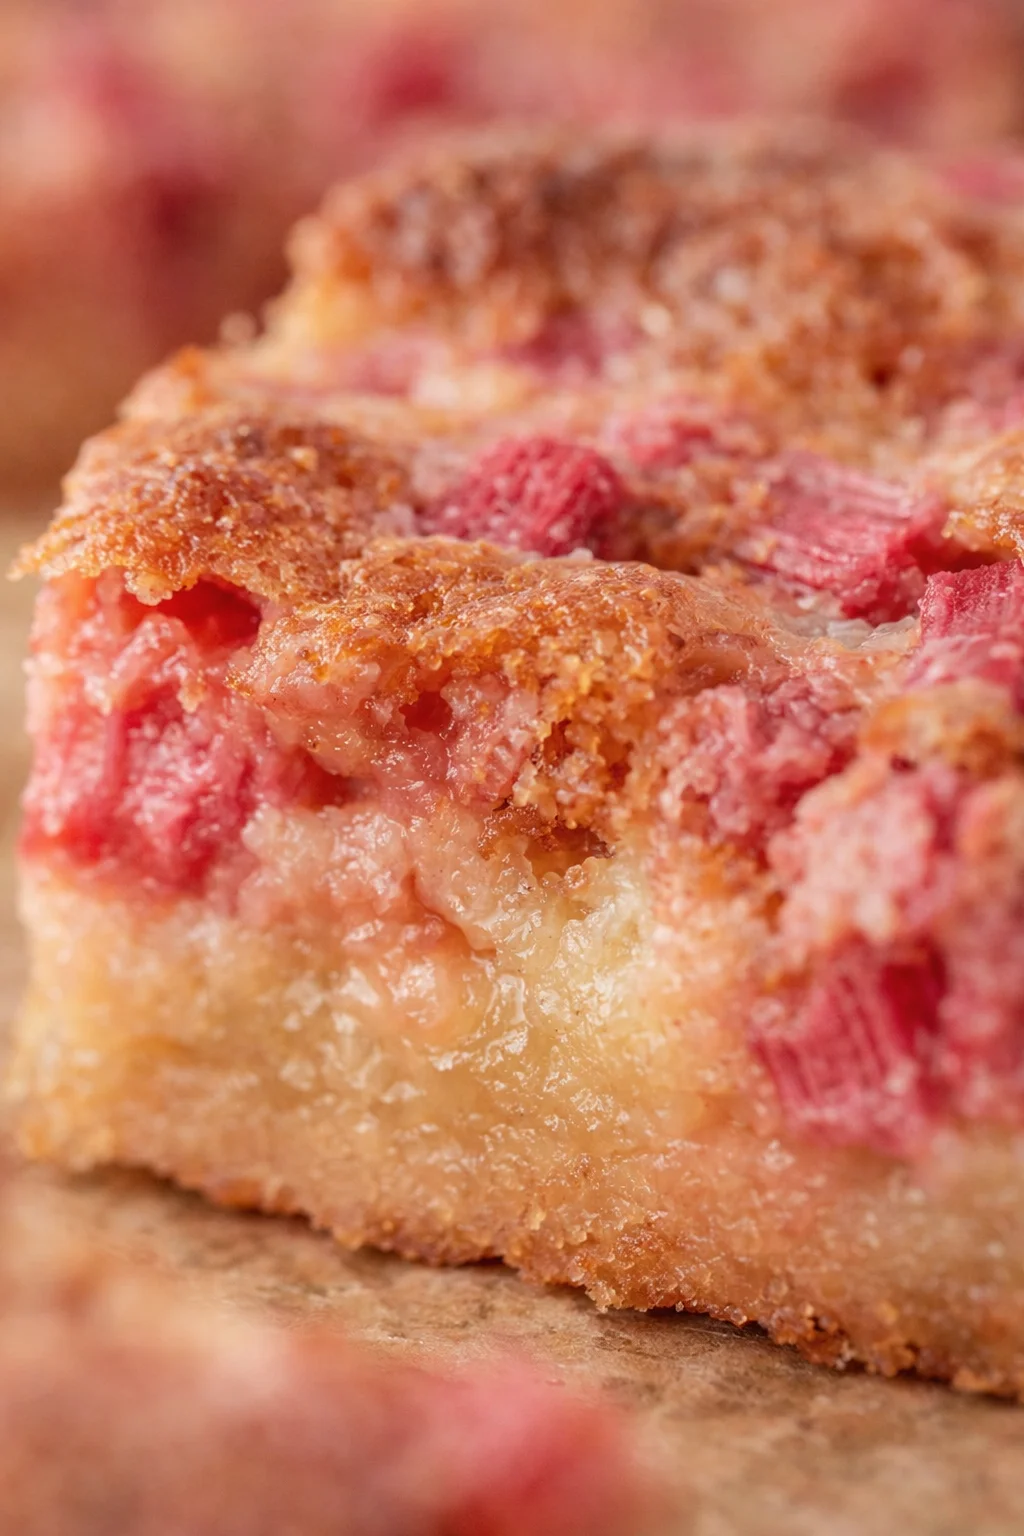
- Flavors & texture: A perfect mix of sweet and tart with a smooth, creamy filling and a soft, tender crust.
- Ingredients & swaps: Use fresh or frozen rhubarb—you’ll get great results either way. You can also swap in other fruits like strawberries, blueberries, or cherries for variety.
- Storage: Store these bars in a tight container in the fridge and enjoy fresh. Freezing isn’t ideal since the bars can get a bit too soft after thawing.
Keep scrolling for the full ingredient list, step-by-step instructions, plus some insider tips to help your bars turn out perfectly pink and creamy every time.
What Makes Them Special
These Rhubarb Dream Bars bring together a dreamy creamy filling and rhubarb’s bright tang in a simple dessert that anyone can make. Whether you’re picking rhubarb fresh from your garden, buying it at the farmers’ market, or using frozen, you’ll love how easy this recipe is to pull together.
Here’s why they’re a favorite:
- Super simple and forgiving: The crust whirls up fast in a food processor (or by hand) and the filling mixes in just one bowl.
- Fresh or frozen rhubarb works: You can enjoy this dessert no matter the season.
- Flexible fruit options: Try swapping in strawberries, blueberries, blackberries, cherries, or even pineapple. Craving the classic combo? See our Strawberry Rhubarb Bars for a dedicated take. Add your favorite mix-ins like shredded coconut or chopped nuts for extra fun.
- Just the right size: The recipe makes about 16 small squares – perfect for sharing without a mess.
- Tested & loved by readers: This recipe has earned great reviews and is a staple on my site.
Crust and Filling Ingredients
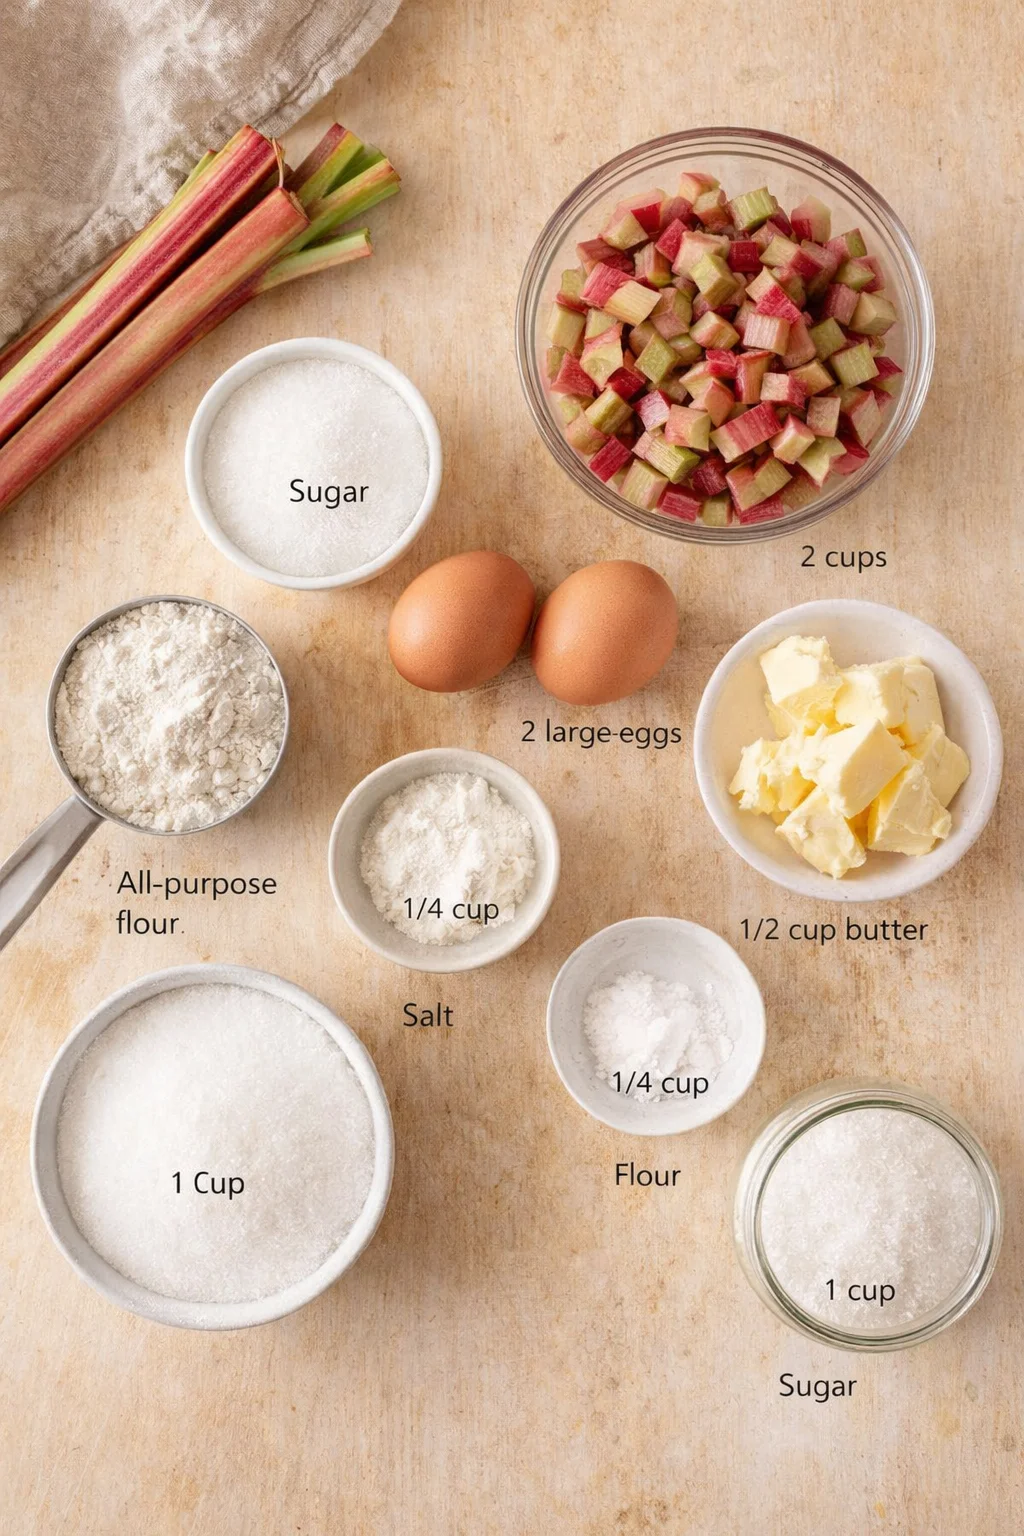
- 1 cup all-purpose flour
- 1/2 cup sugar
- 1/2 cup butter, room temperature
- 2 large eggs
- 1 cup sugar
- 1/4 cup flour
- 1/4 tsp. salt
- 2 cups diced rhubarb
How to Bake and Assemble
- Preheat oven to 350°F and line an 8×8-inch pan with parchment, leaving the paper up the sides.
- Combine the crust ingredients in a food processor (or mix by hand) until evenly combined and a dough forms.
- Press the crust mixture firmly and evenly into the prepared pan.
-
Bake the crust 15 minutes until pale and tender.
- While the crust bakes, whisk eggs, sugar, flour, and salt in a medium bowl about 1 minute until smooth.
- If using frozen rhubarb, thaw and drain any excess liquid.
- Gently fold diced rhubarb into the filling mixture.
-
Pour the filling over the warm crust.
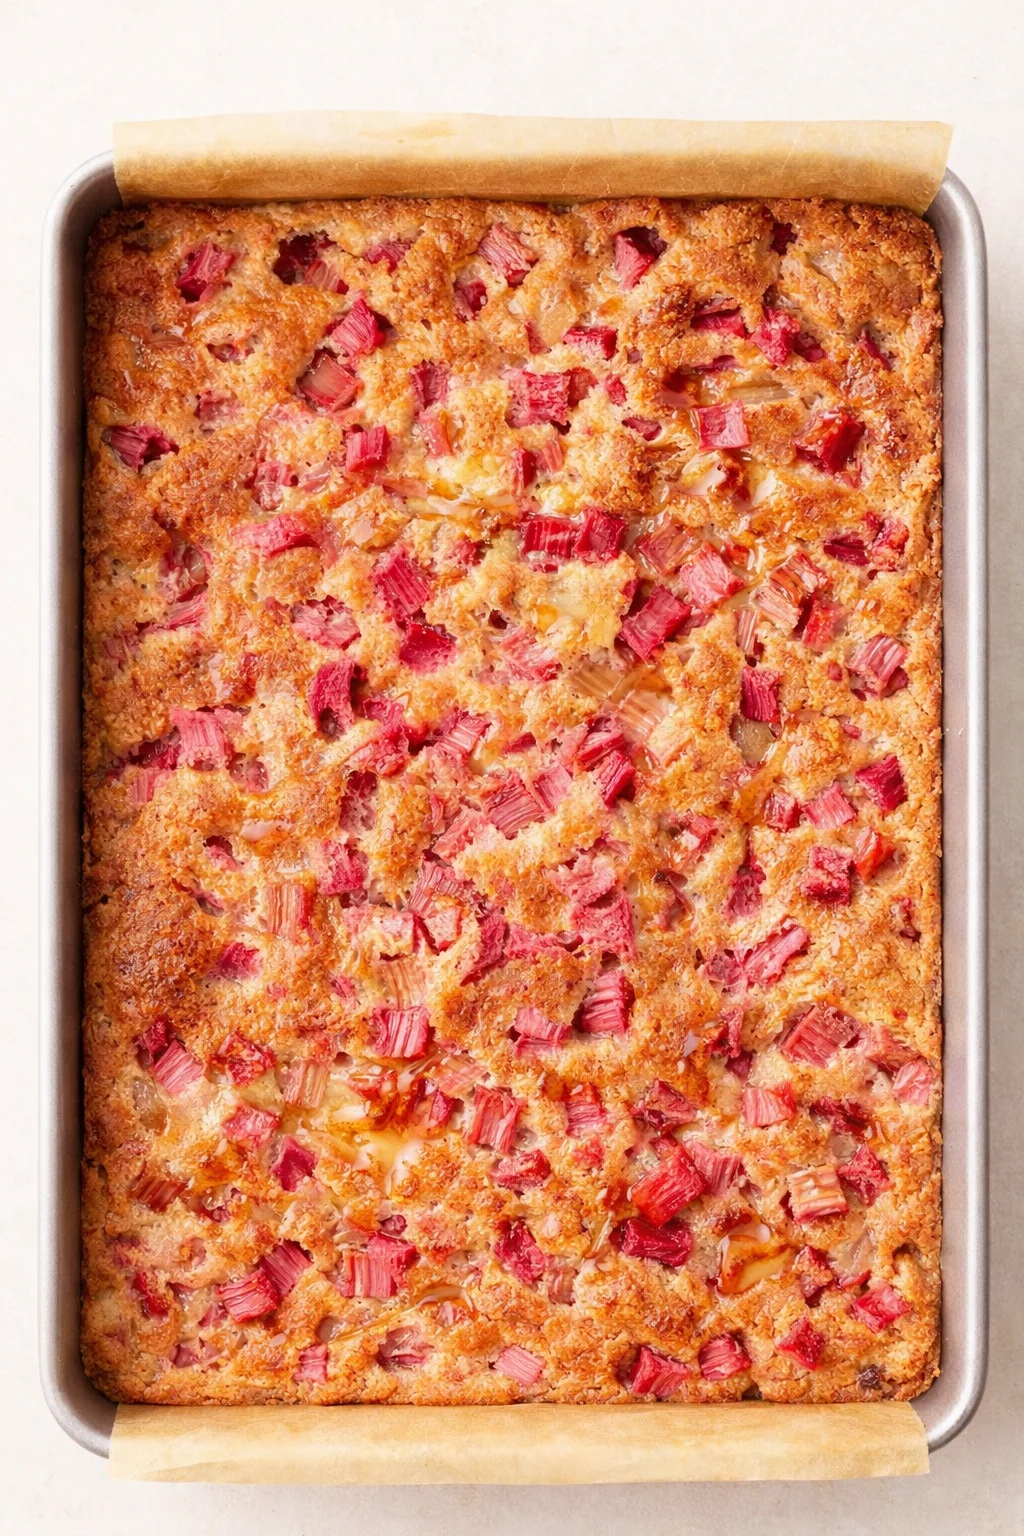
- Bake 40–45 minutes more until the filling is mostly set with a slight wobble in the center.
- If the edges are set but the center is underdone, tent the pan loosely with foil and continue baking until set.
- Let the bars cool completely in the pan.
-
Lift the bars out using the parchment and slice into squares.

Tips for Best Results
Look for ruby red rhubarb when you can — it makes the most beautiful pink bars that really pop on the plate.
If the edges of your bars look done but the center is still a little jiggly, tent the pan loosely with foil and keep baking until the filling is fully set—similar to what you’d look for with lemon bars with a shortbread crust.
Frozen rhubarb works just fine here, too—just as it does in our Vegan Rhubarb Crumble (Gluten-Free). Just drain it well if there’s extra moisture after thawing.
Picking ruby red rhubarb adds the prettiest pink color to your bars.
If your bars are browning around the edges but the center stays underdone, tent the pan with foil and bake until set.
You can use frozen rhubarb for this recipe—just drain it well if it’s extra juicy.
Flavor Swaps and Add-Ins
You don’t have to stick with just rhubarb, although it’s so good! Try mixing things up with these tasty options:
- Strawberries (or try the strawberry–rhubarb combo in muffin form)
- Blueberries
- Blackberries
- Pineapple
- Cherries
- Or toss in extras like shredded coconut or your favorite chopped nuts for extra flavor and crunch.
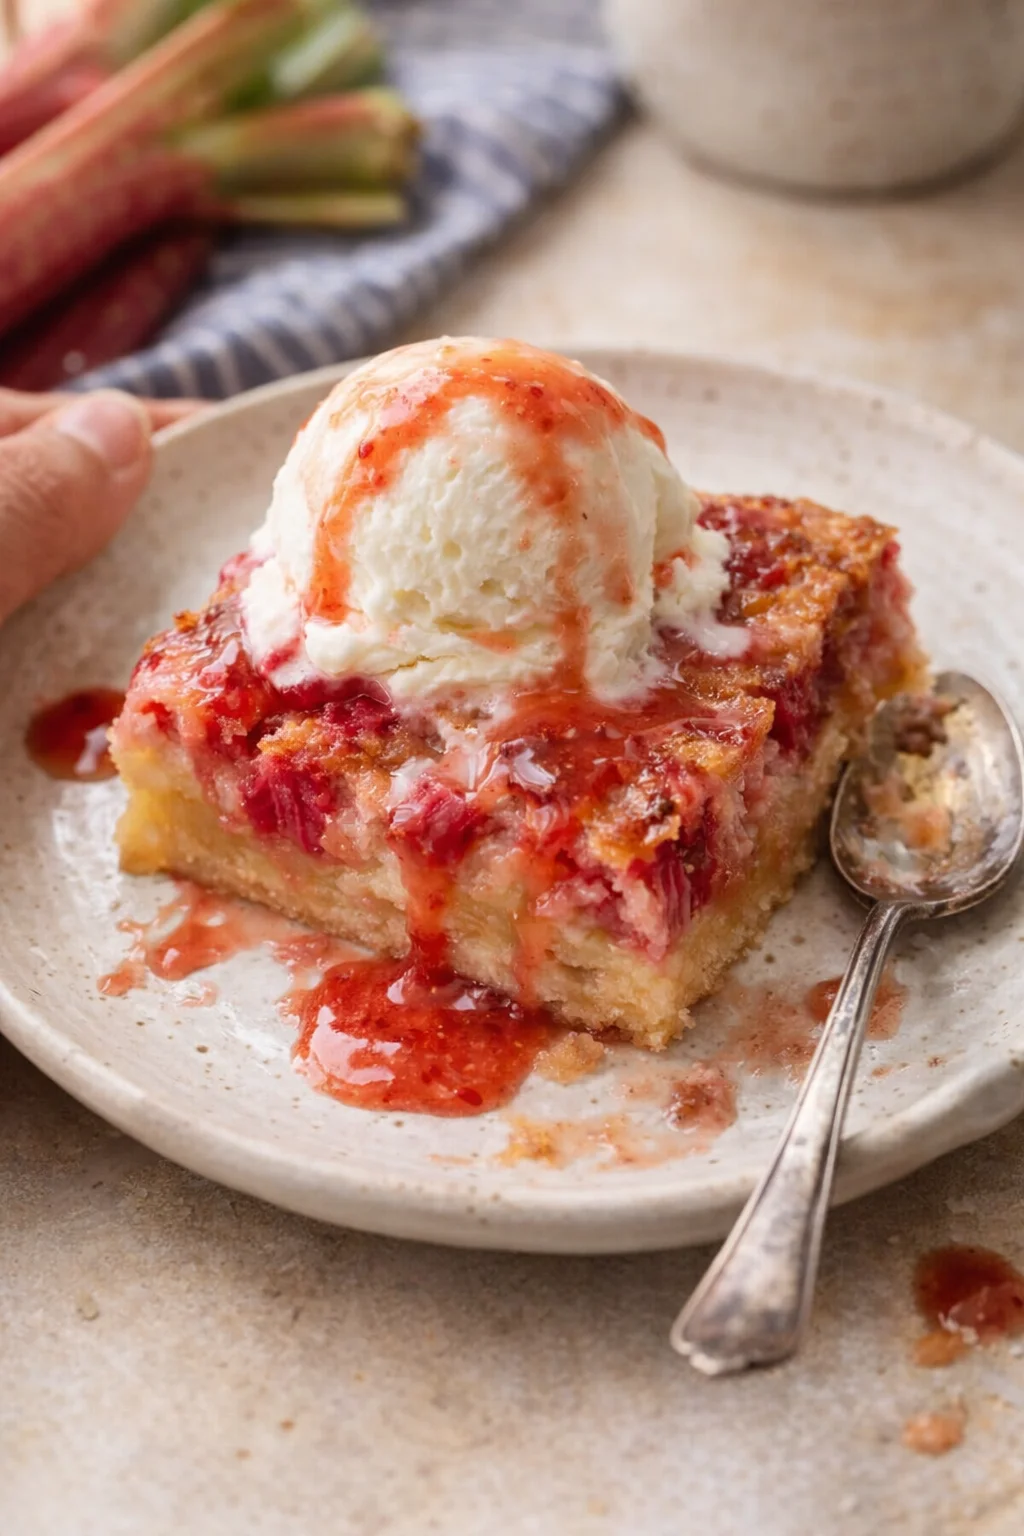
These bars are incredibly simple to make and packed with fresh, bright flavor. Plus, their pink hue makes them a fun and pretty dessert for warm-weather parties. Serve with a spoonful of macerated strawberries for extra brightness.
If you’re new here, this recipe has been a staple on Noshing With The Nolands for years — it’s one of our top-rated, most-loved crowd-pleasers.
The creamy custard filling paired with just the right balance of sweet and tart rhubarb is what keeps people coming back. And yes, frozen rhubarb makes a great substitute whenever you need it!
They’re also super easy to serve and just the right size — no giant slices here — making them perfect for picnics, BBQs, or any casual get-together.
Recipe Pro Tips!
Expert Tips
Picking ruby red rhubarb adds the prettiest pink color to your bars.
If your bars are browning around the edges but the center stays underdone, tent the pan with foil and bake until set.
You can use frozen rhubarb for this recipe—just drain it well if it’s extra juicy.
Make Ahead & Storage Instructions
You can keep these bars in an airtight container in the fridge, but they’re really best the day you bake them. If you need a dessert that’s designed to be made ahead and served chilled, try our No Bake Lemon Tart.
Freezing them isn’t the best plan since they can get a bit too soft and gooey once thawed.
Rhubarb Bars Recipe
These creamy rhubarb squares are a bright and delightful dessert that’s perfect for spring and summer gatherings!
Instructions
- Heat your oven to 350°F. Line an 8×8″ baking pan with parchment paper, making sure to pull it up the sides to help lift the bars out easily once they’re baked. Toss the crust ingredients in a food processor until evenly combined, then press the mixture firmly into the pan. Bake the crust for 15 minutes – it should stay pale and tender.
- While the crust bakes, whisk together the eggs, sugar, flour, and salt in a medium bowl for about a minute – no more, so you don’t overwork it. Gently fold the diced rhubarb into the mixture. Pour this filling over the warm crust and bake for another 40 to 45 minutes until set.
- Let the bars cool completely in the pan. Then lift them out by the parchment, slice into squares, and enjoy. A little dusting of powdered sugar on top is a lovely touch.
Notes
For more handy tips and tricks, check out the full post above. These bars are forgiving, but a few tweaks will guarantee a perfect bake every time.
Nutrition
Serving: 1Calories: 171kcalCarbohydrates: 27gProtein: 2gFat: 6gSaturated Fat: 4gPolyunsaturated Fat: 2gCholesterol: 39mgSodium: 92mgFiber: 1gSugar: 19g
Nutrition info is an estimate only. If you need precise details for medical reasons, be sure to consult a trusted source.
Recipe adapted from Food.com.
Storing and Make-Ahead Advice
You can keep these bars in an airtight container in the fridge, but they’re really best the day you bake them.
Freezing them isn’t the best plan since they can get a bit too soft and gooey once thawed.
Store your rhubarb dream bars in an airtight container in the fridge to keep them fresh — they’re best savored within a day or two of baking.
I don’t recommend freezing these bars because they tend to get a little too soft and lose their perfect texture after thawing. So, it’s best to make just what you need!
Common Questions Answered
-
Can I use frozen rhubarb?
Absolutely! I’ve used frozen rhubarb many times with great results. Just make sure to drain or pat dry any extra liquid after thawing to avoid a watery filling.
-
How do I know when the bars are done?
The edges should look set and slightly golden, and the center should be mostly firm but might still have a slight wobble when you gently shake the pan. If the sides are done but the center isn’t, tent with foil and bake a bit longer. For a visual reference, the same cues apply to lemon bars with a buttery shortbread crust.
-
What pan size should I use?
This recipe is designed for an 8×8″ baking pan lined with parchment. It makes about 16 perfect-sized bars.
-
Can I make these gluten-free?
I haven’t tried a gluten-free switch, but if you want to experiment you could swap a 1:1 gluten-free flour blend for the all-purpose flour. Just know it might change the crust and filling texture a bit.
-
How should I store them and can I freeze them?
Store bars in an airtight container in the fridge and eat them within a couple of days. Freezing isn’t the best because the texture gets gooey and soft when thawed.
-
Can I halve or double the recipe?
Sure thing! Halve the ingredients for a smaller batch or double them for a bigger pan (use a 9×13″ if doubling). Keep an eye on baking time — smaller batches cook faster, bigger ones take longer.
-
Any tips for serving?
These bars are good at room temperature or chilled. A light dusting of powdered sugar, a dollop of whipped cream, or a scoop of vanilla ice cream are lovely additions.
-
Can I use salted butter?
Yes! I prefer salted butter in the crust. Just keep the 1/4 teaspoon salt in the filling as is, or adjust to taste.
More in Uncategorized

Crock Pot Chicken and Rice Recipe
Crock-Pot Chicken Noodle Soup

Slow Cooker Hearty Chicken Soup.