Turkey Cupcakes
These Turkey Cupcakes are vanilla cupcakes topped with colorful buttercream swirled into adorable little turkeys! They look way fancier than they are to make, and they bring that perfect festive vibe for Fall and Thanksgiving!

Why You’ll Love These Turkey Cupcakes
Bright, cheerful, and totally cute – what’s not to adore? These cupcakes will definitely steal the show and bring lots of smiles at any fall gathering. Bonus? They taste just as amazing as they look!
- Fun and festive – These turkey cupcakes are perfect for this season. They fit any kids’ party, cozy fall get-together, or the big Thanksgiving feast.
- Delicious cupcakes – Adorable and delicious! These are my homemade vanilla cupcakes, tweaked with a bit more oil for extra moistness. You’re going to love biting into these soft, flavorful treats.
- Easy to make – The cupcakes come together quickly, and the decorating is surprisingly doable. With just a few piping tips and patience, you’ll create sweet little turkeys. Follow along with my step-by-step photos for a smooth decorating experience.
- Customizable – I kept it classic with vanilla cupcakes, but feel free to switch things up! Chocolate, pumpkin, or cinnamon swirl cupcakes all make fun bases for these Turkey Cupcakes.

What You’ll Need
These Turkey Cupcakes call for simple pantry staples plus a handful of decorating tools. Scroll down to the recipe card for exact measurements and details.
For the cupcakes
- All-purpose flour – Getting this right is key. Weigh it on a food scale if you can, or use the classic spoon and level method to avoid dry cupcakes.
- Baking powder – Helps the cupcakes rise nicely and gives a nice tender crumb.
- Salt – Just a pinch to bring out flavors.
- Butter – Unsalted and softened to room temperature. If you prefer salted butter, skip or reduce added salt in the recipe.
- Vegetable oil – This keeps the cupcakes extra moist and tender, working together with butter for the best texture.
- Sugar – Sweetness is essential, of course!
- Vanilla extract – For that warm, comforting flavor we all love.
- Eggs – Use large eggs to ensure the proper balance in the recipe.
- Milk – Whole milk or 2% work perfectly for a smooth batter.
For the buttercream
- Unsalted butter – Softened to room temp for smooth mixing.
- Powdered sugar – This gives volume and holds the buttercream firm enough for piping. You can reduce sugar a bit if you prefer, but the frosting might be softer.
- Vanilla extract – Just a splash for flavor.
- Heavy whipping cream – Helps get the buttercream to the perfect fluffy consistency.
- Salt – Optional, but just a pinch cuts sweetness and adds depth.
- Cocoa powder – Use natural unsweetened cocoa powder for the richest, truest chocolate taste without going too dark.
- Gel icing colors – You’ll need yellow, orange, red, and black. Gel colors give vibrant hues without thinning your frosting.
For Decorating
- Two Wilton 104 tips – Perfect for making red and orange “feathers.” You could squeeze by with just one, but having two helps you skip cleaning between colors.
- Wilton 102 tip – This smaller tip is great for the yellow feathers since you’re working in a tighter space.
- Ateco 808 tip – A big round tip perfect for piping the turkey’s body and head.
- Wilton 4 and 5 tips – Tip 4 works for tiny eyes, and tip 5 is great for the little beak. You can use just one tip for both if you like, but having both gives a nice size difference.
- Piping bags – Lots to choose from! Check Walmart, Michaels, or Hobby Lobby. I usually stick with Wilton brand for durability over some off-brand bags found online.
- Couplers – These handy tools let you swap out piping tips without emptying your bag. I use Wilton, but other brands work just fine and are widely available.

How To Make Turkey Cupcakes
Don’t let these cupcakes intimidate you! They’re easier than they look, especially with photos to guide you every step. You’ll find a handy printable recipe card with all the details at the bottom of this post.
Make the cupcakes
- Prep: Set your oven to 350°F and line a cupcake pan with paper liners. Whisk together flour, baking powder, baking soda, and salt in a bowl, then set aside.
-
Blend wet ingredients: Using a stand or hand mixer, beat butter, sugar, oil, and vanilla until fluffy and lighter in color about 2 to 3 minutes.
Next, add the eggs one by one, mixing well after each addition.
- Add dry ingredients and milk: Mix half the dry ingredients into the batter just until blended. Pour in the milk and stir until combined. Add the rest of the dry ingredients, mixing until the batter is smooth and silky.

Cream the butter, sugar, oil and vanilla until fluffy.

Add the eggs individually, mixing well between each addition.

Add dry ingredients and milk, mix until smooth.
- Bake: Fill cupcake liners about ¾ full. BBake for 15–18 minutes, or until a toothpick inserted into the center comes out clean. Allow them to cool completely on a wire rack before decorating.

Spoon batter into prepared liners.

Cupcakes fresh out of the oven.
Make the buttercream
-
Mix buttercream: Beat butter until creamy. Add half the powdered sugar and mix well. Mix in the vanilla, 1 tablespoon of heavy cream, and salt until the mixture is smooth.
Add the rest of the powdered sugar and beat the mixture until light and fluffy.
Adjust consistency with more cream if needed.
- Color the frosting: Scoop out about 1 cup of plain buttercream into another bowl. Mix cocoa powder and 3 tablespoons of heavy cream into this portion until smooth and chocolatey. Divide the remaining vanilla buttercream into three bowls color the biggest batch red, the smallest yellow, and the last one orange.
- Prep piping bags: Fill two piping bags with the red and orange colors, each fitted with a Wilton 104 tip. Put the yellow buttercream into another bag with the Wilton 102 tip.
Decorate the cupcakes
- Start with red feathers: Pipe red feathers around the outer edge of the cupcake. Hold the tip close but not touching the cupcake, and use short up-and-down motions to create a pretty ruffled look.

- Add orange and yellow feathers: Next, pipe orange feathers just inside the red, then yellow feathers inside the orange. This layering creates a colorful feather effect where each row peeks out from behind the last.


- Pipe the turkey body: Fill a piping bag with the chocolate buttercream using the Ateco 808 or another large round tip. Pipe one continuous swirl for the body and head, applying a bit more pressure for the bigger body area.
- Add the turkey’s face: Mix a tiny bit of leftover chocolate buttercream with black gel color, then pipe eyes with a small round tip Wilton 4 works great. Use orange buttercream and a small round tip (Wilton 5) to pipe a little triangle beak just below the eyes.

Tips For Success
- Measure your flour carefully. Too much flour dries these cupcakes out. I swear by using a food scale, but if you don’t have one, spoon and level is the way to go.
- Don’t rush creaming. Taking your time when mixing butter, oil, and sugar until light and fluffy brings air into the batter and makes your cupcakes extra soft and tender.
- Buttercream texture matters. This buttercream makes a lot of frosting with 5 ½ cups of powdered sugar. You can cut back a little sugar if you want, but then your frosting won’t be quite thick enough for neat piping. I really recommend sticking to the full amount so your turkeys keep their shape.
- No piping tip? No problem! If you’re missing a small round tip, just snip the tip of a piping bag or a Ziplock bag corner for simple eyes and beak details.

How to Store Turkey Cupcakes
Keep these cupcakes fresh in a cupcake carrier with a lid, or an airtight container tall enough to protect the frosting. They’re good on the counter at room temperature for a day, in the refrigerator for about 4 days, or frozen for up to 3 months. Just bring them to room temperature before serving to enjoy that soft texture and rich flavor.
More in Cupcakes
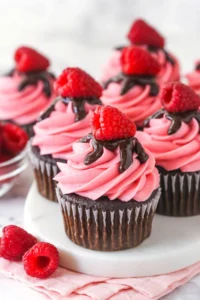
Raspberry Chocolate Cupcakes
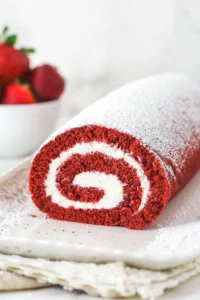
Red Velvet Cake Roll
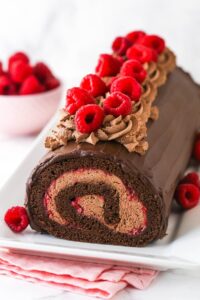
Raspberry Chocolate Cake Roll

