Chewy and Gooey Chocolate Crinkle Cookies
If you’re in the mood for a sweet treat that’s easy to make and bursting with rich chocolate goodness, Chocolate Crinkle Cookies are just the thing. These cookies steal the show with their beautiful cracked exterior dusted in powdered sugar, giving way to a soft, fudgy center packed with deep, chocolaty flavor. They’re straightforward enough for new bakers, but impressive enough to impress anyone who loves a classic dessert.

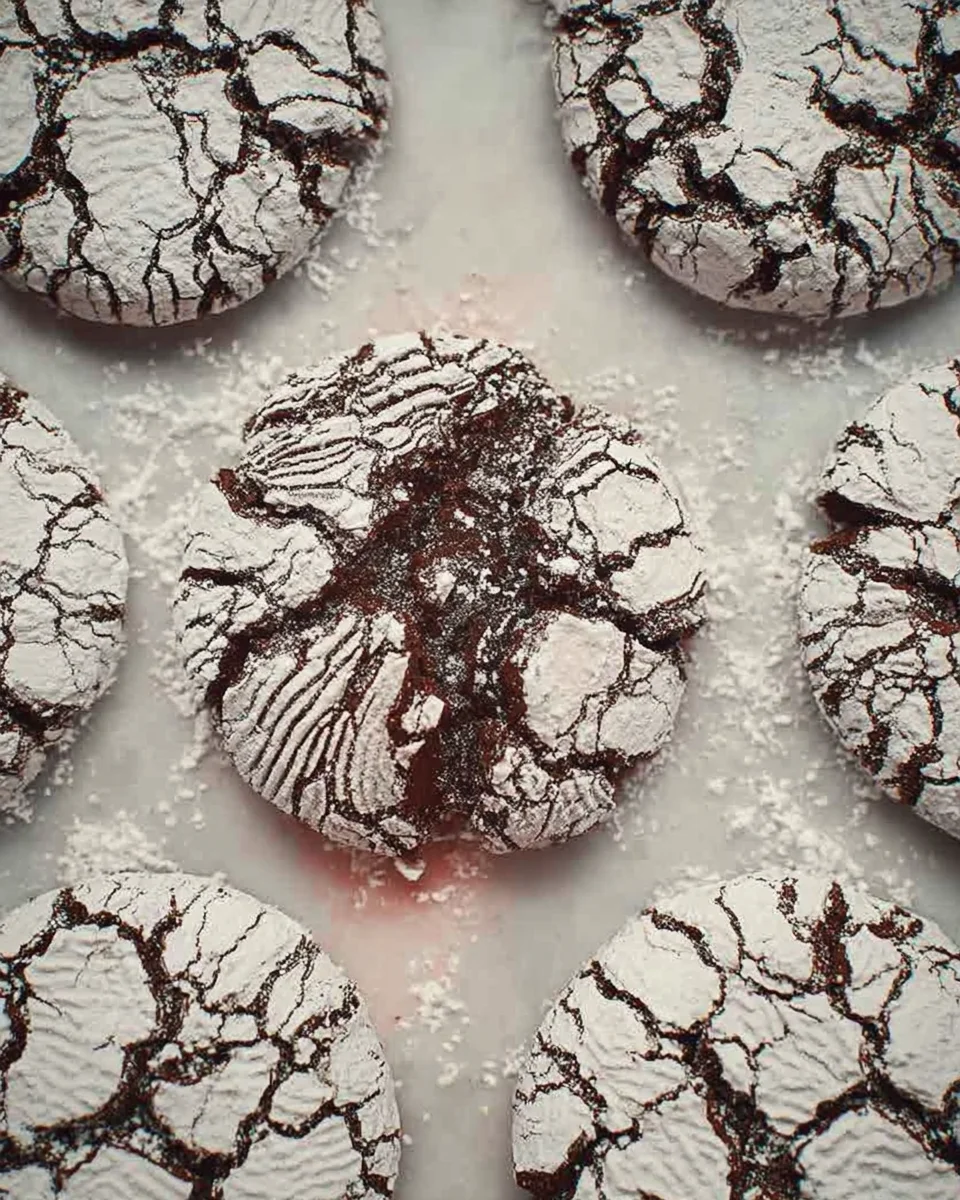
Chocolate Crinkle Cookies. Photo Credit: Splash of Taste
These cookies have a special place on my holiday baking list because getting that cool cracked look is actually easier than it seems. They’re great for Christmas cookie trays, potlucks, or even just a cozy night at home. Plus, with just around 15 minutes of hands-on prep, the ability to make them ahead, and fantastic freezer-friendly qualities, they’re a home cook’s dream come true.
Ingredients You’ll Need
Take a look at the photo below to see the exact ingredients that come together to create these chewy, chocolatey delights.
Chocolate Crinkle Cookies Ingredients. Photo Credit: Splash of Taste
How to Make Chocolate Crinkle Cookies with Step-By-Step Instructions
Keep scrolling to find the full recipe card with every measurement you need. Whether you like using US customary cups or metric grams, everything is covered here to make baking easy and stress-free.
You’ll appreciate just how simple this recipe is. Follow my clear steps, and you’ll be rewarded with a batch of amazing chocolate crinkle cookies that everyone will love.
Mix Your Wet Ingredients
First, grab a medium mixing bowl and stir together your cocoa powder, sugar, and vegetable oil. Keep stirring until the mixture is smooth and looks rich—this is where the chocolate flavor really starts to build.

Combine cocoa powder, sugar, and oil until silky and smooth.

Next, add your eggs one at a time, stirring well after each to keep everything smooth and combined.
Once your eggs are mixed in, pour in the vanilla extract. This little addition brightens the flavor and makes the whole batch taste extra special.
Combine the Dry Ingredients
In a separate bowl, whisk together your flour, baking powder, and salt. Slowly add this dry mixture to your wet ingredients, stirring gently until everything comes together. You want a thick, fudgy dough that’s rich and ready for chilling.

Whisk your flour, baking powder, and salt so they’re evenly mixed.

Gradually fold the dry mix into the wet until combined.

Stir until you get a thick, dense chocolate dough ready to chill.
Chill the Dough
Cover your dough with plastic wrap and pop it in the fridge for at least 4 hours. I know waiting can be tough, but this step is key to getting that stunning cracked surface and the perfect chewy-soft texture inside. Trust me, it’s so worth it!
Preheat the Oven and Prepare Your Cookie Sheets
When you’re ready to bake, preheat your oven to 350°F (175°C). Line your baking sheets with parchment paper or lightly grease them to prevent sticking. This little step keeps cleanup quick and makes it easier to lift the cookies off the tray.
Shape and Coat the Cookies
Now comes the fun part! Scoop out about 1-inch portions of your chilled dough and roll them into smooth balls. Next, generously coat each ball in a thick layer of confectioners’ sugar. Place them on your prepared baking sheets, leaving about an inch of space between each cookie so they can spread without sticking together.

Use a scoop to portion out 1-inch balls of dough.

Roll each ball well in powdered sugar for that beautiful cracked look.

Slide your trays into the oven and bake for about 10 to 12 minutes.
Bake to Perfection
Bake your cookies until the edges are set but the centers still look soft and tender—usually about 10 to 12 minutes. This contrast between a delicate exterior and a soft inside is what makes these cookies so addictive.
After baking, leave the cookies on the sheet for a couple of minutes. This helps them firm up a bit so they don’t break when you transfer them to a wire rack to cool completely.

Let the cookies cool fully before snacking or storing—though it’s so tempting to dive in right away!
Recipe Notes and Expert Tips
- Use Room Temperature Eggs: Have your eggs out of the fridge for a bit before mixing. This helps everything blend smoothly and makes the dough come together beautifully.
- Mix Gently: When combining wet and dry ingredients, stir just until everything is combined. Overdoing it can make your cookies tough, so take it slow and steady.
- Chill for the Win: Don’t skip chilling the dough. It’s the secret to those perfect crinkles and that soft, chewy texture you’re after.
- Overnight Chill for Bigger Cracks: For even more dramatic crackled tops, refrigerate the dough overnight. The longer, the better when it comes to those gorgeous crinkle patterns!
- Load Up on Sugar: Don’t hold back on the powdered sugar coating. This not only adds sweetness but creates the signature contrast and cracks these cookies are known for. If you see the sugar soaking in before baking, give the dough balls another roll in sugar right before they go into the oven.
- Keep Cookie Sizes Uniform: Try to make all your dough balls the same size for even baking. This keeps some cookies from ending up overdone while others stay undercooked.
- Watch for Doneness: The cookies should have firm edges and cracked tops but still feel soft in the middle when you take them out. If you’re unsure, it’s better to slightly underbake—they firm up as they cool.
- Cool on the Baking Sheet: Letting the cookies sit on the baking sheet for a few minutes after baking helps them hold their shape and keeps them from falling apart when you transfer them to the cooling rack.

Chocolate Crinkle Cookies. Photo Credit: Splash of Taste
How to Store Leftover Chocolate Crinkle Cookies
If you have any cookies left over (not that that usually happens!), keep them fresh by storing in an airtight container at room temperature. They’ll stay soft and delicious for up to 5 days, making for an easy snack or breakfast addition.
Want to save them longer? These cookies freeze beautifully. Lay them out on a baking sheet in a single layer to freeze first, then pop them into a freezer-safe container or bag. They’ll hold for up to 3 months. When it’s time to enjoy, simply thaw at room temperature or warm gently in the oven for that just-baked feel. So handy and tasty!
More in Cookies