Raspberry Mousse Filling for Cakes That Stays Light and Creamy – Emma’s Cake Studio
Tried by 43
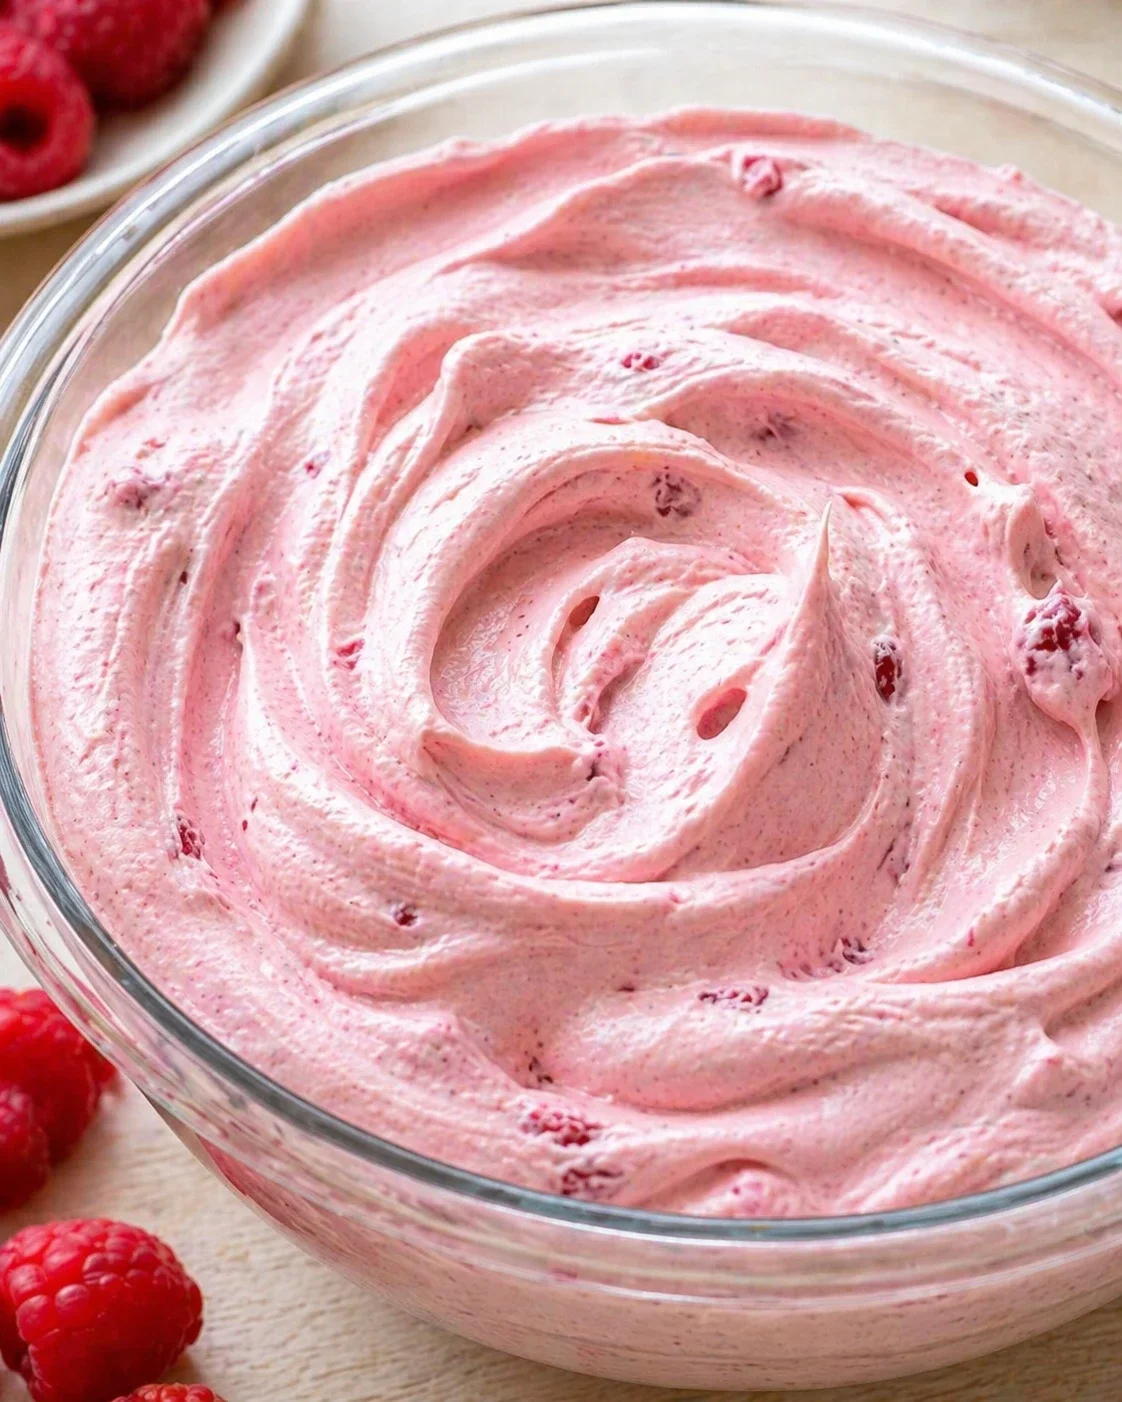
Looking for a filling that feels lighter than buttercream but still holds up nicely inside a cake? Raspberry mousse filling is a total winner. It adds that fresh, bright berry flavor with a soft pink blush and an airy texture that keeps your layer cakes feeling light and springy. It’s perfect for springtime bakes, special celebrations, or anytime you want your filling to stand out with real fruit flavor instead of just sweetness.
A great raspberry mousse filling does more than just look beautiful when you slice into the cake. It needs enough body to spread without falling apart, a bold enough flavor to shine through the cake layers, and enough stability to hold up in the fridge without turning rubbery. When you get the balance right between the fruit puree, whipped cream, and gelatin, you end up with a filling that’s creamy, fluffy, and easy to work with. If you like berry fillings, banana custard, or classic vanilla pastry cream, this raspberry mousse gives you a fresh, fruit-forward option that’s a little lighter and brighter.
This raspberry mousse filling quickly becomes a go-to when you want your cakes to look polished, taste fresh, and feel a little lighter than your typical frosting. It packs a real punch of berry goodness and gives your homemade cakes that extra pop of color and elegance. Keep it in your recipe box for birthdays, springtime parties, or whenever you want to brighten up a dessert with a fruity twist instead of a heavy layer of frosting.
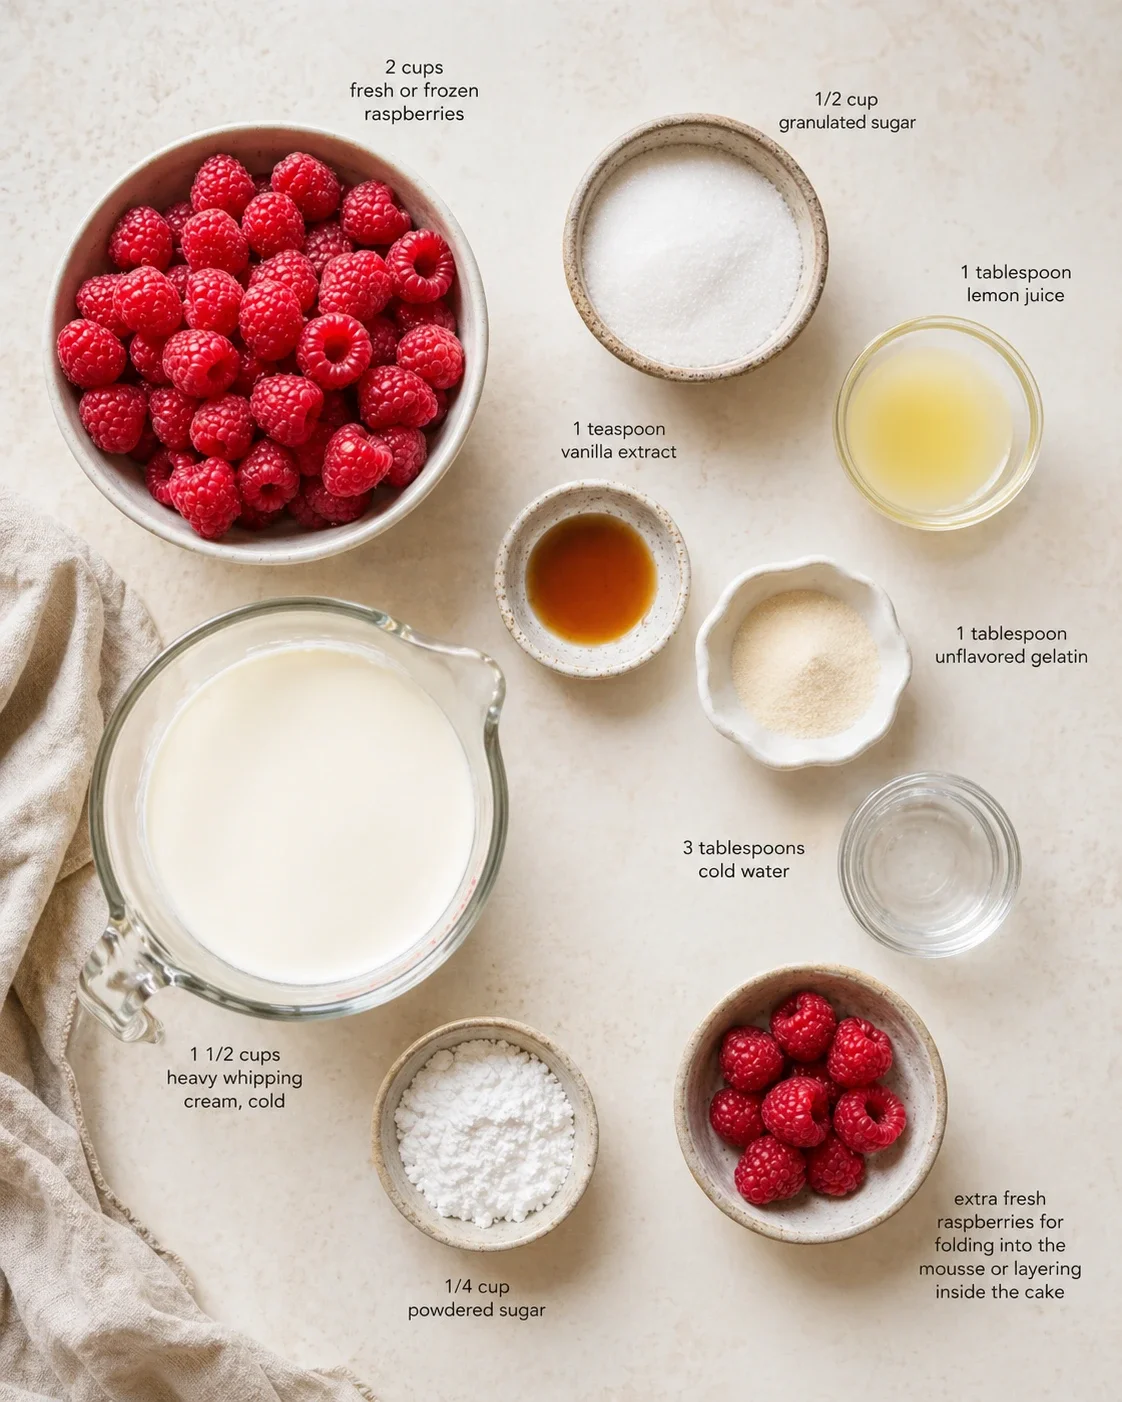
Ingredients
- 2 cups fresh or frozen raspberries
- 1/2 cup granulated sugar
- 1 tablespoon lemon juice
- 1 teaspoon vanilla extract
- 1 tablespoon unflavored gelatin
- 3 tablespoons cold water
- 1 1/2 cups heavy whipping cream, cold
- 1/4 cup powdered sugar
- Optional:
- Fresh raspberries for folding into the mousse or layering inside the cake
Instructions
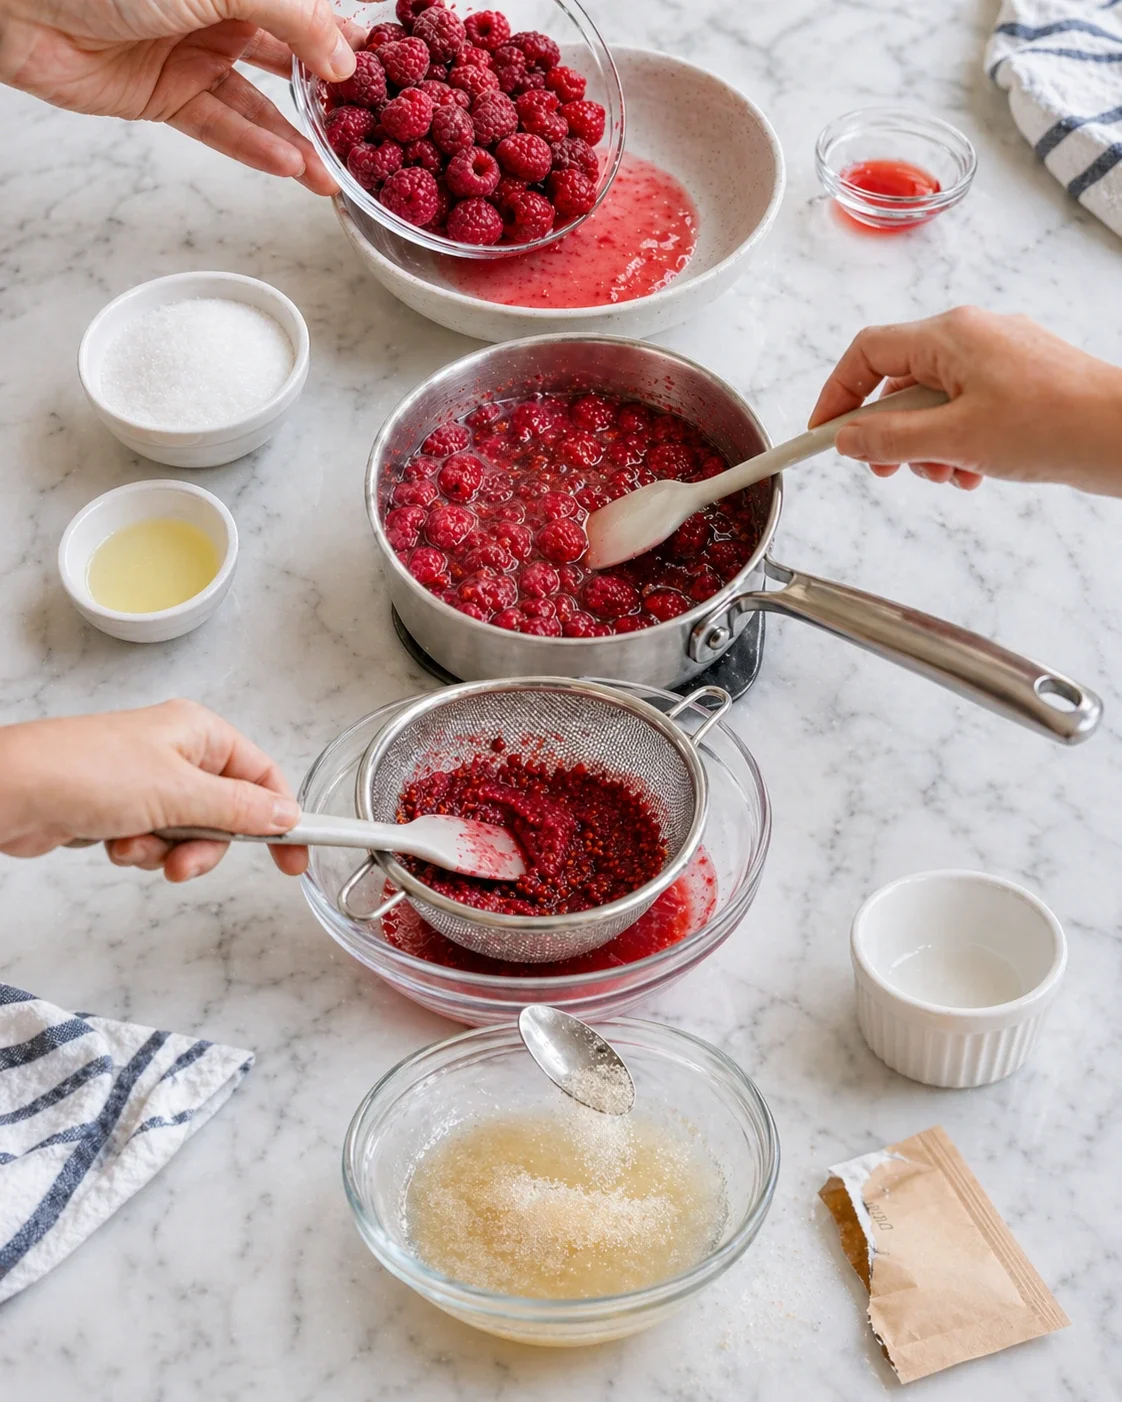
- MAKE THE RASPBERRY PUREE: Place raspberries, granulated sugar, and lemon juice in a saucepan over medium heat. Stir gently as the berries soften and release their juices, about 5 to 7 minutes. Remove from heat and press the mixture through a fine mesh sieve to get a smooth, seed-free puree.
BLOOM THE GELATIN: Sprinkle the gelatin over the cold water in a small bowl. Let it sit for about 5 minutes until it thickens and becomes gel-like.
COMBINE GELATIN AND PUREE: Warm the raspberry puree gently—but don’t boil it. Stir in the bloomed gelatin until it dissolves completely. Add the vanilla extract and mix well. Let the mixture cool to room temperature.
WHIP THE CREAM: Using a chilled bowl, beat the heavy cream with powdered sugar until soft peaks form. You want the cream to be fluffy but still soft enough to fold easily.
FOLD TOGETHER: Gently fold the cooled raspberry mixture into the whipped cream. Use slow, broad strokes to combine fully without deflating the cream. If you like, fold in some fresh raspberries for texture.
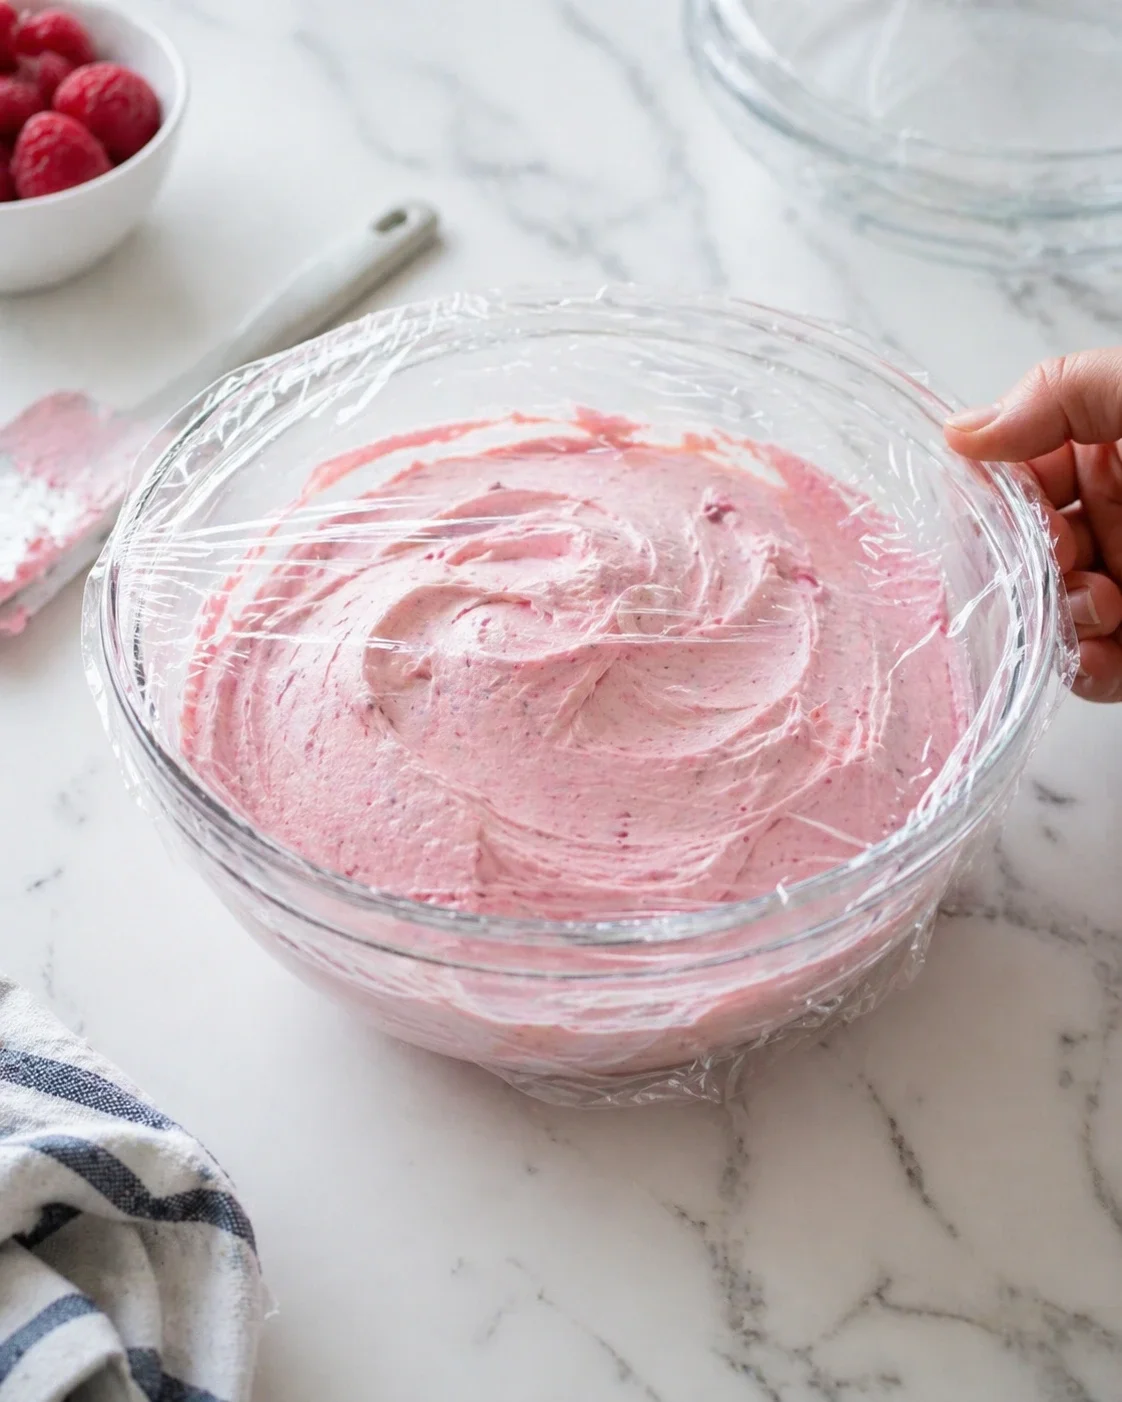
CHILL THE MOUSSE: Put the mousse in the fridge for 30 to 60 minutes so it firms up a bit. It should be soft enough to spread, but hold its shape nicely when layered in your cake.
Notes
Be sure the raspberry mixture is totally cool before folding it into the whipped cream to keep the mousse light.
Straining the puree makes for a silky smooth texture that spreads beautifully.
Use the mousse soon after chilling for the best texture when building your cake.
Raspberry mousse is a filling that lifts your cake with a lovely, light touch. It adds brightness and soft pink color while staying airy and fresh without feeling heavy on the palate. In this post, I’ll explain why this mousse works so well and how you’ll get a reliably smooth, spreadable filling that brings genuine raspberry flavor to your cakes.
You’ll find everything here: a straightforward ingredients list and how each part contributes—like raspberries for color and zing, gelatin for shape, and whipped cream for softness. I’ll walk you through clear steps for making, straining, and cooling the puree, plus tips for whipping and folding the cream to keep that cloudlike texture. I also include advice on assembling your cake, storing the mousse, how to make it ahead, and trouble-shooting the most common hiccups like mousse that’s too firm, too loose, or deflated.
- This recipe is all about a smooth raspberry puree set with gelatin and folded gently into softly whipped cream for fluffiness.
- Timing matters: cool the puree before folding in, and chill the mousse 30–60 minutes so it spreads without smooshing out.
- Learn to whip just right, fold carefully to keep air, and pick the best cakes and add-ins to highlight your filling.
Keep reading for the detailed, step-by-step recipe with photos, plus FAQs and tips to help you get that perfect, sliceable result every time.
What Makes It Special
This raspberry mousse feels lighter than many traditional cake fillings but still carries enough richness to make every slice satisfying. The whipped cream lightens the texture (learn how to make perfect, easy homemade whipped cream), as in a light and airy raspberry mousse, while the tart raspberry base sharpens the flavor so it really stands out next to vanilla, white chocolate, or buttery sponge layers. That flavor lift prevents the filling from just fading into the background once sliced.
It’s also a smart choice if you want cakes that cut cleanly after chilling—see how a Mango Mousse Cake sets up for tidy slices. The mousse layers out evenly without being dense or heavy, making it great for birthdays, spring desserts, and elegant layer cakes where you want the inside to look neat and polished without a thick, heavy frosting layer overpowering the presentation.
Ingredients and Why They Matter
- 2 cups fresh or frozen raspberries
- 1/2 cup granulated sugar
- 1 tablespoon lemon juice
- 1 teaspoon vanilla extract
- 1 tablespoon unflavored gelatin
- 3 tablespoons cold water
- 1 1/2 cups heavy whipping cream, cold
- 1/4 cup powdered sugar
- Fresh raspberries for folding into the mousse or layering inside the cake
Cook, Strain, and Assemble the Mousse
- Thaw frozen raspberries and drain excess liquid, if using.
- Place raspberries, granulated sugar, and lemon juice in a saucepan over medium heat; stir gently as berries soften and release juices, about 5–7 minutes.
- Remove from heat and press the cooked berries through a fine-mesh sieve to make a smooth, seed-free puree.
-
Sprinkle the unflavored gelatin over cold water in a small bowl and let sit about 5 minutes to bloom.
- Warm the raspberry puree gently (do not boil) and stir in the bloomed gelatin until fully dissolved; add vanilla and mix.
- Let the raspberry-gelatin mixture cool to room temperature.
- Using a chilled bowl, beat heavy whipping cream with powdered sugar until soft peaks form.
-
Gently fold the cooled raspberry mixture into the whipped cream with slow, broad strokes until evenly combined; optionally fold in fresh raspberries for texture.
-
Refrigerate the mousse for 30–60 minutes until it firms slightly but remains spreadable.
Whipping and Folding Tips
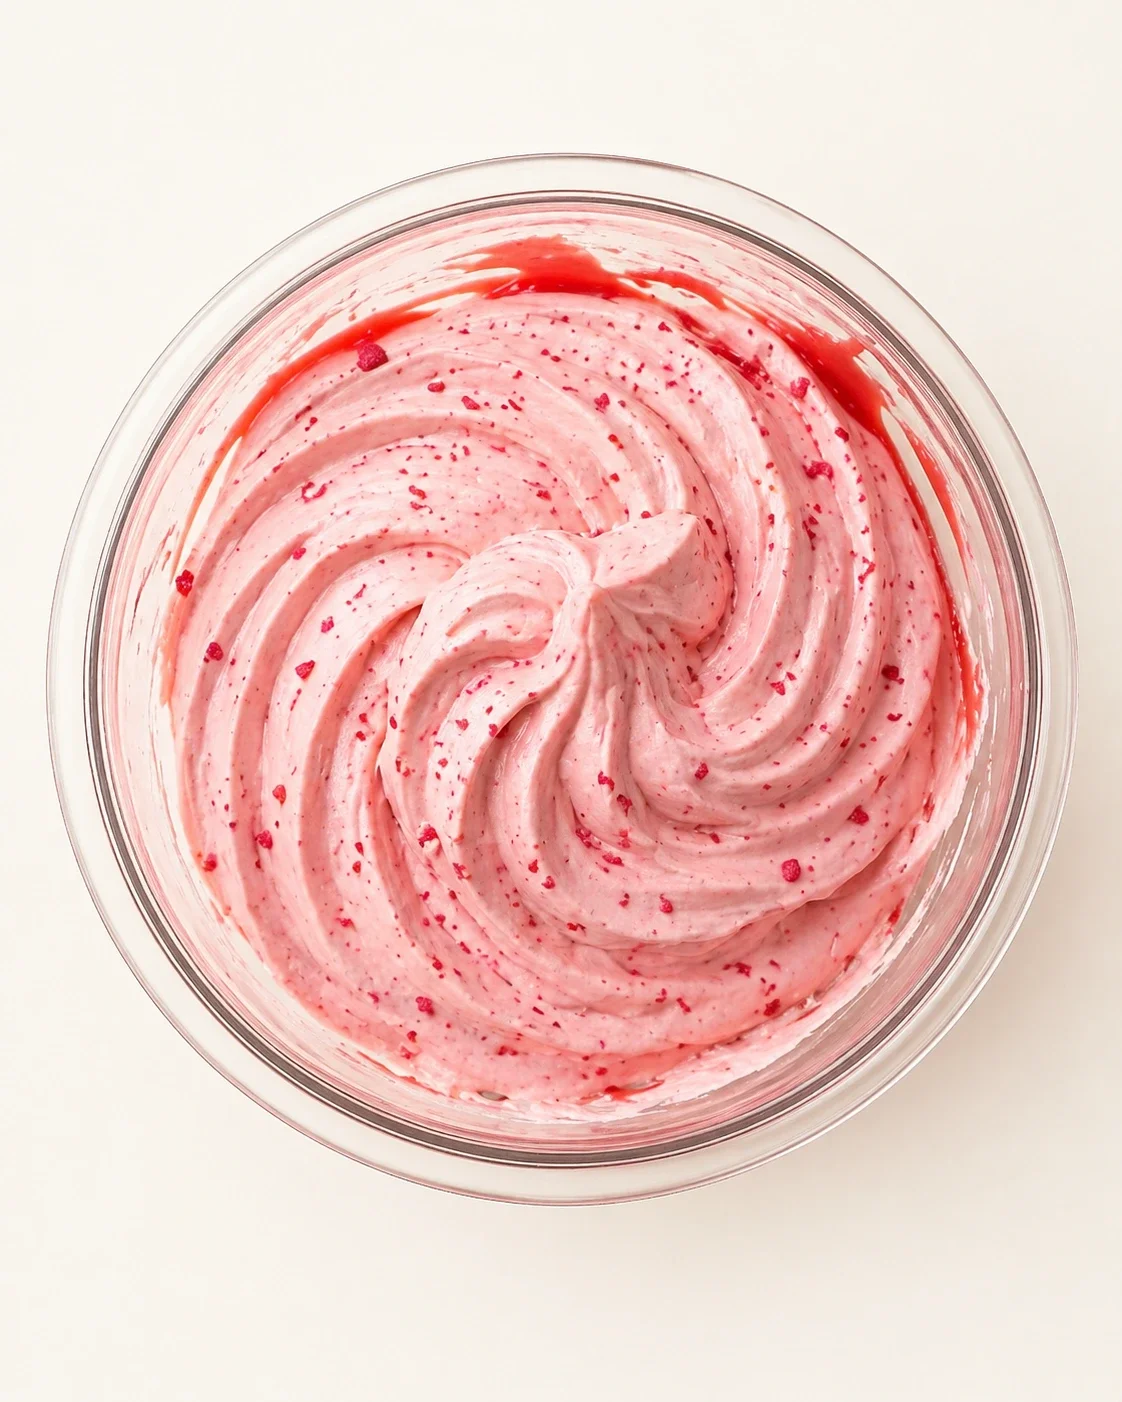
Whip your cream to soft peaks, not stiff. Soft peaks mean the cream holds its shape but is still soft and billowy. This makes it easier to fold in the raspberry puree without knocking out a lot of air. Whipping your cream too far will give you a thicker, drier mousse that’s less spreadable and can feel grainy.
When folding, be gentle and use broad, slow strokes. Fold just until the color is even and the mixture is smooth—the goal is to keep as much air as possible inside. Over-mixing pushes out the air and makes the mousse dense. Your finished mousse should be soft, silky, and almost cloudlike—similar to Fresh Raspberry Cloud Mousse—when you scoop it out.
This raspberry mousse filling pairs beautifully with classic vanilla or lemon sponge cakes, but it’s equally delicious in chocolate or almond cakes—for a chocolate pairing, try a Raspberry Chocolate Cake Roll. Serve your layered mousse cake with fresh berries on the side or a dusting of powdered sugar for a simple, elegant finish. The bright fruit flavor also works well alongside light whipped cream or crème fraîche dollops.
Cake Pairings and Add-Ins
This raspberry mousse is super versatile, but it really shines with cakes like vanilla sponge, white cake, lemon cake, or chocolate cake. Vanilla and white cake let that raspberry flavor sparkle front and center, while lemon layers brighten the berry notes even more. Chocolate gives you a deeper, dramatic contrast that’s perfect if you want a richer dessert vibe (see these raspberry chocolate cupcakes for a delicious example).
If you want to add a bit of texture, folding in a handful of fresh raspberries or spreading a thin layer of jam under the mousse can be delicious. Just remember—less is more here. Too many extras can make your cake layers slip or look messy when sliced. Keeping your filling simple usually makes for the prettiest and cleanest slices.
- Try swapping raspberries for strawberries or blackberries for a different berry twist.
- Add a tablespoon of liqueur like Chambord or Grand Marnier into the raspberry puree for a grown-up flavor.
- Mix in finely chopped white chocolate or lemon zest for extra dimension in the filling—this raspberry white chocolate loaf cake is a great example of the combo.
- For a dairy-free version, substitute coconut whipped cream and agar-agar, though texture and firmness will change.
Storage and Make-Ahead Tips
This mousse filling makes a fantastic make-ahead because chilling helps it set just right for spreading. If it still feels loose after chilling, just give it more time in the fridge rather than stirring it more. On the flip side, if it feels too firm, let it sit a few minutes at room temperature before using, and it’ll soften up nicely.
When you’re assembling a multi-layer cake, you can create a frosting dam if your layers are particularly soft or tall. This little border helps keep the mousse nice and tidy without changing its light texture. Once chilled, the mousse will hold its shape well but still look creamy and inviting in each slice.
After making raspberry mousse filling, store it in a sealed container in the fridge for up to 3 days. Keeping it chilled preserves the texture and flavor. If you want to freeze your mousse, do so before assembling it into a cake. Store in an airtight container for up to 1 month. When ready to use, thaw it gently overnight in the fridge and give it a gentle fold to bring back some softness before assembling.
This mousse is a fantastic make-ahead for busy cooks. You can prepare the raspberry puree a day ahead and keep it chilled—or even make a complementary, make-ahead layer like Passion Fruit Curd for a bright, tangy contrast. Whip the cream and fold everything together a few hours before you plan to assemble your cake, then let the mousse chill well to firm up its texture. This gives you a nice window to make your cake layers or get other parts of your dessert ready without rushing.
Answers to Common Questions
- How long can I store raspberry mousse filling? Keep it in an airtight container in the fridge, and it stays fresh for 2–3 days. Cakes with this filling should be eaten within the same timeframe. You can freeze the mousse alone (not the assembled cake) for up to a month. Thaw it in the fridge and expect it to be just a touch softer in texture.
- Can I use frozen raspberries? Absolutely! Just thaw them and drain off any excess liquid before cooking. Frozen berries often release more water, so simmer the puree a little longer to concentrate that vibrant flavor before straining—see this raspberry mousse method for the texture to aim for.
- What can I use instead of unflavored gelatin? Gelatin sheets or powdered gelatin work interchangeably if you measure carefully. Agar-agar is a vegetarian option but needs to be boiled and tends to give a firmer texture—start with a small amount and test. Pectin or cornstarch won’t give the same mousse texture and aren’t recommended here.
- My mousse is too loose after chilling — how can I fix it? First, make sure you chill it at least 30–60 minutes. If it stays loose, dissolve a bit more bloomed gelatin in warm raspberry puree, cool slightly, then fold gently into your mousse and chill again. Avoid stirring vigorously as that will deflate it.
- My mousse is rubbery or too firm — what went wrong? Usually this happens if there was too much gelatin or the mixture got too hot when mixing. Letting it sit at room temp for a few minutes before using helps soften it. Next time, cut back on the gelatin slightly.
- How do I keep the filling light instead of dense? Whip your cream to soft peaks and fold in the raspberry base slowly and gently until just combined. Don’t overwhip or overfold or you’ll push out air and end up with a heavy mousse.
- Can I assemble the cake with warm cake layers? No, always make sure your cake layers are completely cooled or even chilled briefly before adding the mousse. Warm cake can melt your filling and cause the layers to slide.
- Can I add fresh raspberries or jam inside the cake as well? Yes! A few fresh berries or a thin spread of jam can add nice texture and flavor. Just keep it light—too much fruit or jam can cause your cake layers to slip or the slice to look messy.
- Are there any food-safety concerns? Since the mousse has dairy and gelatin, keep it refrigerated and use within 2–3 days. If adding fresh fruit, use clean, ripe berries and keep the cake chilled until serving.
- Can I use jam instead of fresh raspberries? Jam is sweeter and may be less tangy and fresh-tasting, but you can mix a small amount into the mousse. For best flavor and texture, fresh or puree is preferred.
- Why does my raspberry mousse turn watery? Likely the berries released too much liquid or the gelatin ratio was off. Make sure to simmer the puree enough and strain well, and use the right amount of gelatin for firmness.
- How do I fix a mousse that’s too thick? Gently warm the mousse in small increments and fold a little extra whipped cream in to lighten the texture.
- Can I layer this mousse with other fillings? Yes, it pairs nicely with vanilla pastry cream or chocolate ganache if you want a more complex cake.
-
Is it best to use frozen or fresh raspberries? Both work fine, but if using frozen, thaw and drain them well before cooking so you don’t add too much extra moisture.
A light and airy raspberry mousse filling ideal for layer cakes, offering fresh berry flavor with a soft pink color and smooth texture. It combines raspberry puree, gelatin, and whipped cream to create a spreadable, fluffy, and stable cake filling.
- Prep Time: 15 minutes
- Cook Time: 10 minutes
- Total Time: 1 hour 0 minutes
- Yield: Enough filling for a layered cake (approximately 4-6 servings)
- Category: Filling
Ingredients
- 2 cups fresh or frozen raspberries
- 1/2 cup granulated sugar
- 1 tablespoon lemon juice
- 1 teaspoon vanilla extract
- 1 tablespoon unflavored gelatin
- 3 tablespoons cold water
- 1 1/2 cups heavy whipping cream, cold
- 1/4 cup powdered sugar
- Optional: Fresh raspberries for folding into the mousse or layering inside the cake
Instructions
- Place raspberries, granulated sugar, and lemon juice in a saucepan over medium heat. Stir gently as the berries soften and release their juices, about 5-7 minutes.
- Remove from heat and press the mixture through a fine mesh sieve to get a smooth, seed-free puree.
- Sprinkle the unflavored gelatin over the cold water in a small bowl. Let it sit for about 5 minutes until it thickens and becomes gel-like.
- Warm the raspberry puree gently (do not boil). Stir in the bloomed gelatin until it dissolves completely. Add the vanilla extract and mix well. Let the mixture cool to room temperature.
- Using a chilled bowl, beat the heavy cream with powdered sugar until soft peaks form.
- Gently fold the cooled raspberry mixture into the whipped cream with slow, broad strokes until evenly combined. Optionally fold in some fresh raspberries for texture.
- Refrigerate the mousse for 30 to 60 minutes until it firms slightly but remains spreadable and holds its shape nicely when layered in the cake.
Notes
Ensure the raspberry mixture is completely cool before folding into the whipped cream to maintain mousse lightness., Straining the puree creates a smooth, silky texture that spreads beautifully., Use the mousse soon after chilling for the best texture in cake assembly., Whip cream to soft peaks (not stiff) to maintain fluffiness and spreadability., Fold gently and slowly to keep air in the mousse; overmixing causes density., Chill mousse for 30-60 minutes to firm up; if too loose after chilling, add more dissolved gelatin gently and chill again., Use cooled or chilled cake layers to prevent melting or sliding of mousse filling., Store mousse in an airtight container in the fridge for up to 3 days; freeze before use for up to 1 month and thaw slowly., Add-ins like fresh raspberries or a thin layer of jam can add texture but keep them light to avoid cake layer slipping.
Nutrition
- Serving Size: About 1/4 cup per serving
- Calories: Approximately 150 calories per 1/4 cup serving
- Fat: 10 g per serving
- Carbohydrates: 12 g per serving
- Protein: 2 g per serving
More in Uncategorized

Crock Pot Chicken and Rice Recipe

Crock-Pot Chicken Noodle Soup

Slow Cooker Hearty Chicken Soup.