Easy Vanilla Mousse Cups
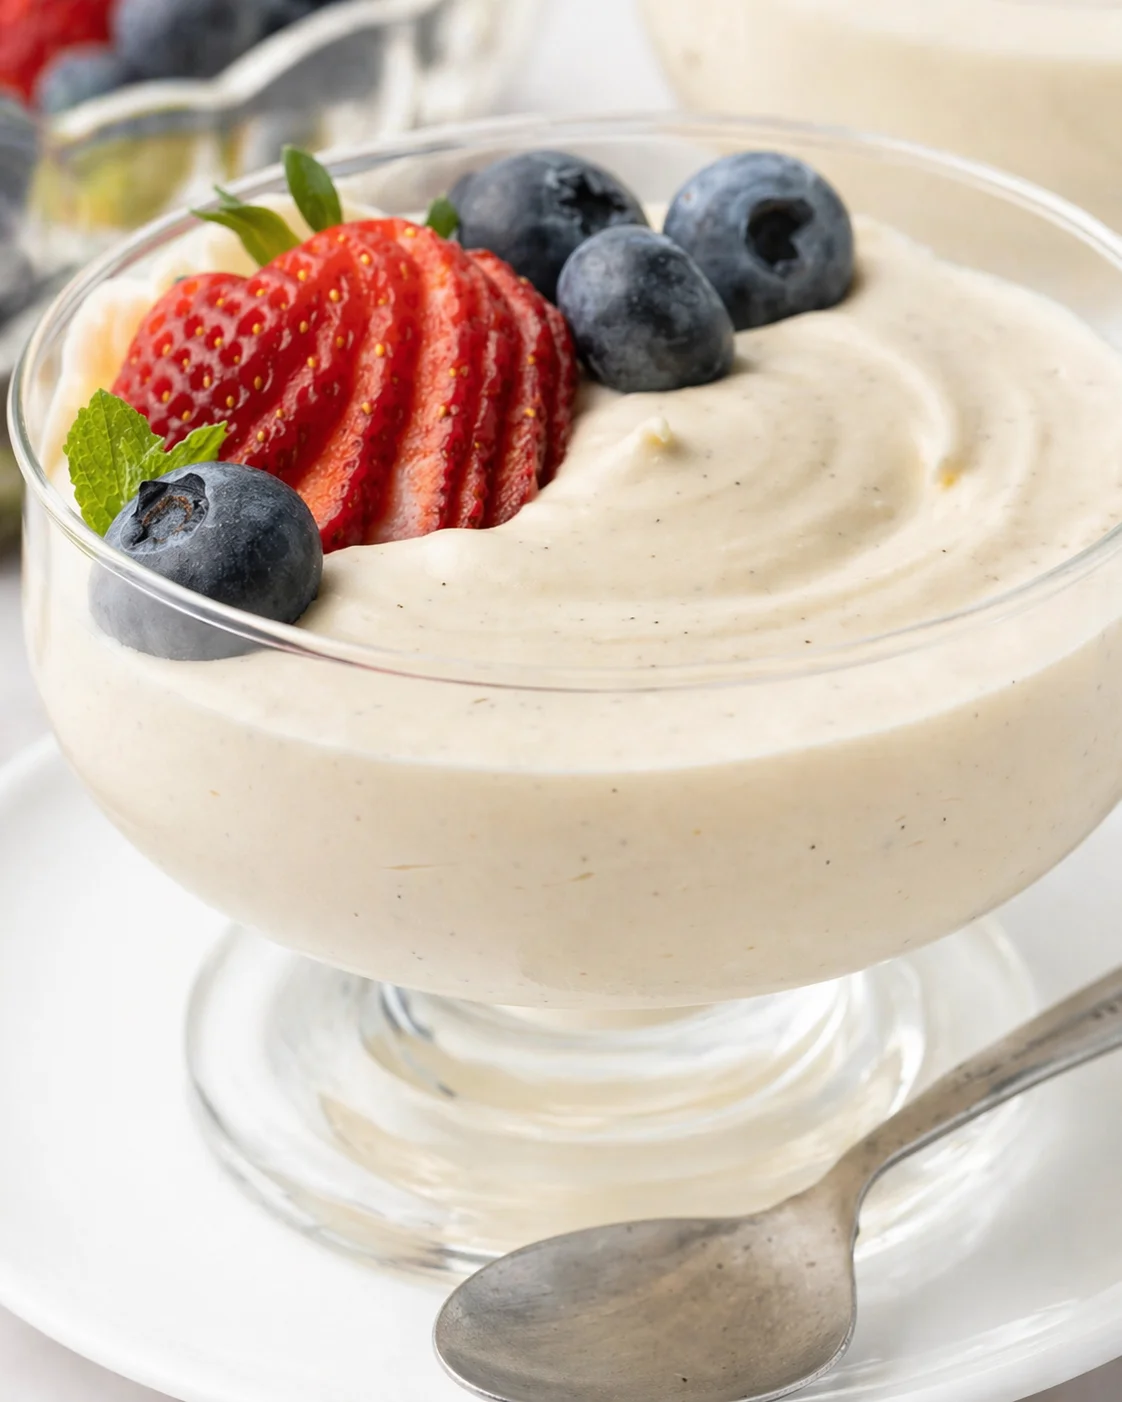
If you’re looking for a simple and delicious Vanilla Mousse recipe, you’re in the right place! This dessert uses just a handful of ingredients but delivers a light, fluffy texture combined with rich, fresh vanilla bean flavor. It’s perfect for making ahead, whether you’re planning a special dinner or hosting friends.
I first shared this recipe back in January 2023 and updated it in April 2025 to fix some setting issues. The ingredients stayed the same, but I tweaked the process a bit to make sure your mousse turns out perfectly every time.
The word “mousse” is French for foam or froth — which perfectly describes this dessert’s light, airy texture. Mousse is usually made by combining a whipped ingredient, like cream or egg whites, with a rich flavored base. This vanilla recipe uses a simple custard base with eggs, sugar, and cream to build that dreamy texture and flavor.
Once chilled, it transforms into a fluffy, irresistible dessert that’s just right for serving on its own or layering into cakes and tarts.
Vanilla isn’t the only option here — you can find mousse recipes in tons of flavors like chocolate, raspberry (my personal favorite), lemon, or coffee, too!
Can’t get enough mousse?
Take a peek at my roundup of 15+ mousse recipes for even more sweet ideas!
Hey there! This Vanilla Mousse recipe is one of those desserts that look fancy but are shockingly easy to pull off. With just a few everyday ingredients — including a fresh vanilla bean or paste — you’ll get a luscious, light mousse bursting with authentic vanilla flavor. It’s great served in individual cups or used as part of an elegant layered dessert.
On this page, you’ll find a detailed, step-by-step guide walking you through making the vanilla bean custard, tempering your eggs gently, whipping up the cream, and folding everything together without losing air. Plus, I’ll share tips on how to make this ahead of time (perfect for busy evenings) and an option for adding gelatin if you want a firmer finish.
To round things out, I’ve included some troubleshooting advice (in case your custard curdles or mousse won’t set), photo notes to guide you, ideas for toppings and serving, plus storage and nutrition info. This recipe has been fine-tuned since its first debut in 2023 to help you get consistent, beautiful results.
- Simple ingredients that you probably already have — with easy pantry swaps.
- Clear instructions with photos to keep you confident along the way.
- Pro tips to nail the texture and troubleshoot common hiccups.
- Suggestions for toppings, plus how to store and make ahead.
Keep reading and you’ll soon be enjoying a silky smooth, vanilla-scented mousse that’s as versatile as it is tasty.
Why this mousse shines
This vanilla mousse is a total gem — whipped to airy perfection and full of real vanilla bean flavor. You don’t need gelatin to get a beautifully light but rich finish, though I’ll share how to use it if you’d like your mousse firmer for cakes or piping.
The secret is starting with a sweet vanilla bean custard base (similar to vanilla pastry cream), then folding it gently into fluffy whipped cream (make perfect, easy homemade whipped cream). The result feels fancy but is actually a breeze to whip up. This dessert is perfect for special dinners or just treating your family!
Key ingredients and notes

- 240 ml Thickened Cream / Heavy Whipping Cream (part 1), min. 35% fat content
- 1 fresh Vanilla Bean Pod, or 2 teaspoon vanilla paste
- 40 gr Caster Sugar
- 2 large Eggs, at room temperature
- 8 gr (1 tablespoon) Cornstarch
- 360 ml Thickened Cream / Heavy Whipping Cream (part 2), min. 35% fat content
Step-by-step preparation
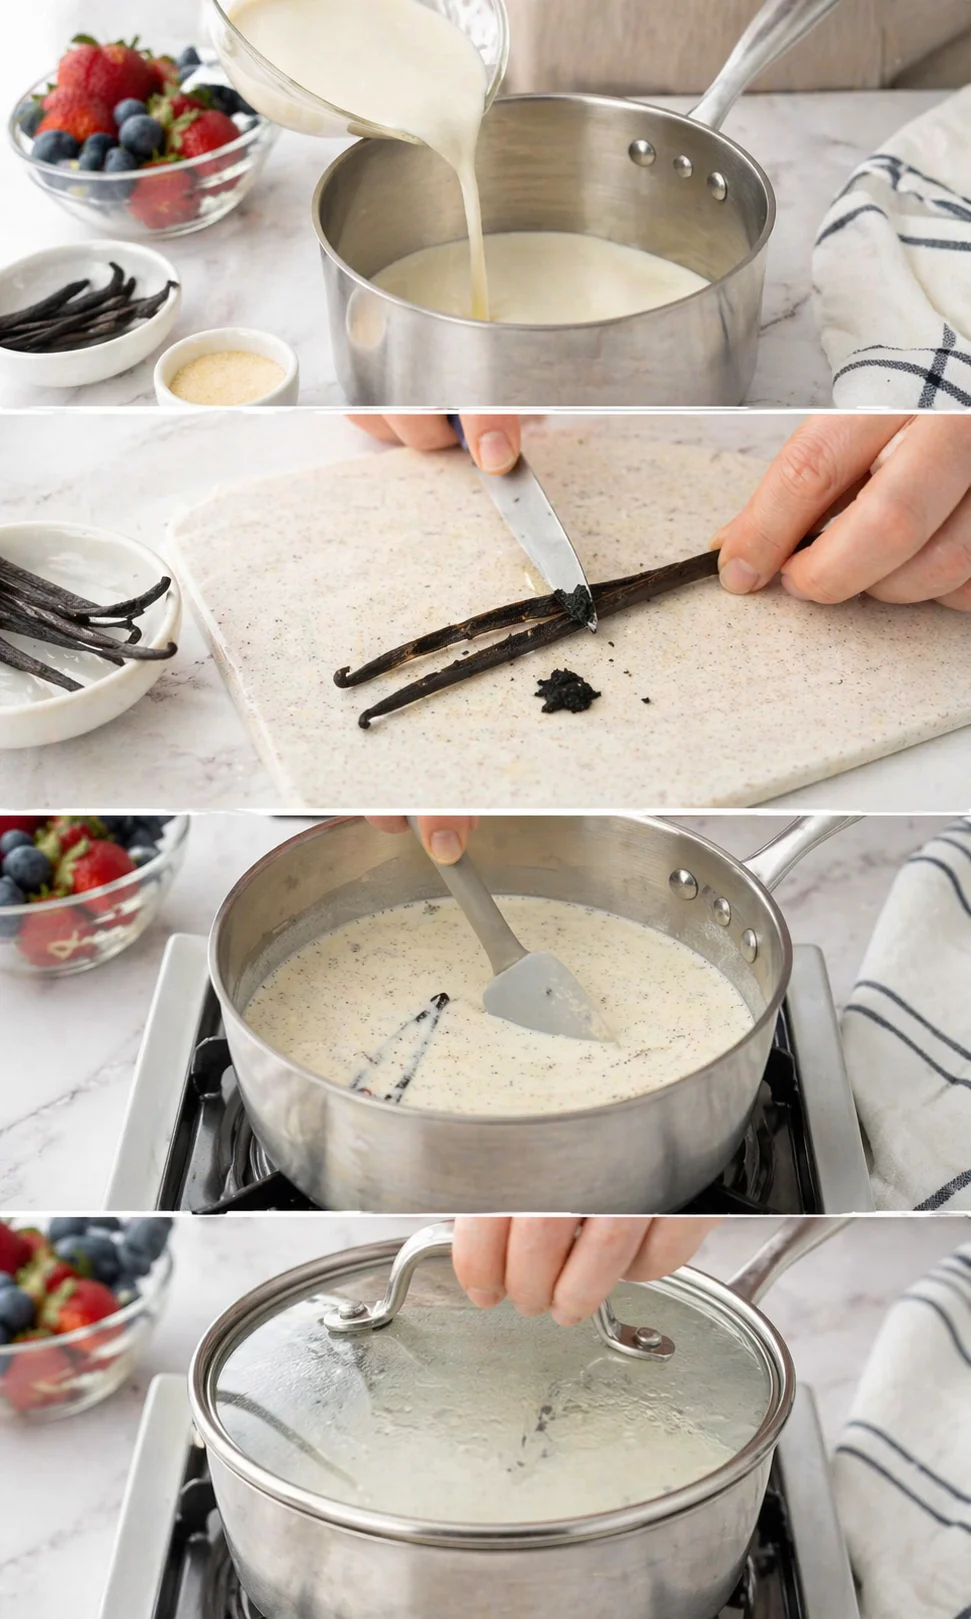
- Pour the first part of the cream into a saucepan.
- Slice the vanilla bean pod lengthwise and scrape out the seeds; add both seeds and pod to the cream.
- Stir and warm the cream over low heat until it just starts to simmer.
-
Turn off the heat, cover the pan, and let the vanilla infuse for 10–15 minutes.
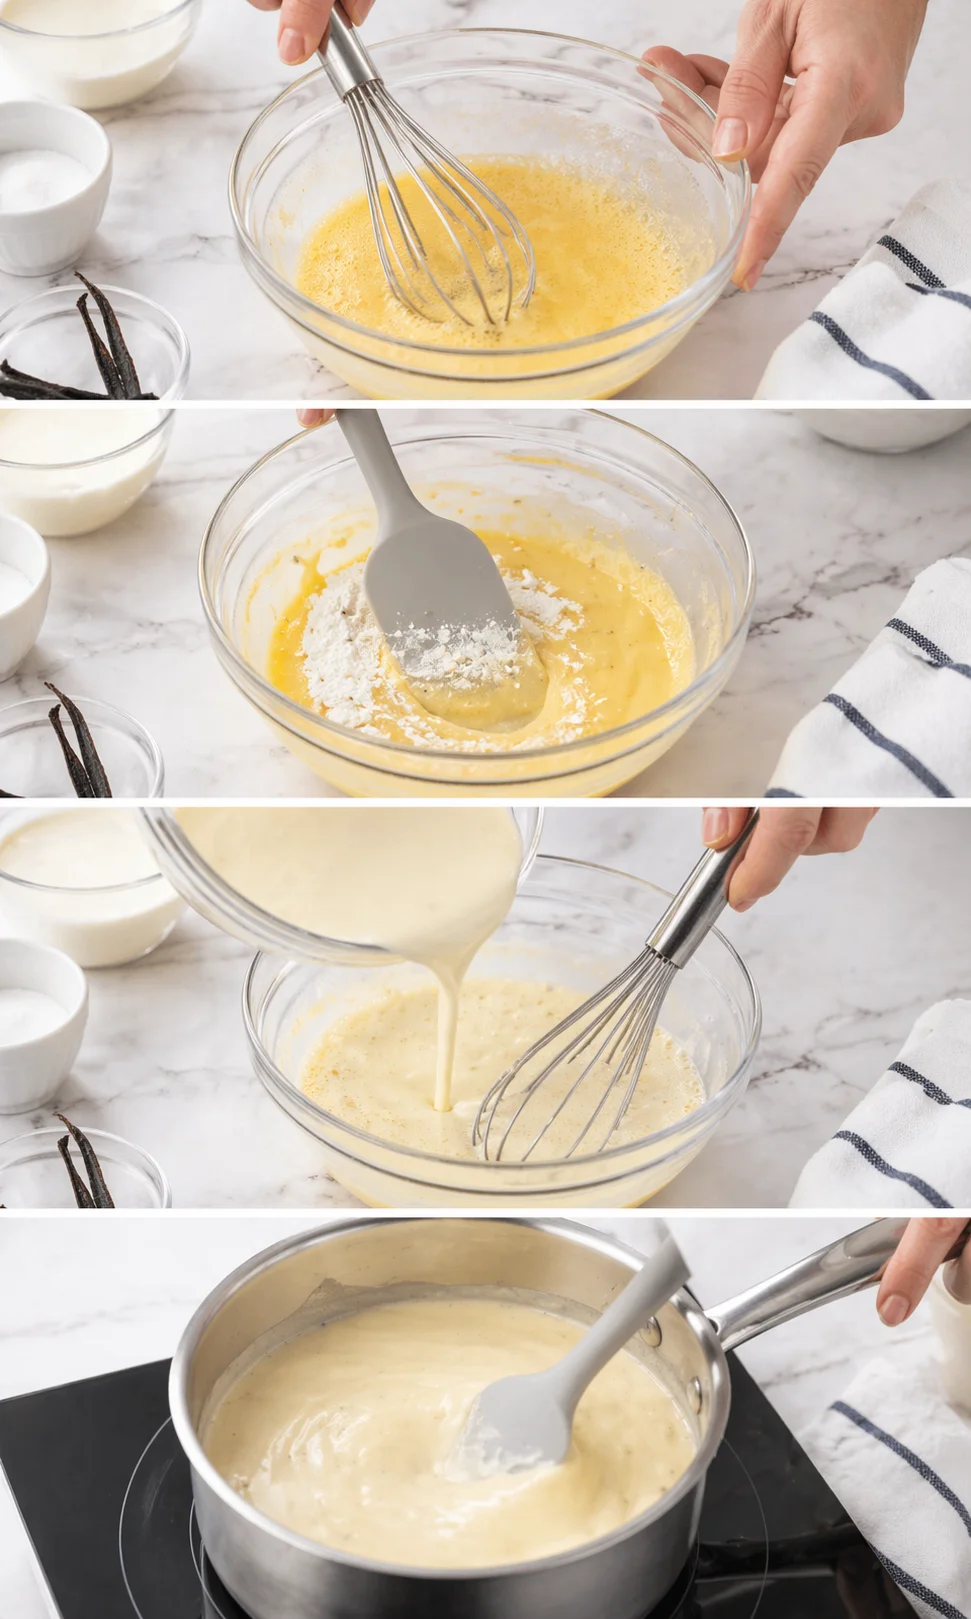
- Whisk the eggs and sugar together in a bowl until combined (about 1 minute).
- Stir the cornstarch into the egg and sugar mixture until smooth.
- Remove the vanilla pod from the cream and slowly pour the warm cream into the egg mixture while whisking constantly (temper the eggs).
-
Pour the mixture back into the saucepan and cook over low heat, stirring continuously, until thickened (about 5 minutes) without boiling.
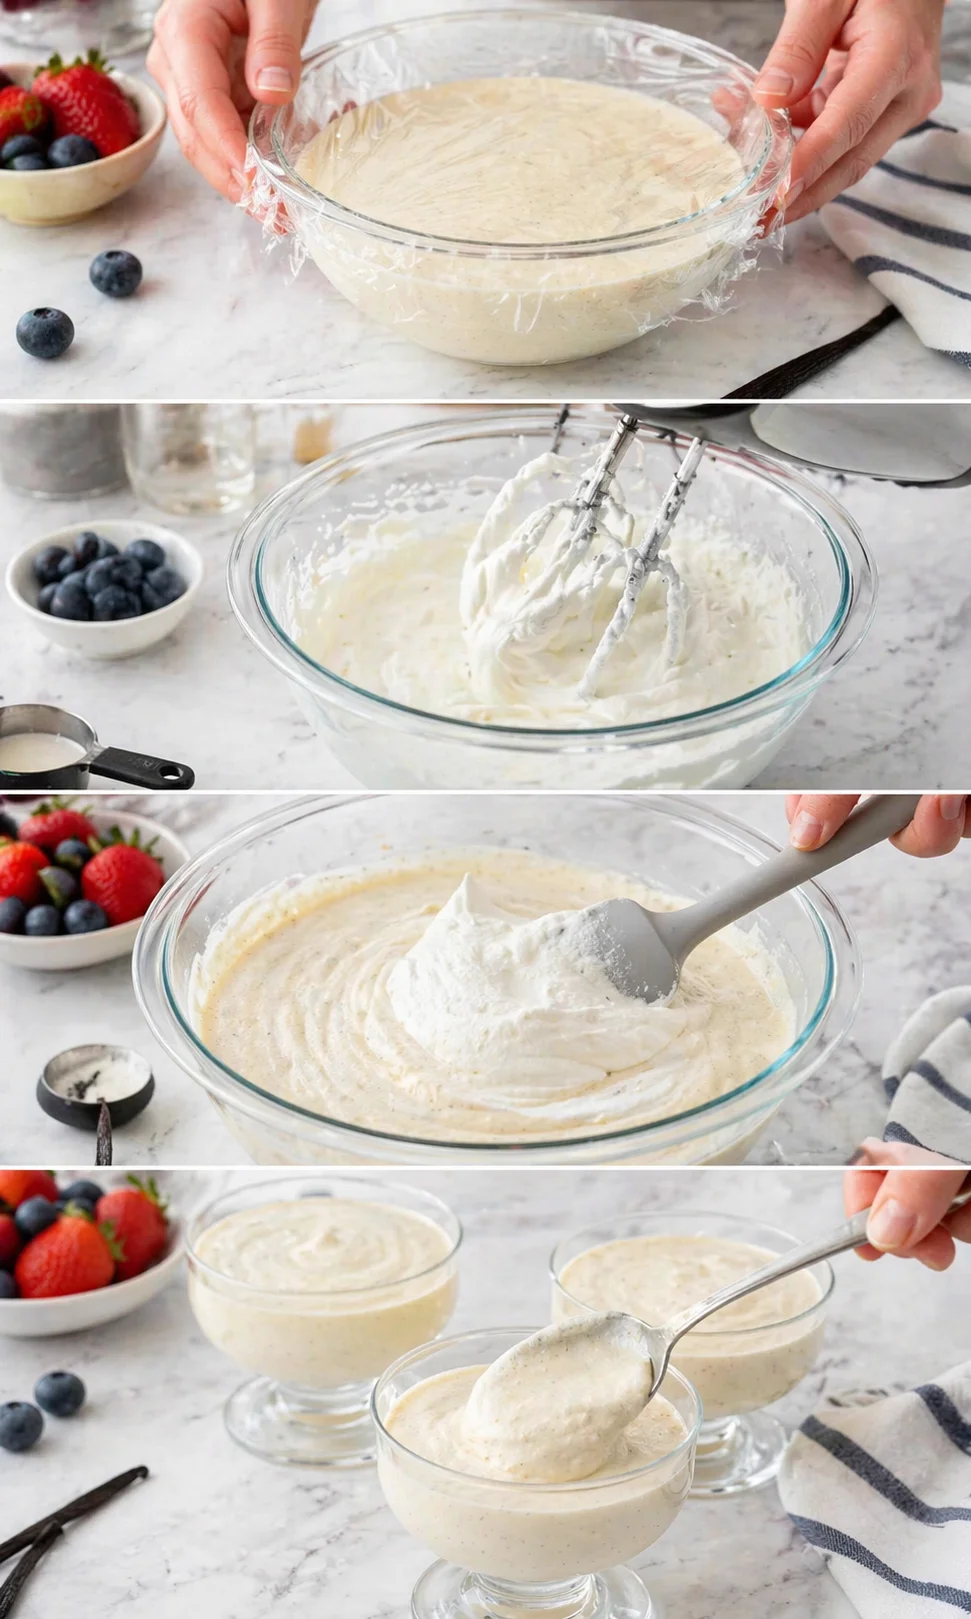
- Transfer the custard to a clean bowl, press plastic wrap onto the surface, and chill in the fridge for 1–2 hours until completely cold.
- Pour the second part of the cream into a bowl or stand mixer and whip on medium–medium-high speed until stiff peaks form.
- Lightly whisk the chilled custard to loosen it, then gently fold in the whipped cream in 3–4 additions until combined and airy.
-
Divide the mousse into serving cups, cover, and chill for at least 3 hours (or overnight) until set.
Pro tips for perfect texture
- Know when the custard is ready: Use the spoon test — dip a spoon or spatula into the custard. If it drips off too quickly, it’s not done. If it coats the back thickly and you can swipe a finger through it leaving a clear line, it’s perfect. You can also check with a thermometer; aim for 82–84°C (180–183°F). For a visual reference, see how the custard should look in this coconut cream pie custard.
- Why might custard get lumpy or curdled? High heat or rapid temperature changes will scramble your eggs. If it happens, don’t stress—strain the custard through a fine mesh or blitz it gently with an immersion blender to smooth it out.
- My mousse isn’t setting — what gives? This usually means the cream was whipped too little or too much, or it hasn’t chilled long enough. Make sure to whip your cream to the right firmness and give the mousse ample fridge time, ideally overnight. For a clear example of the right whipped-cream peaks and gentle folding, see our Light and Airy Raspberry Mousse Recipe.
Flavor swaps and add-ins
If you want to tweak this mousse flavor or texture, here are some easy swaps and add-ins you can try. I’ll note when to add them so your mousse still sets nicely.
- Swap the vanilla: Use 2 teaspoons of vanilla bean paste or 1½ to 2 teaspoons of good vanilla extract instead of a vanilla pod. Add it to the warm cream or fold into the cooled custard.
- Chocolate mousse: Stir 100–150 g melted dark or milk chocolate into the warm custard off the heat, chill it, then fold in whipped cream for a luscious chocolate version.
- Coffee mousse: Dissolve 1–2 teaspoons instant espresso in the warm cream or stir 30–50 ml cooled strong coffee into the custard before chilling for a rich coffee flavor.
- Fruit mousse (like berry, mango, passionfruit): Puree 150–200 g ripe fruit, strain if needed, and fold it into chilled custard before folding in whipped cream. For watery fruits, drain excess juice to keep it from getting too loose. For a berry version, see our Fresh Raspberry Cloud Mousse.
- Citrus or curd swirls: Dollop 80–100 g lemon, orange, or passionfruit curd on top or gently swirl it through each cup before chilling for a zesty twist.
- Add a splash of liqueur: Stir in 1–2 tablespoons (15–30 ml) of Grand Marnier, Amaretto, Frangelico, or coffee liqueur into the cooled custard. Keep it light so the mousse still sets.
- Make it firmer with gelatin: For a mousse that holds shape better (perfect for cakes or piping), bloom 1 teaspoon (≈2.5 g) powdered gelatin in 2 tablespoons cold water for 5 minutes. Warm gently to dissolve, then whisk it into the warm custard off the heat before chilling and folding in the whipped cream. You can also use a gelatin sheet prepped per package instructions.
- Swap the starch: Cornstarch can be swapped 1:1 with tapioca starch, arrowroot, or plain flour (added when mixing eggs and sugar).
- Richer or tangier textures: Replace up to 50 g of whipped cream with mascarpone for a creamier, slightly denser mousse, or fold in a few tablespoons of Greek yogurt for a subtle tang. Keep amounts small to maintain lightness.
- Adjust firmness by whipping: Stop at medium peaks for a softer mousse or continue to stiff peaks for a firmer, more stable result.
Quick tip: When you add sugar-rich or liquid extras like fruit purée, curd, or liqueur, taste the mixture and adjust sweetness carefully. Also, avoid too much extra liquid—about 60–80 ml total is the safe limit to keep your mousse setting perfectly.
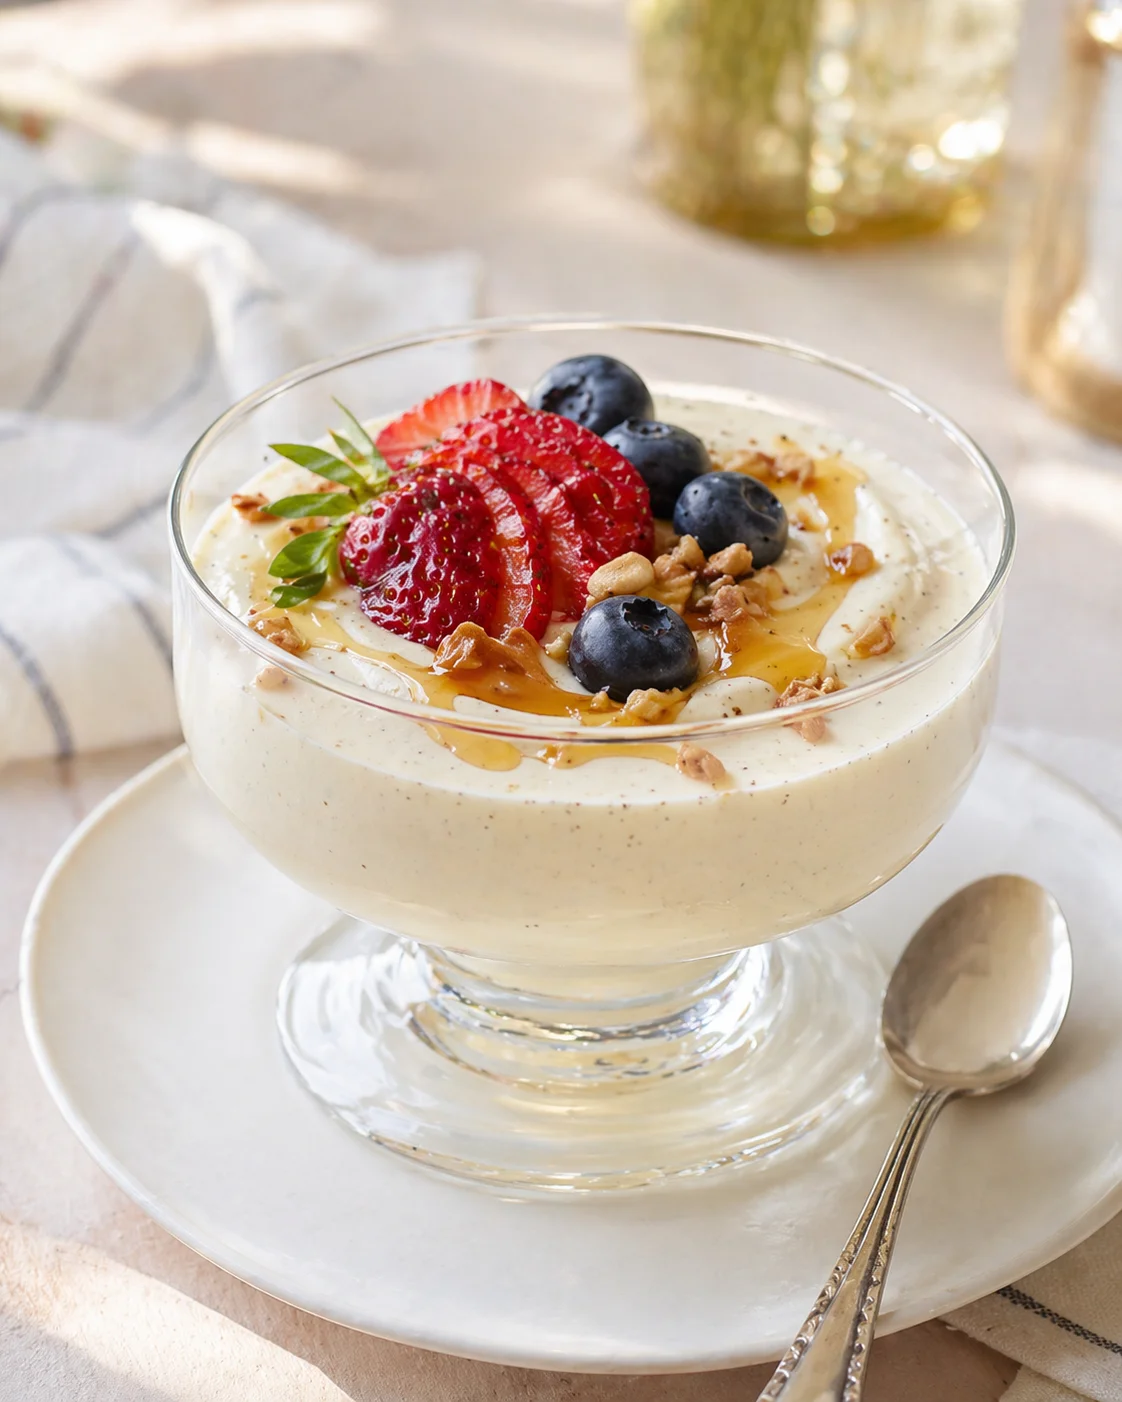
This vanilla mousse is perfect served plain, but adding toppings or layers can make it extra special! Mix and match to suit your guests or what you have on hand.
Topping Ideas:
- Fruit Coulis: Raspberry, strawberry, blueberry, passionfruit, or mango coulis all pair beautifully.
- Fruit Compotes: Try mixed berry, peach, strawberry, blueberry, pear, cherry, or stewed rhubarb compotes.
- Curds: Lemon, orange, or passionfruit curd add a bright, tangy touch.
- Chocolate: Drizzle chocolate sauce or sprinkle chocolate shavings on top for a decadent finish.
Base Layer Ideas:
- Crumbed cookies: Crushed Sablés Bretons, Biscoff cookies, or graham crackers make a lovely crunchy bottom, or make a quick graham cracker crust.
- Sponge cake: A simple layer of dacquoise or vanilla sponge works great for individual trifles or layered desserts.
Storing and serving advice
Store your vanilla mousse cups in the fridge and plan to enjoy them within two days for best taste and texture. If you’re not serving them right away, cover each cup with plastic wrap or foil to keep the mousse from drying out. Hosting a dessert bar? Pair them with Chocolate Mousse Cups for an effortless flavor contrast guests love.
A quick heads-up: don’t freeze this dessert, as it won’t keep its lush texture once thawed. For serving inspiration and pretty layering ideas, browse these presentation ideas for layered dessert cups.
Common mousse questions
Why is mousse called mousse?
The word comes from the French “mousse,” meaning foam or froth. It refers to the light, airy texture created by tiny air bubbles that make mousse so delicate and delightful.
How is mousse different from whipped cream?
Whipped cream is just cream beaten until it’s light and fluffy, thanks to its fat content stabilizing the air bubbles. Mousse, on the other hand, usually blends whipped cream (or whipped egg whites) with a flavored base like fruit purée or chocolate, giving it a richer taste and more complex texture. For a fruit-based example, try these 5 Ingredient Mango Mousse Cups.
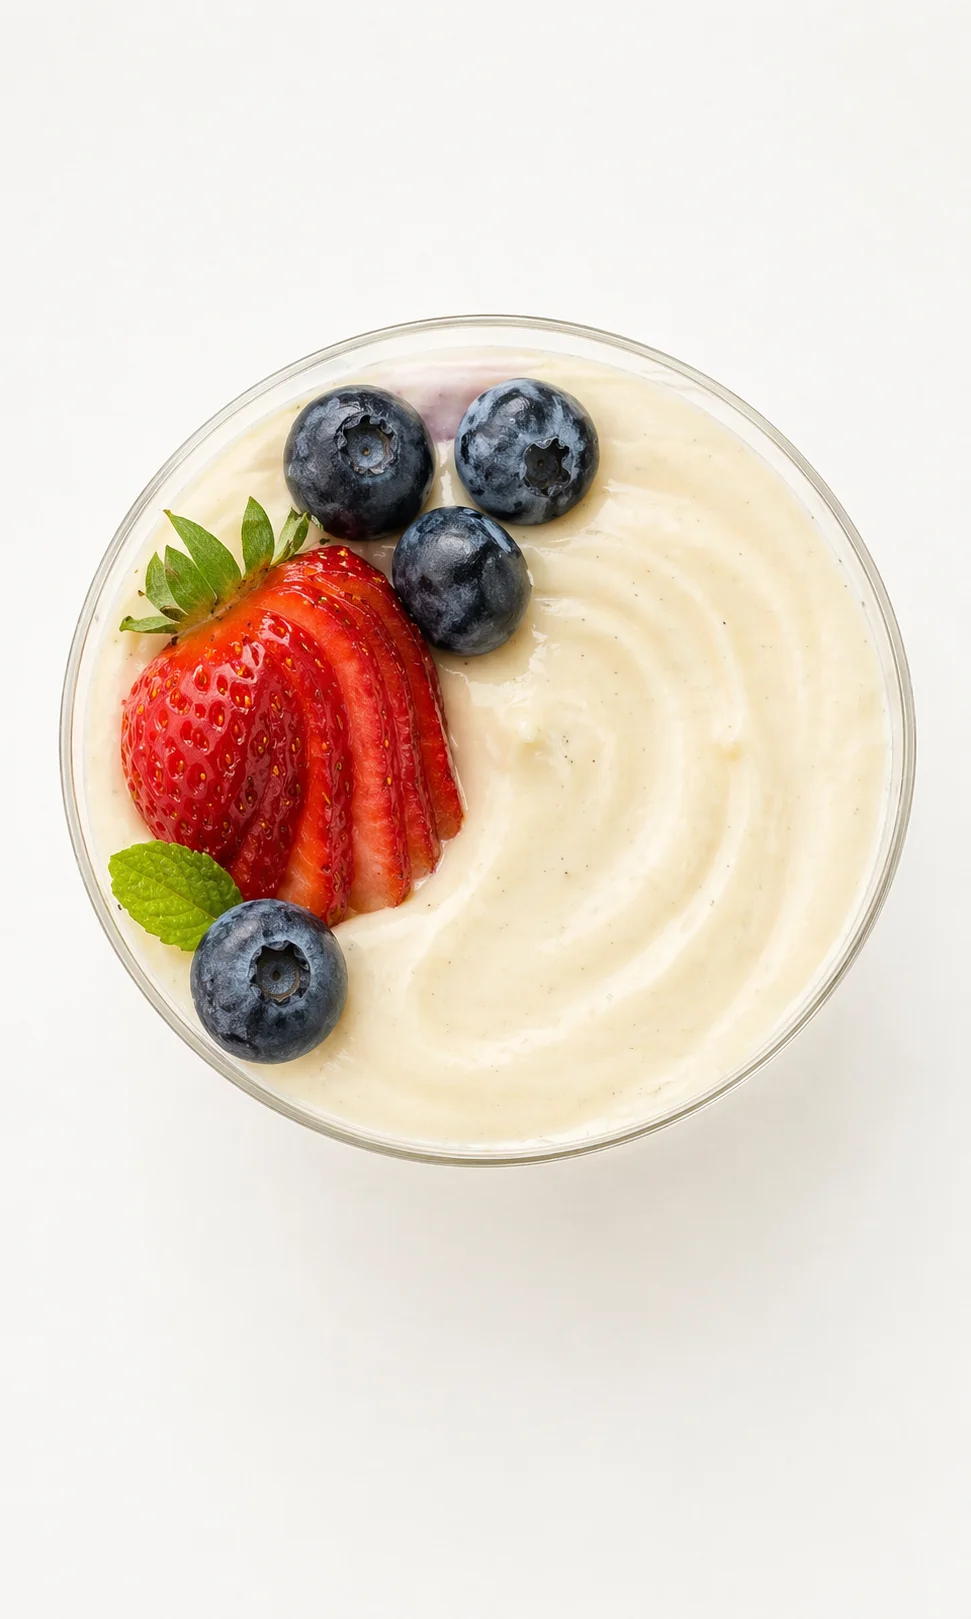
Can I use vanilla extract or vanilla paste instead of fresh beans?
For the best fresh vanilla flavor and those pretty black specks, I highly recommend fresh vanilla beans. Vanilla paste works well too. You can use vanilla extract, but the flavor won’t be as vibrant or natural.
Can I use this vanilla mousse as a cake filling?
This mousse is quite soft since it’s meant to be light and airy. If you want to use it as a cake filling and need it firmer, adding a bit of gelatin will help it set up to hold its shape; for a sliceable example, see Mango Mousse Cake. As is, it’s great for filling lighter pastries like choux au craquelin, brioche donuts, or tarts.
More in Uncategorized

Crock Pot Chicken and Rice Recipe

Crock-Pot Chicken Noodle Soup

Slow Cooker Hearty Chicken Soup.