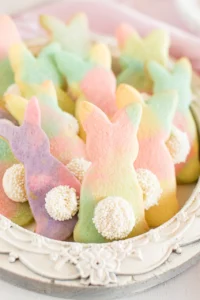
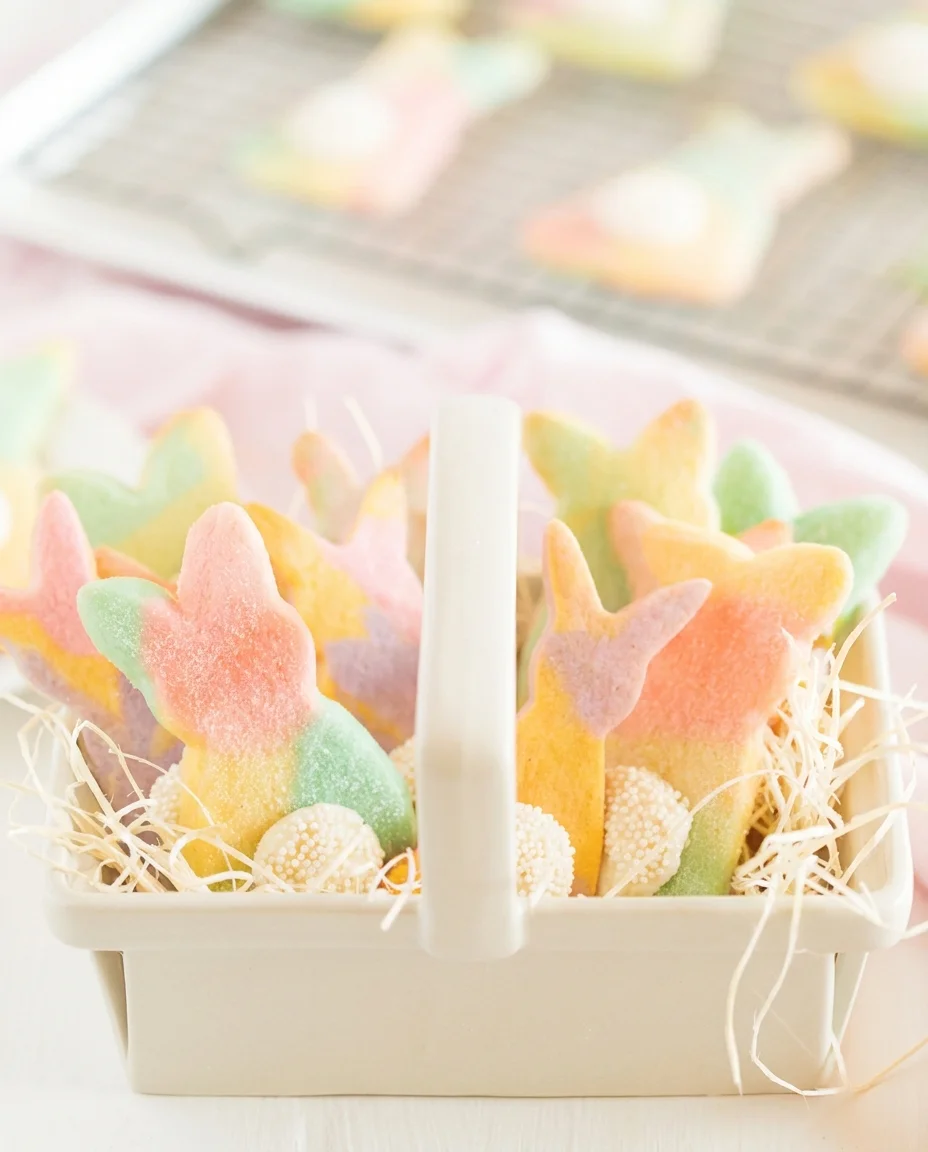
Marbled Easter Bunny Cut Out Cookies
What Makes Them Special
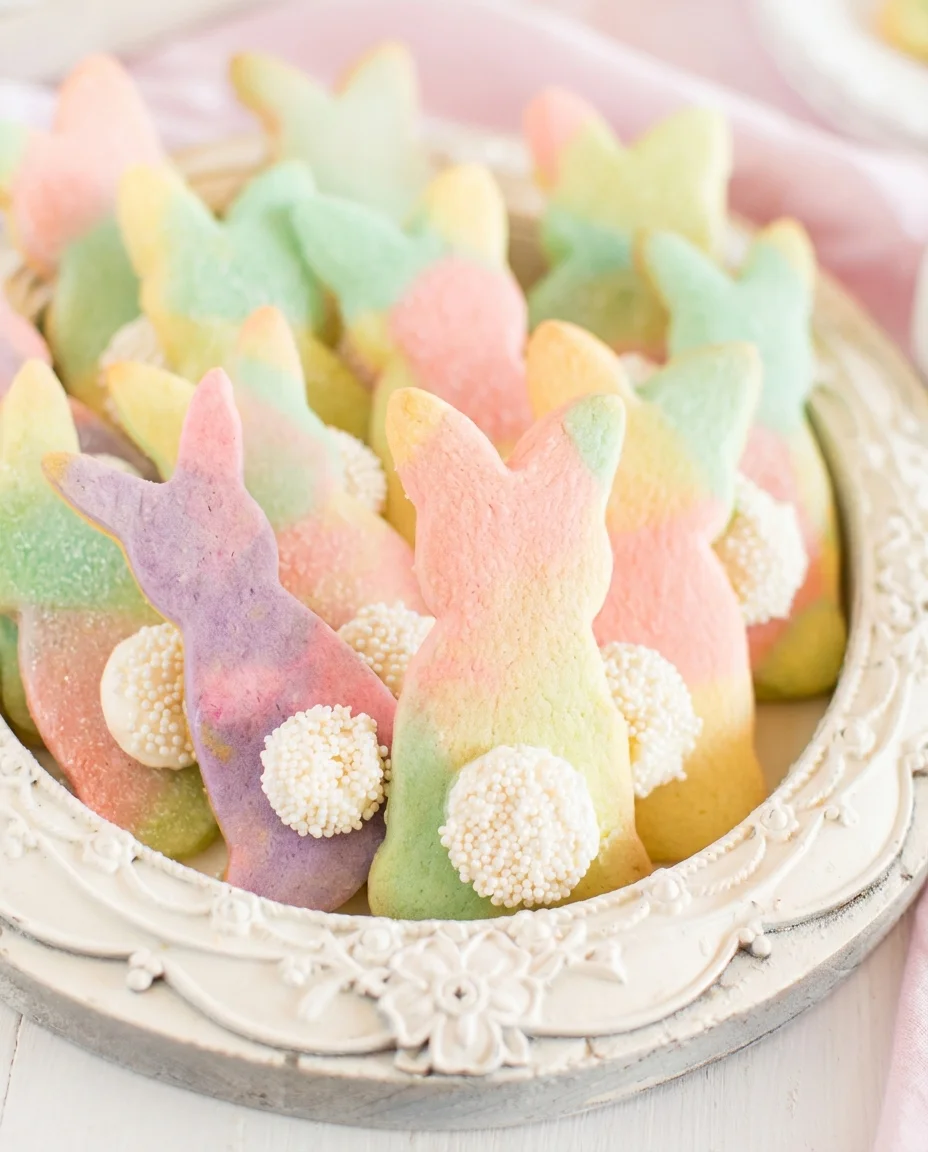
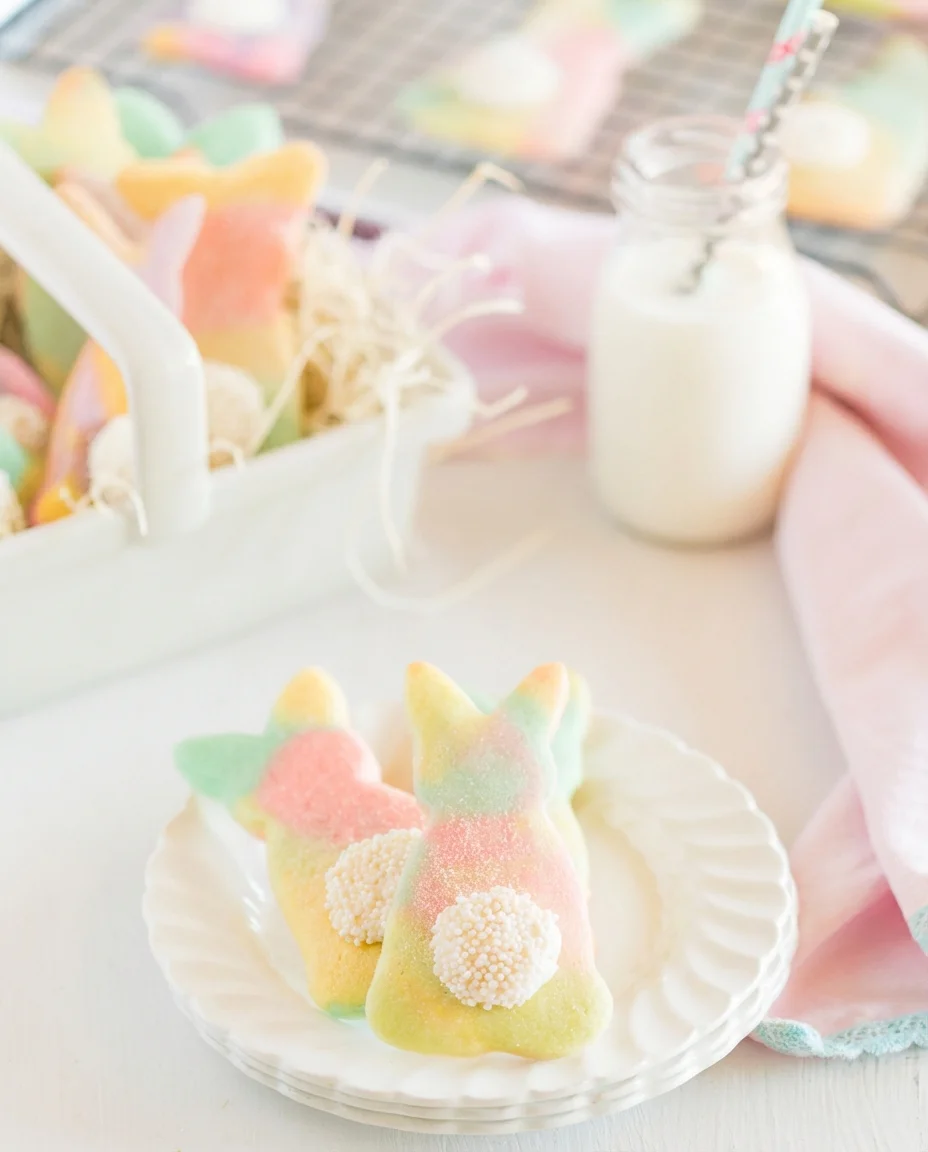
These marbled Easter bunny cutout cookies are packed with fun colors and charm. They’re perfect for springtime gatherings, school parties, or tucked into Easter baskets as a delightful treat. The dough is super sturdy, so your cookie shapes come out crisp and clean every time. Plus, the marbled design means every cookie is unique — no two bunnies will look the same! Kids love making them, too; mixing and pressing the dough is straightforward and safe. A quick dollop of icing and a sprinkle of white candy dots add the sweetest finishing touch to those fluffy bunny tails.
Ingredients and Decorations
- 1 cup butter, softened
- 1 cup sugar (feel free to add an extra 1/4–1/2 cup if you like your cookies a bit sweeter)
- 1/2 teaspoon sea salt
- 2 eggs
- 1 1/2 teaspoons vanilla extract
- 4 cups all-purpose flour
- 1/3 cup cornstarch (reduce to 1/4 cup if you want slightly softer cookies)
- 1/4 teaspoon nutmeg (optional, but adds a lovely warm note)
- Gel or liquid food coloring in various shades to create your marbled effect
- White sprinkles and store-bought icing or frosting to make the bunny tails
- Flour for dusting your workspace
Mix, Marble, and Bake
- Start by preheating your oven to 375°F.
-
In a stand mixer fitted with the paddle attachment, cream together the softened butter, sugar, and sea salt until everything becomes light and fluffy.

- Add in the eggs and vanilla extract, mixing just until everything is smooth and combined.
-
Slowly add the flour, cornstarch, and optional nutmeg, stirring on low speed just until the dough comes together.

- If your dough feels warm or too soft to handle, pop it into the fridge for 30 minutes—it will be easier to work with.
-
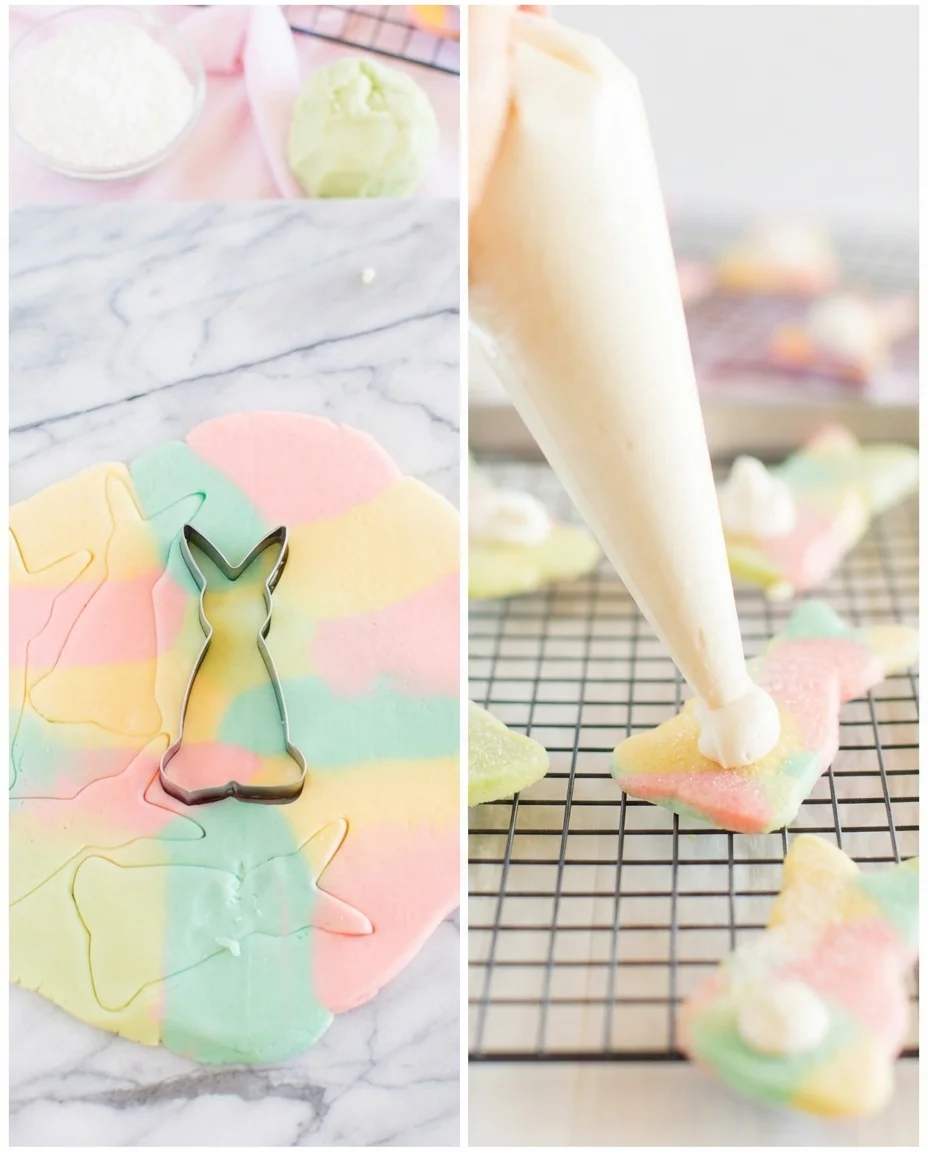
Divide your dough into as many portions as you have colors, then tint each section with gel or liquid food coloring.

- Lightly flour your work surface or cover with parchment paper, then place dollops of each colored dough right next to each other.
-
Press the dough balls together gently and roll out once or twice just enough to swirl the colors, aiming for about 1/4 to 1/2 inch thickness. Be careful not to over-roll so the marbled pattern stays pretty.

- Use your bunny cookie cutter to stamp out shapes, working fairly fast. If your dough gets soft, just chill the whole sheet for 10–15 minutes before cutting more.
-
Place the cutout bunnies on a parchment-lined baking sheet, leaving a bit of space between each.
- Bake for 8 to 10 minutes or until you see the edges just begin to turn a light golden color.
-
Move the cookies to a wire rack and let them cool completely before decorating.
-
Spoon a little bit of store-bought icing on the backsides of the bunnies and dip each into white sprinkles to create their fluffy tails.

Tips for Smooth Marbling
- I always reach for gel food coloring because it gives those bright, vivid colors without needing much. Liquid food coloring works too—just expect to use a bit more to get the same punch.
- If your dough feels sticky or hard to roll, chilling it for 20 to 30 minutes makes a huge difference and helps your cookie shapes stay nice and tidy.
- When you do the marbling, keep the rolling gentle and don’t do it too many times. Over-rolling blends all the colors together, and you don’t want that.
- Roll your dough to about 1/4 to 1/2 inch thick so the cookies bake evenly and hold their shape instead of spreading too much.
- If you love sweeter treats (and I know I do!), add an extra 1/4 to 1/2 cup of sugar to the dough. These cookies have just a light icing tail, so a little more sugar balances things out.
- Try to work quickly while cutting out your shapes. If the dough warms up and gets soft, pop your dough sheet back into the fridge for 10 to 15 minutes before continuing to cut more.
Flavor, Color, and Shape Variations
- Mix up your cookie cutters! Try eggs, chicks, flowers, or even carrots to keep things exciting and fresh for spring.
- Give your dough a flavor punch by stirring in 1 teaspoon of lemon zest or 1/2 teaspoon of almond extract. Both add a nice little twist and compliment those buttery cookies beautifully.
- Pick your colors thoughtfully. Soft pastels give you that classic Easter look, but bold jewel tones can really make your cookies pop with modern flair.
- Change up the decorations, too. Instead of the classic sprinkle tails, pipe on tiny buttercream tails or use colored sanding sugar for some fun textures that kids will love.
- Feel free to swap out this recipe for your favorite sugar cookie dough or even a store-bought mix. Just adjust the sugar amounts to keep the sweetness just right.
Storage and Make-Ahead Tips
Once your cookies have cooled, tuck them into an airtight container at room temperature, and they’ll stay fresh for up to two weeks. If you’d like to keep them longer, freeze them in a sealed, freezer-safe container or bag for a few months. When you’re ready to dig in, thaw them in the fridge for a few hours or leave them out at room temperature. For a warm, fresh-baked feel, zap individual cookies in the microwave for 8 to 12 seconds or warm a whole batch in the oven at 300°F for about 3 to 5 minutes.
Answers to Common Questions
Q: Can I use liquid food coloring instead of gel?: A: Definitely! Gel food coloring packs more color with less amount, but liquid works fine, too. Just remember to add a little more to get those bright colors.
Q: How far ahead can I make the dough?: A: You can keep your dough wrapped and refrigerated for up to 48 hours. For longer storage, shape it into a disk or log, wrap it tightly in plastic wrap, and freeze it for as long as three months. Just thaw it in the fridge before rolling it out.
Q: How do I keep the marbling from blending into one color?: A: The key is to handle your dough gently. Press the colored dough pieces together and roll them only once or twice. Avoid overworking the dough so those pretty swirls stay distinct.
Q: Will these cookies spread while baking?: A: When rolled to the right thickness and chilled if needed, these cookies hold their shape well with minimal spreading. Bake them just until the edges turn light golden and pull them out promptly.
Q: How many cookies does this recipe make?: A: Depending on how thick you roll your dough and the size of your cookie cutter, you can expect about 24 to 36 medium-sized bunny cookies from this batch.
PrintColorful marbled Easter bunny cut out cookies that are crisp, charming, and kid-friendly, perfect for springtime celebrations.
- Prep Time: 30 minutes (plus chilling time)
- Cook Time: 8-10 minutes per batch
- Total Time: Approximately 1 hour (including chilling and baking)
- Yield: 24-36 medium-sized bunny cookies 1x
- Category: Dessert, Cookies, Holiday
Ingredients
- 1 cup butter, softened
- 1 cup sugar (optionally add 1/4–1/2 cup more for sweeter cookies)
- 1/2 teaspoon sea salt
- 2 eggs
- 1 1/2 teaspoons vanilla extract
- 4 cups all-purpose flour
- 1/3 cup cornstarch (reduce to 1/4 cup for softer cookies)
- 1/4 teaspoon nutmeg (optional)
- Gel or liquid food coloring in various shades
- White sprinkles
- Store-bought icing or frosting (for bunny tails)
- Flour for dusting work surface
Instructions
- Preheat oven to 375°F (190°C).
- Cream softened butter, sugar, and sea salt in a stand mixer with paddle attachment until light and fluffy.
- Mix in eggs and vanilla extract until smooth and combined.
- Add flour, cornstarch, and optional nutmeg; stir on low speed just until dough forms.
- If dough is warm/too soft, chill in refrigerator for 30 minutes.
- Divide dough into portions for each color and tint each portion with desired gel or liquid food coloring.
- Lightly flour work surface or line with parchment; place small dollops of each colored dough side by side.
- Gently press dollops together and roll once or twice to create marbled effect; roll to about 1/4 to 1/2 inch thickness, avoiding over-rolling.
- Use bunny cookie cutter to cut shapes; work quickly. If dough softens, chill sheet for 10–15 minutes before continuing.
- Arrange cutouts on a parchment-lined baking sheet.
- Bake for 8–10 minutes until edges just start to turn lightly golden.
- Transfer cookies to wire rack and cool completely.
- Spoon store-bought icing onto bunny bottoms and dip into white sprinkles to create tails.
Notes
Gel food coloring provides more vivid colors than liquid coloring, but liquid works too with more quantity., Chilling sticky dough for 20-30 minutes aids rolling and shape maintenance., Roll dough gently and minimally for marbling to keep distinct swirls., Optimal dough thickness is 1/4 to 1/2 inch to minimize spreading., Add extra sugar (1/4 to 1/2 cup) if a sweeter cookie is desired., Work quickly when cutting shapes; chill dough sheet if it softens., Flavor variations include adding 1 teaspoon lemon zest or 1/2 teaspoon almond extract., Shape variations: eggs, chicks, flowers for spring themes., Decorations: pipe buttercream tails or use colored sanding sugar as alternatives to sprinkles., Cookies store well in an airtight container at room temperature for up to two weeks or frozen for a few months., Thaw frozen cookies in fridge or at room temperature before serving., Warm cookies by microwaving for 8-12 seconds or heating in oven at 300°F for 3-5 minutes.
Nutrition
- Serving Size: 1 cookie
- Calories: Approximately 150-180 calories per cookie (estimate, varies by size and icing)
- Fat: Approximately 8g fat per serving
- Carbohydrates: Approximately 20g carbohydrates per serving
- Protein: Approximately 2g protein per serving
More in Cookies