Angel Food Cake (Light & Fluffy) – Sally’s Baking
With just six easy-to-find ingredients, this perfect angel food cake rises beautifully, stays light as air, and melts like a sweet cloud in your mouth. To nail that dreamy texture, stick with this recipe and watch the video I made just for you. The secret lies in the right ingredients and tender mixing—no fuss, just magic.

When you want a dessert as light as a whisper, angel food cake is the perfect fix. Unlike the usual rich, buttery cakes, this beauty is mostly egg whites, cake flour, and sugar. Inside, it stays a stunning bright white while the outside edges get a gentle golden brown crust with a hint of chewiness. No butter means less fat but plenty of delicate, tender crumb that’s downright heavenly.
I’ve made angel food cupcakes before, but today we’re going all in with the classic homemade angel food cake—the original dream come true!

Let’s dive right in! Just before you start mixing, I made a handy video to walk you through each step. The ingredients and process are simple, but sometimes a live demo makes all the difference. 🙂

This step-by-step guide will show you exactly how to create a classic angel food cake that climbs tall, stays bright white, and tastes like a fluffy dream—all with just six simple ingredients. The trick? Using superfine sugar, whipping egg whites at room temp to soft peaks, folding gently, baking in an ungreased tube pan, and cooling the cake upside down. I’ve added clear photos and a quick video to make sure nothing trips you up.
Here’s what you can expect in this post:
- A quick, easy video to catch the key moments
- A simple ingredient list with why each one matters
- A detailed, photo-backed step-by-step method with timing tips and gear advice
- Helpful troubleshooting tips to avoid common missteps
- Fun flavor swaps, plus advice on making ahead, freezing, and serving
Stick with me through the whole post and you’ll bake an angel food cake that’s light as air, stunning on the table, and begging for some whipped cream or fresh berries to make it extra special.
Why This Cake Shines
This cake is a real showstopper—simple to make, but fancy enough to impress everyone. With only six ingredients and straightforward techniques, you get a dessert that’s light, beautiful, and melts in your mouth.
- Light as a cloud, soft as a dream. Egg whites are the magic here. Whipped with cream of tartar to soft peaks, they bring a tall rise and delicate crumb that no butter cake can match.
- Everyday pantry staples. You don’t need fancy ingredients—just sugar, cake flour, salt, egg whites, cream of tartar, and vanilla. No butter, no hassle.
- Bright, elegant look. That glowing white center and tall tube shape make this cake a natural stunner. Dust it with powdered sugar or pile on berries and whipped cream—it’s an instant classic.
- Lower fat dessert option. No added butter or yolks makes this cake lighter, yet it still feels indulgent thanks to its airy texture.
- Endless serving possibilities. Keep it simple or dress it up with lemon curd (that uses leftover yolks nicely), berry sauce, or even colorful sprinkles for special occasions.
- Easy to prep ahead or freeze. Bake it a day earlier or freeze it for up to three months without losing that light texture—perfect for party planning.
- Impressive but totally doable. Sure, there’s a technique to it, but trust me—follow the steps carefully, and you’ll end up with a bakery-level cake right from your kitchen.
If you love desserts that feel light and classy, without chasing complicated ingredients, this angel food cake is your next best friend.
This cake is simple but delivers big on flavor and texture. It’s made mostly of whipped egg whites, so it’s lighter than traditional cakes with butter and yolks. The interior stays a stunning white, making it as lovely as it tastes. Follow the steps carefully: pulse your sugar for a fine texture, whip your whites to soft peaks, gently fold in sifted dry ingredients, bake in an ungreased tube pan, and cool upside down. The end result is a graceful dessert perfect for any occasion—top it with whipped cream, fresh berries, lemon curd, or just a sprinkle of powdered sugar. Plus, it’s a smart way to use up extra egg yolks.
What You Need to Bake

- 1 and 3/4 cups (350g) granulated sugar*
- 1 cup + 2 Tablespoons (133g) cake flour (spooned & leveled)
- 1/4 teaspoon salt
- 12 large egg whites, at room temperature*
- 1 and 1/2 teaspoons cream of tartar
- 1 and 1/2 teaspoons pure vanilla extract
Step-by-Step Baking Method
- Set your oven rack in the lower-middle position and preheat the oven to 325°F (163°C).
-
Pulse your granulated sugar in a food processor or blender until it becomes superfine sugar; set aside 1 cup of this superfine sugar, leaving the rest in the processor.

- Add cake flour and salt to the remaining sugar in the processor and pulse 5–10 times until the mix looks light and airy.
-
In a large bowl or your stand mixer with the whisk attachment, beat the room-temperature egg whites and cream of tartar on medium-low until foamy, about 1 minute.

- Turn mixer speed to medium-high and gradually add the reserved 1 cup of superfine sugar, whipping until you see soft peaks form (about 5–6 minutes). Add vanilla and beat just a little more to combine.
-
Sift the flour-sugar mixture over the whipped egg whites in three parts, gently folding each addition with a rubber spatula to keep all the airiness intact.

- Pour the batter into an ungreased 9- or 10-inch straight-sided tube pan. Gently shake the pan back and forth to level the batter evenly.
-
Bake at 325°F (163°C) for 40–45 minutes, rotating the pan halfway through. Check doneness with a toothpick—it should come out clean.

-
Immediately invert the pan onto a wire rack and let the cake cool completely upside down (about 3 hours). Once cool, run a thin knife around the edges and gently tap the pan until the cake releases.

Techniques for Light, Airy Texture
Here’s a deal-breaker tip: whip your egg whites only until soft peaks form. What’s soft peaks? It means your egg whites hold their shape but the peak bends softly instead of standing straight up. Check out the photos here to see the difference. Soft peaks expand in the oven to give that light, fluffy texture. Going all the way to stiff peaks can lead to a heavy, collapsed cake.
Watch out: not a single drop of yolk should sneak in because any bit of fat stops egg whites from whipping properly. My go-to trick is cracking eggs one at a time over a separate bowl or using an egg separator. That way, if a yolk breaks, you won’t lose the whole batch.

When you add the flour mixture, sift it over the whipped whites and fold in gently, in a few batches. This keeps the air bubbles safe and sound. Dumping it all in at once or stirring vigorously will flatten your mixture and make the cake dense and heavy.

Alright, let’s wrap up the most important tips to get your angel food cake just right—it all boils down to:
- Using fresh, well-separated egg whites.
- Pulsing granulated sugar until it’s superfine.
- Whipping egg whites to soft, not stiff, peaks.
- Sifting and folding dry ingredients gently in multiple parts.
- Never greasing your tube pan.
- Cooling the cake upside down on a wire rack.
- Cutting slices with a serrated knife to keep the crumb intact.
- Food Processor — Any size is fine, from a small chopper to a big blender or processor.
- Egg Separator — Super cheap and helps keep yolks out of your whites.
- Stand or Hand Mixer — Whisk attachment on a stand mixer works beautifully for this.
- Fine Mesh Strainer (Sifter) — Essential for a smooth, even dry mix.
- Tube Pan — A must-have for that classic angel food cake shape.
- Cooling Rack — Important for letting the cake cool upside down without trapping moisture.
If you’re curious, I also have a great angel food cupcake recipe using this same batter—perfect if you want something bite-sized!

Angel food cake is lovely all on its own, no heavy frosting needed. It pairs beautifully with fresh berries, raspberry sauce, or a cloud of whipped cream. You can keep it simple with a sprinkle of powdered sugar for a touch of elegance. If those flavors sound good, don’t miss my fresh berry cream cake for a bit easier but just as delicious treat!
Wondering if all this fuss pays off? It really does! The texture is like no other—so airy and light, it just melts. The process might feel a little delicate at first, but once you get the hang of it, it’s super rewarding. Ready to give it a try? Let’s make some cake magic! 😉

Flavor Swaps and Add-Ins
- Want a fresh, zingy twist? Fold in 1 to 2 teaspoons of finely grated lemon or orange zest with the vanilla. Serve it with lemon curd to brighten things up even more.
- If you’re a chocolate fan, swap a bit of cake flour for unsweetened cocoa powder (sift it in with the dry ingredients). Just keep it light so the cake still holds its fluff.
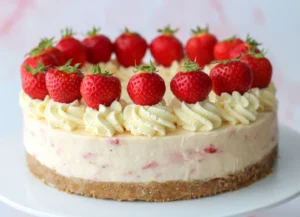
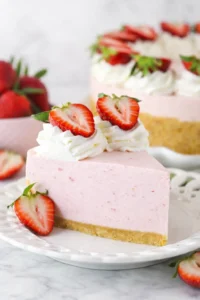
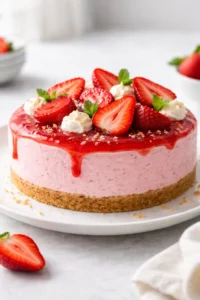
- Mix in 1/3 to 1/2 cup of finely ground freeze-dried strawberries or raspberries for a natural fruity flavor and a pretty pink tint.
- Looking for party fun? Gently fold in 1/2 cup rainbow sprinkles before baking, and top the cake with a luscious chocolate ganache instead of powdered sugar for a festive vibe.
- Swap vanilla for almond or toasted coconut extract (up to ½ teaspoon) to add a subtle, lovely aroma—just don’t overpower the delicate cake!
- Try baking angel food cupcakes with the same batter using ungreased cupcake or mini angel food pans. Just adjust baking time and resist greasing those pans!
- Serve slices with whipped cream, fresh berries, berry sauce, a light glaze, or just a simple dusting of powdered sugar for extra flair.
Storing and Make-Ahead Tips
If you happen to have leftovers (I won’t judge!), store your whole or sliced angel food cake covered well at room temperature for up to 24 hours. For longer freshness, wrap it tightly and keep it in the fridge for up to 5 days—an airtight container or plastic wrap works great to prevent drying out.
This cake is also perfect for making ahead! Bake it a day in advance and keep it covered at room temperature overnight. Then, add any toppings like whipped cream or berries right before serving for an easy, stress-free dessert.
For longer storage, wrap the cooled cake very tightly with plastic wrap and foil, or place it in a freezer-safe container. Freeze for up to 3 months. When you want to enjoy it, thaw overnight in the fridge, then let it come to room temperature before serving so it tastes fresh and delicious.
Important note: If you top the cake with whipped cream or other perishables, keep it refrigerated and eat within a couple of days. Let it warm to room temp before serving for the best texture—no reheating needed!
Common Troubleshooting Questions
Q: Can I bake this in a Bundt pan instead of a tube pan? A: For angel food cake, it’s really best to use a straight-sided tube pan designed for this type of cake. Bundt pans have sloped sides and decorative shapes that make it tough to release the delicate cake without tearing.
Q: My cake didn’t rise or fell after baking. Why? A: The most common culprit is yolk contamination—any fat can stop egg whites from whipping fully. Also, using carton or frozen egg whites often lowers volume. Under- or over-whipping, adding dry ingredients too fast, folding too aggressively, greasing the pan, or baking at the wrong temperature can also cause your cake to flop.
Q: What do soft peaks look like? A: Picture soft peaks as glossy, fluffy whites that hold their shape, but the peak on your whisk gently bends or folds over after a second or two. Stiff peaks stand straight and tall and are way too firm for angel food cake.
Q: Can I use carton egg whites or frozen whites? A: Fresh, room-temperature egg whites whip best and give the best rise and light crumb. Carton or frozen whites usually can’t achieve the same volume or texture.
Q: Can I use all-purpose flour? A: Cake flour is best for that tender crumb. You can try a homemade substitute by mixing 1 cup all-purpose flour minus 2 tablespoons plus 2 tablespoons cornstarch, sifted well—but the real deal cake flour really sets this cake apart.
Q: Can I freeze angel food cake? A: Definitely! Just wrap it tightly and freeze up to 3 months. Thaw in the fridge overnight, then bring to room temperature before serving for the best experience.
Q: Why cool the cake upside down? A: Cooling the cake upside down keeps that tall, airy structure from collapsing under its own weight. Most tube pans have little feet that make this easy. If yours doesn’t, just hold the pan inverted on a wire rack.
Q: What’s the best knife to slice angel food cake? A: A serrated knife is the best tool. Its gentle sawing motion preserves the cake’s delicate crumb. Avoid straight-edged knives, which can squash your beautiful cake slices.
PrintA light and airy angel food cake made with six simple ingredients, whipped egg whites, and baked in an ungreased tube pan for a tall, tender crumb dessert.
- Prep Time: 15 minutes
- Cook Time: 40-45 minutes
- Total Time: 3 hours 55 minutes (including cooling)
- Yield: 12-16 servings 1x
- Category: Dessert
- Cuisine: American
Ingredients
- 1 and 3/4 cups (350g) granulated sugar*
- 1 cup + 2 Tablespoons (133g) cake flour (spooned & leveled)
- 1/4 teaspoon salt
- 12 large egg whites, at room temperature*
- 1 and 1/2 teaspoons cream of tartar
- 1 and 1/2 teaspoons pure vanilla extract
Instructions
- Set your oven rack in the lower-middle position and preheat the oven to 325°F (163°C).
- Pulse granulated sugar in a food processor or blender until it becomes superfine sugar; set aside 1 cup of this superfine sugar, leaving the rest in the processor.
- Add cake flour and salt to the remaining sugar in the processor and pulse 5–10 times until the mixture looks light and airy.
- In a large bowl or stand mixer with whisk attachment, beat the room-temperature egg whites and cream of tartar on medium-low speed until foamy, about 1 minute.
- Turn mixer to medium-high and gradually add the reserved 1 cup of superfine sugar, whipping until soft peaks form (about 5–6 minutes). Add vanilla extract and beat briefly to combine.
- Sift the flour-sugar mixture over the whipped egg whites in three parts, gently folding each addition with a rubber spatula to keep airiness intact.
- Pour batter into an ungreased 9 or 10-inch straight-sided tube pan. Gently shake the pan to level the batter evenly.
- Bake at 325°F (163°C) for 40–45 minutes, rotating the pan halfway through baking. Check doneness with a toothpick; it should come out clean.
- Immediately invert the pan onto a wire rack and let the cake cool completely upside down (about 3 hours). Once cool, run a thin knife around the edges and gently tap the pan until cake releases.
Notes
Whip egg whites to soft peaks, not stiff peaks, to ensure light, airy texture., Avoid yolk contamination in egg whites as fat inhibits proper whipping., Do not grease the tube pan to allow proper cake rise and release., Cool cake upside down to maintain height and prevent collapse., Use a serrated knife to slice the cake gently preserving the delicate crumb., Best served with whipped cream, fresh berries, berry sauce, or dusted powdered sugar., Can fold in flavor add-ins like lemon zest, cocoa powder, or freeze-dried berries., Cake stores covered at room temperature up to 24 hours or refrigerated up to 5 days., Cake can be frozen wrapped tightly for up to 3 months; thaw overnight in fridge before serving.
Nutrition
- Serving Size: 1 slice
- Calories: Approximately 140-150 calories per serving (varies by serving size)
- Fat: 0.1g per serving
- Carbohydrates: 30g per serving
- Protein: 3g per serving
More in Cakes