Easy Reese’s Peanut Butter Pie Recipe
If you absolutely adore Reese’s Peanut Butter Cups, just wait until you try this Reese’s Peanut Butter Pie! It’s a no-bake dream dessert that comes together in no time. The filling is silky, creamy, and bursting with that rich peanut butter flavor we all love, and then it’s topped off with a luscious chocolate layer that’s simply irresistible. Honestly, this pie is a total showstopper that’ll have your family and friends asking for seconds — trust me on this one!

Introduction
If you’re all about Reese’s Peanut Butter Cups, this Reese’s Peanut Butter Pie is about to become your absolute favorite dessert. It’s super easy to whip up, with a silky peanut butter filling layered over a rich chocolate (or hot fudge) base, finished with chopped peanut butter cups sprinkled right on top. The best part? No baking needed! You can have this pie ready in mere minutes — perfect for a quick dessert that feels like a special treat everyone will adore.
Keep scrolling for a handy printable recipe card with both US and metric measurements, simple step-by-step instructions, and photos to walk you through every step. Whether you want to grab a pre-made crust or bake your own Graham cracker crust (just 15 minutes at 350°F if you go that route), or use a store-bought hot fudge sauce versus making one from scratch — I cover it all. Plus, I’ll share tips on chilling the pie for at least two hours so it sets perfectly for clean slices.
And hey, I’m not stopping there! I’ll share my recipe notes, smart storage ideas (the pie stays fresh in the fridge for up to 4 days and freezes well for 3 months), serving suggestions like pairing it with ice cream, and cool variations so you can tweak it your way. You’ll find all the ingredient details, pictures for each step, and tips to get the fluffiest texture every time. Let’s dive in and make a dessert that feels fancy but is actually super easy!
Why you’ll love this delicious creamy peanut butter pie
- This Reese’s Peanut Butter Pie hits that perfect sweet and salty balance, just like biting into your favorite peanut butter cup. It’s such a crowd-pleaser for any party or celebration — yes, even Pi Day!
- It’s incredibly creamy — the kind of melt-in-your-mouth texture we all crave in a peanut butter pie.
- If peanut butter is your ultimate weakness, this pie is like peanut butter heaven on a plate, loaded with rich, nutty flavor you’ll want to savor.
- No need to turn on your oven! This no-bake recipe saves you time and mess, so you can get straight to enjoying.
- This pie is a guaranteed showstopper at your next gathering — everyone will be lining up for a slice and asking for the secret.
- Basically, if you’re hooked on the magical combo of peanut butter and chocolate, this is your dream dessert. One bite and you’ll understand why it’s so loved.
Ingredients you’ll need
Here’s everything you’ll want to have at the ready for this pie, all pictured below to get you fully set up.

This peanut butter pie recipe is honestly the best one out there! Try it soon and thank me later.
How to make Reese’s pie with step-by-step instructions
Making a Reese’s peanut butter pie like this couldn’t be easier or more fun! Just follow these clear steps, and you’ll be slicing up a creamy pie in no time.
If you want, there’s a printable recipe card with both US and metric measurements further down for easy reference.
No need to panic about the crust — a store-bought pie crust works perfectly and keeps this dessert truly no-bake and straightforward.
But if you’re feeling adventurous and want to make your own graham cracker crust, I’ve got you covered with a simple recipe right here.
Optional: For the Graham cracker pie crust
You don’t actually need to bake the crust; it holds together beautifully as is. But if you’d like a warmer, crispier base, here’s a quick bake method.
Preheat your oven to 350°F (175°C).
Start by crushing graham crackers into fine crumbs using a food processor or blender.

Pulse the graham crackers until you get fine crumbs.

Combine graham cracker crumbs, sugar, and melted butter.

The crumb mixture will look grainy — that’s perfect.
Dump your graham cracker crumbs into a bowl and stir in the granulated sugar until combined.
Next, pour in the melted butter and mix it all up well.
The mixture should be a bit grainy — if you notice any large chunks, just break them apart with your fingers or a spoon.
Press the crumb mixture firmly into a 9-inch pie plate or cake pan. Use your hands to create a nice, even base and sides. Just press enough so it sticks together well without crumbling when you slice it.

Press crumbs evenly into the pie pan, smoothing edges with a spoon.

If baking, pop the crust in for 15 minutes at 350°F.
Use the back of a spoon to neatly pack the crumb mixture along the edges and smooth the surface.
If you’re baking the crust, set it in the oven for 15 minutes, then let it cool completely on a wire rack before moving on.
For the hot fudge sauce
If you’d rather keep things simple, store-bought hot fudge sauce works perfectly here, no stress!
But, if you want to go homemade, heat a saucepan over medium and combine sweetened condensed milk with milk chocolate chips. Stir constantly until the chocolate melts completely and the mixture is smooth.

Melt together milk chocolate chips and sweetened condensed milk.

Remove from heat and stir in butter until silky smooth.

Spread the hot fudge sauce evenly over the cooled crust.
Once the chocolate chips are melted and smooth, take the pan off the heat and mix in the butter until the sauce is silky.
Pour this luscious fudge sauce over your cooled crust, covering it evenly but not too thick. Save any extra sauce for drizzling on top of your pie right before serving.
For the pie filling
Grab a medium bowl and beat together cream cheese, creamy peanut butter, and powdered sugar with a stand or handheld mixer until everything is smooth and dreamy.
Next, gently fold in half of your Cool Whip topping with a rubber spatula to keep the filling light and fluffy.

Beat cream cheese, peanut butter, and powdered sugar until perfectly smooth.

Keep mixing until silky smooth and combined.

Spread the filling smoothly over the crust.
Pour the creamy peanut butter filling over your cooled crust and spread it out evenly.
Top that with the remaining whipped topping, smoothing it gently so it covers all the peanut butter filling like a fluffy cloud.
Pop the pie in the fridge and let it chill for at least 2 hours — this makes sure it firms up nicely for perfect slices.
Right before serving, sprinkle chopped peanut butter cups and some peanuts over the top, then drizzle with the extra hot fudge sauce for that extra wow factor.

Spread the whipped topping smoothly over the pie.

Finish with chopped Reese’s peanut butter cups on top.
Serve this delicious Reese’s peanut butter pie with a scoop of vanilla ice cream or dig right into its creamy goodness by itself and savor every peanut buttery, chocolatey bite!
Making this pie brought me so much joy, and I hope you love the process just as much! Please share how yours turns out in the comments and ask any questions you have along the way — I’m here to help you nail it!
Recipe notes and expert tips
- Perfecting the crust
Make sure your crust feels nice and firm to keep the pie sturdy. Feel free to switch things up with a store-bought chocolate cookie crust for a fun change of pace. - Smooth cream cheese
Let your cream cheese sit at room temperature before mixing. This makes your filling super silky and easy to whip up. - Choose creamy peanut butter
Stick with creamy peanut butter here — chunky just won’t give you that smooth, dreamy texture. - Adjust sweetness
Keep an eye on the powdered sugar amount. Some peanut butter brands are sweeter than others, so taste and tweak to your liking. - Layer with love
Be gentle when spreading the chocolate sauce and peanut butter filling so you keep those pretty, distinct layers visible. - Switch up the sauce
If hot fudge isn’t your thing, chocolate syrup or melted chocolate are great substitutes. - Crust swaps
If you want to mix it up, an Oreo crust is amazing here — you can find a quick and easy Oreo crust recipe to try. - Chill time is key
Give the pie plenty of chill time in the fridge, at least a few hours or overnight. This helps the flavors meld and the pie to firm up perfectly. - Easiest slicing trick
Dip your knife in hot water and dry it off before slicing each piece. This keeps your slices neat and clean every time. - Storing your pie
Keep leftovers sealed tight in the fridge for up to 4 days, or freeze it for up to 3 months to enjoy later.
Variations and swaps
If you want to put your own spin on this no-bake Reese’s peanut butter pie, here are some simple and tasty swaps and ideas to personalize it without losing that classic magic.
- Swap the crust — Try an Oreo or chocolate cookie crust for a rich, chocolatey boost. Or, for a salty crunch, press crushed pretzels into the crust. Gluten-free? No problem, just grab gluten-free graham crackers or cookies.
- Try different nut butters — Use smooth almond or cashew butter for a nutty flavor twist. Just keep it creamy, not chunky.
- Whipped topping options — Use homemade lightly sweetened whipped cream or stabilized whipped cream if you want your pie to stay fluffy longer.
- Chocolate toppings — Swap the hot fudge for a dark chocolate ganache made with melted dark chocolate and cream for a deeper chocolate flavor. White chocolate or salted caramel drizzles also make beautiful toppings.
- Add-ins & toppings — Fold in chopped peanut butter cups, roasted peanuts, toffee bits, or crushed cookies for extra crunch and flavor, or sprinkle them on top for eye-catching presentation.
- Different formats — Make mini versions layered in jars as parfaits, or press the filling into an 8×8 pan and freeze for bars you can grab on the go.
- Dairy-free or vegan — Swap in vegan cream cheese, coconut whipped topping, and dairy-free chocolate to make this pie vegan-friendly. The flavor and texture will be a bit different but still delicious!
- Less sweetness — If you want less sugar, cut back on the powdered sugar or choose a peanut butter with less added sugar. It still tastes fantastic.
These little twists help make this pie uniquely yours without losing the incredible peanut butter and chocolate combination we all crave.
What size peanut butter cups do I need?
We used mini peanut butter cups because they’re just the right size and look so pretty on top. But you can totally use regular or even giant peanut butter cups — just chop them smaller before sprinkling on your pie.
How to store leftover Reese’s peanut butter cup pie
Got leftovers? Lucky you! Keep any extra pie covered tightly with plastic wrap or in an airtight container and store it in the fridge for up to 4 days.
Since the pie has cream cheese and whipped topping, refrigerating is a must to keep it fresh and safe.

Can you freeze peanut butter pie?
Absolutely! This Reese’s peanut butter pie freezes beautifully.
Just wrap it up tightly and freeze for up to 3 months.
If you want a cool, refreshing treat for a hot day, serve it frozen right out of the freezer — still creamy and delicious!
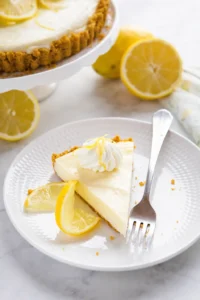
PrintA no-bake Reese’s Peanut Butter Pie with creamy peanut butter filling, chocolate hot fudge topping, and a graham cracker crust, topped with chopped Reese’s peanut butter cups.
- Prep Time: 20 minutes
- Cook Time: 15 minutes (if baking crust)
- Total Time: 2 hours 35 minutes (including chilling)
- Yield: 8 servings 1x
- Category: Dessert
- Cuisine: American
Ingredients
- 9-inch graham cracker crumbs (or about 1 1/2 cups crushed Graham crackers)
- 1/4 cup granulated sugar
- 6 tbsp unsalted butter, melted
- 1 (8 oz) package cream cheese, at room temperature
- 1 cup creamy peanut butter (preferably smooth)
- 1 1/4 cups powdered sugar (adjust to taste)
- 1 cup Cool Whip whipped topping, divided
- 1/3 cup sweetened condensed milk
- 1/3 cup milk chocolate chips
- 2 tbsp unsalted butter
- Chopped Reese’s peanut butter cups for topping
- Optional: peanuts or toffee bits for garnish
Instructions
- Optional: Make the graham cracker crust. Preheat oven to 350°F (175°C). Crush graham crackers into fine crumbs using food processor or blender.
- In a bowl, mix graham cracker crumbs with granulated sugar and melted butter until combined. Press mixture into a 9-inch pie plate or cake pan to form firm base and sides. Don’t press too hard to avoid crumbling.
- Bake crust for 15 minutes then cool completely on a wire rack. (If you use store-bought crust, skip baking.)
- Make the hot fudge sauce: In a saucepan over medium heat, combine sweetened condensed milk and milk chocolate chips. Stir constantly until chocolate melts and mixture is smooth.
- Remove from heat, stir in 2 tbsp butter until melted and smooth. Let cool slightly.
- Pour hot fudge sauce evenly over cooled crust, just enough to cover it. Reserve any leftover sauce for topping the pie later.
- Make the pie filling: In a medium bowl, using stand or handheld electric mixer, beat cream cheese, peanut butter, and powdered sugar until smooth and creamy.
- Gently fold in half of the Cool Whip whipped topping using rubber spatula until light and airy.
- Spread peanut butter filling over the cooled crust with hot fudge layer.
- Top with remaining Cool Whip whipped topping, spreading gently with the back of a spoon to cover the filling completely.
- Chill pie in the refrigerator for at least 2 hours to allow it to set properly.
- Before serving, sprinkle chopped Reese’s peanut butter cups, peanuts or toffee bits on top.
- Drizzle reserved hot fudge sauce over the top for extra indulgence.
Notes
Let cream cheese come to room temperature before mixing for a smooth filling., Use creamy peanut butter, not chunky, for best texture., Adjust powdered sugar amount depending on the sweetness of your peanut butter., You can substitute hot fudge sauce with chocolate syrup, melted chocolate, or ganache for different chocolate flavors., For crust variations, use Oreo cookie crust, chocolate cookie crust, or gluten-free crackers as needed., Try almond or cashew butter instead of peanut butter for a unique twist., Use homemade lightly sweetened whipped cream instead of Cool Whip if preferred., Chill pie overnight for best flavor and texture., Dip knife in hot water and wipe dry between slices for clean cuts., Store leftover pie covered in an airtight container in the refrigerator up to 4 days or freeze up to 3 months.
Nutrition
- Serving Size: 1 slice
- Calories: About 450 calories per serving
- Fat: 30 g
- Carbohydrates: 35 g
- Protein: 7 g
More in Pies