Pumpkin Pie Bars
There’s so much to juggle on Thanksgiving, but getting a perfectly flaky, buttery pie crust ready? Not anymore! Traditional pie crusts are a real time suck with all that rolling and chilling. Honestly, they’re not my cup of tea. That’s why I adore these pumpkin pie bars. They’re easy, totally delicious, and just made for sharing with a crowd — the ultimate Fall dessert made simple!
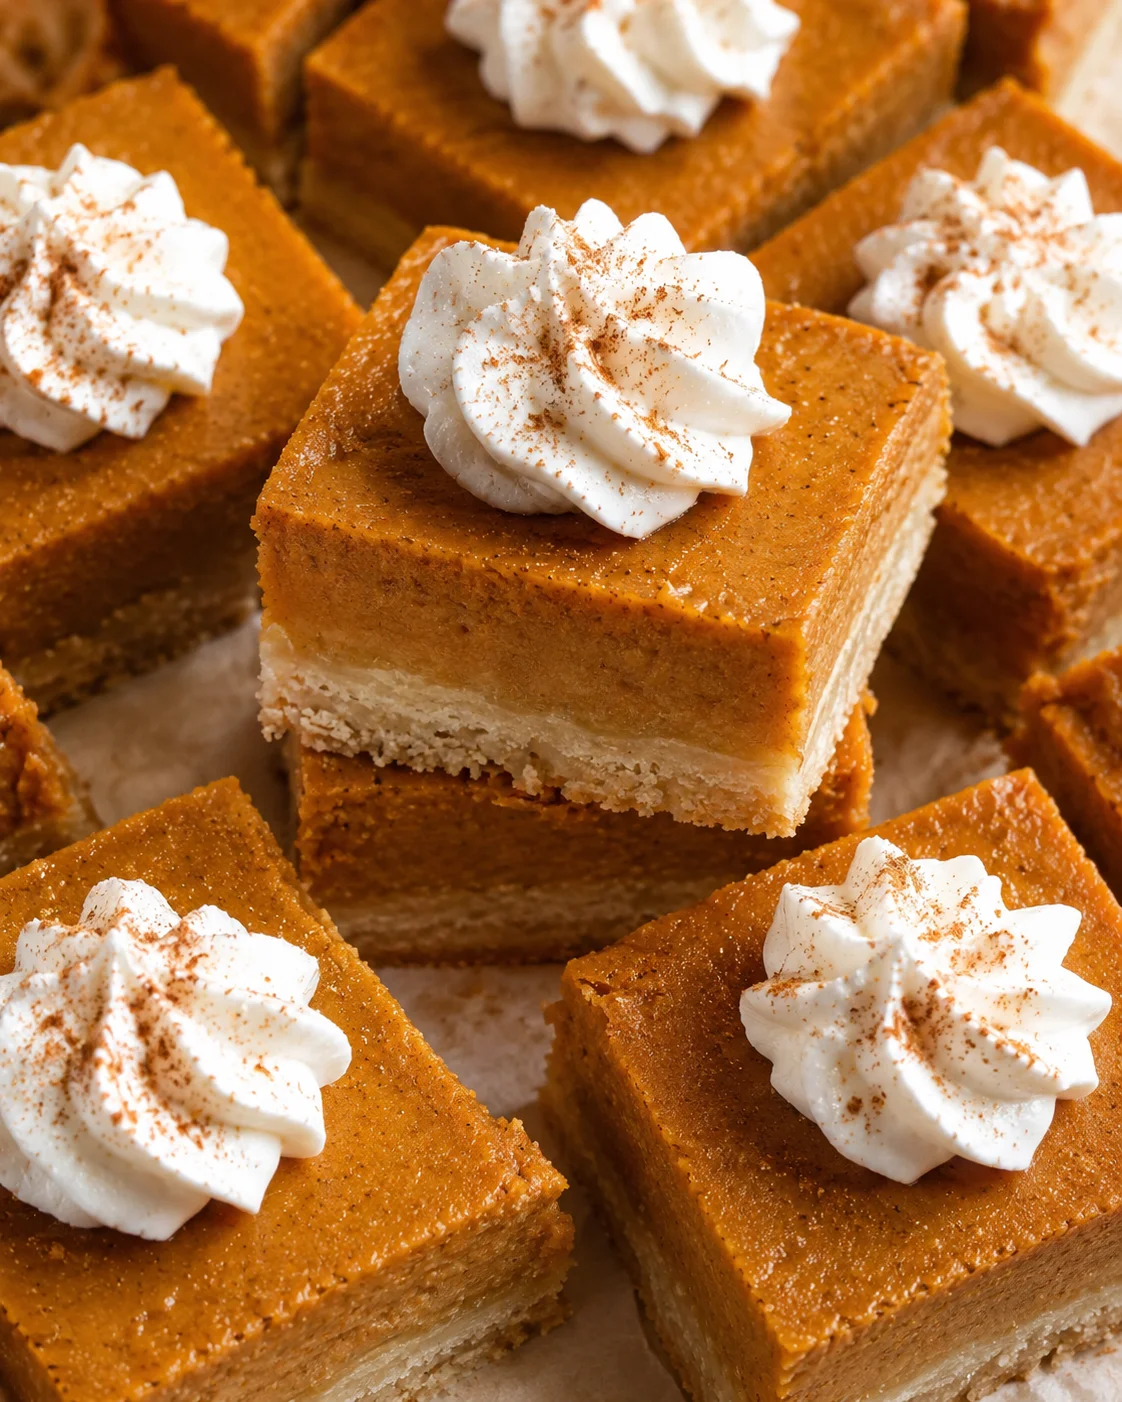
We all know Thanksgiving can be a whirlwind, so dessert should be the easy part, right? These pumpkin pie bars bring all the warm spices and creamy pumpkin goodness of a classic pie, but you skip the hassle of rolling crusts or fiddling with pie weights. Baked in a 9×9 pan and chilled till firm, they cut into 16 perfect squares, ready to please at any Friendsgiving or holiday dessert spread.
Keep reading because I’m sharing everything you need to make these bars confidently: a smart shopping list filled with pantry favorites, a clear step-by-step for the buttery press-in shortbread crust and silky pumpkin filling, plus baking tips to dodge soggy crusts or cracked tops. I’ll also toss in fun flavor tweaks, plus storage and make-ahead tips so you can prep stress-free before the big day. Total time? About 70 minutes (15 to prep, 55 to bake) plus chilling — easy, dependable, and crowd-pleasing every time.
Why You’ll Love Them
These pumpkin pie bars pack every bit of Fall flavor you crave, all wrapped up in a nifty handheld treat. Here’s why they’re a favorite in my house:
Quick and easy holiday dessert. Let’s be honest, pumpkin desserts are a Thanksgiving must-have. These bars taste just like traditional pumpkin pie — scratch that, they’re even BETTER! — but are way simpler to pull off.
Delicious, cozy Fall flavors. Loaded with warm spices like cinnamon, ginger, nutmeg, and cloves, these bars bring the classic pumpkin pie flavor you want for your holiday table.
No fuss crust! The buttery shortbread crust presses right into the pan—no rolling or chilling necessary—and adds a wonderful crunch in every bite.
Perfect for parties. Think of pumpkin pie bars as pumpkin pie…but way easier to share! Cutting them into 16 squares makes for easy, grab-and-go, perfectly portioned servings—ideal for Friendsgiving or any holiday gathering—and if you want another crowd-pleasing pumpkin dessert, try these no-bake mini pumpkin pie cheesecakes.
Pantry Staples and Measurements
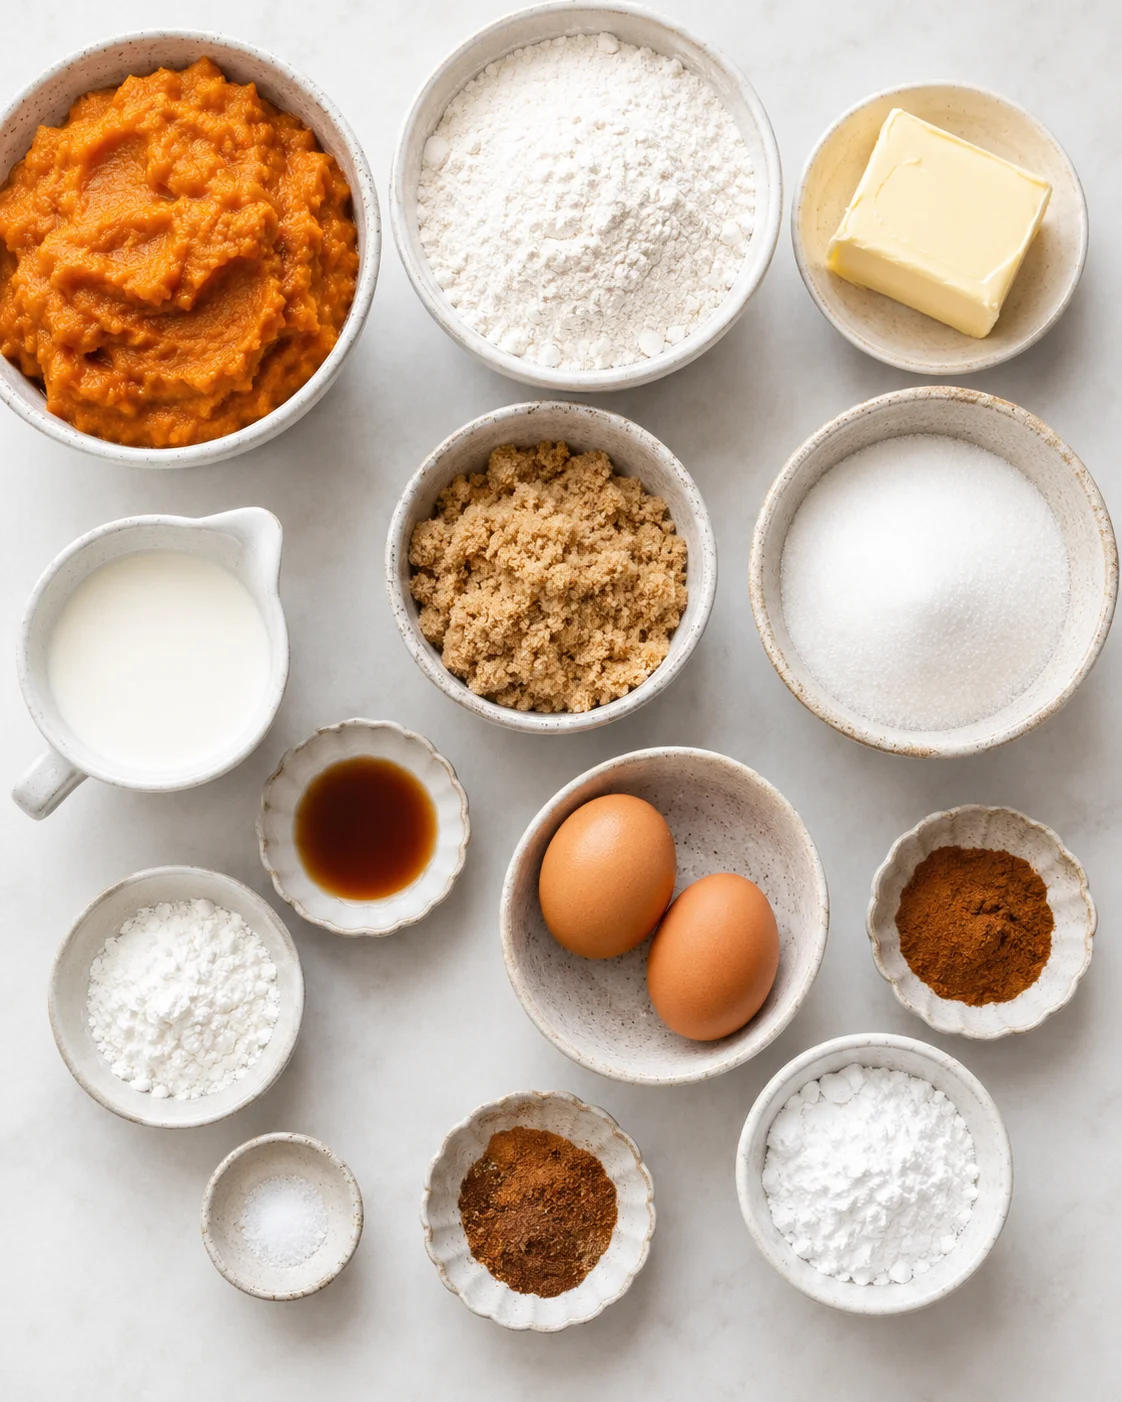
- 1/2 cup (113 g) unsalted butter, softened to room temperature
- 1/4 cup (50 g) granulated sugar
- 1/4 cup (50 g) light brown sugar, packed
- 1 egg, at room temperature
- 1 teaspoon vanilla extract
- 1 1/2 cups plus 2 tablespoons (205 g) all-purpose flour, spooned and leveled
- 1/2 teaspoon baking powder
- 1/2 teaspoon ground cinnamon
- 1/8 teaspoon kosher salt
- 1 15-ounce can pumpkin puree (not pumpkin pie filling)
- 1 1/4 cups (10 ounces) heavy cream
- 3 large eggs
- 1/2 cup (100 g) light brown sugar, packed
- 1/3 cup (66 g) granulated sugar
- 2 teaspoons vanilla extract
- 1 tablespoon cornstarch
- 1 teaspoon pumpkin pie spice
- 1 teaspoon cinnamon
- 1 teaspoon salt
- 1 cup heavy whipping cream
- 2 tablespoons powdered sugar
Baking the Bars
- Preheat oven to 350°F and line a 9×9-inch baking pan with parchment paper, leaving a 1–2 inch overhang; set aside.
- Beat softened butter, granulated sugar, and light brown sugar in a stand mixer fitted with the paddle attachment for 3 minutes until light and fluffy, scraping down the bowl as needed.
- Add the egg and vanilla and mix until combined.
- Add flour, baking powder, cinnamon, and salt; mix just until the dough begins pulling away from the sides of the bowl.
- Press the dough evenly into the bottom of the prepared pan, using the bottom of a measuring cup to press into corners and level the surface.
- Bake the crust at 350°F for about 15 minutes, or until edges are lightly golden and the center is nearly set; remove and cool slightly.
- Increase oven temperature to 400°F.
- Whisk together pumpkin puree, heavy cream, eggs, light brown sugar, granulated sugar, and vanilla in a large bowl until smooth.
- Stir in cornstarch, pumpkin pie spice, cinnamon, and salt until evenly combined.
- Pour the pumpkin filling over the pre-baked crust and set the pan on a rimmed baking sheet to catch drips.
-
Bake at 400°F for 15 minutes, then reduce oven to 350°F and bake an additional 40 minutes, or until the edges are firm and the center still jiggles slightly.
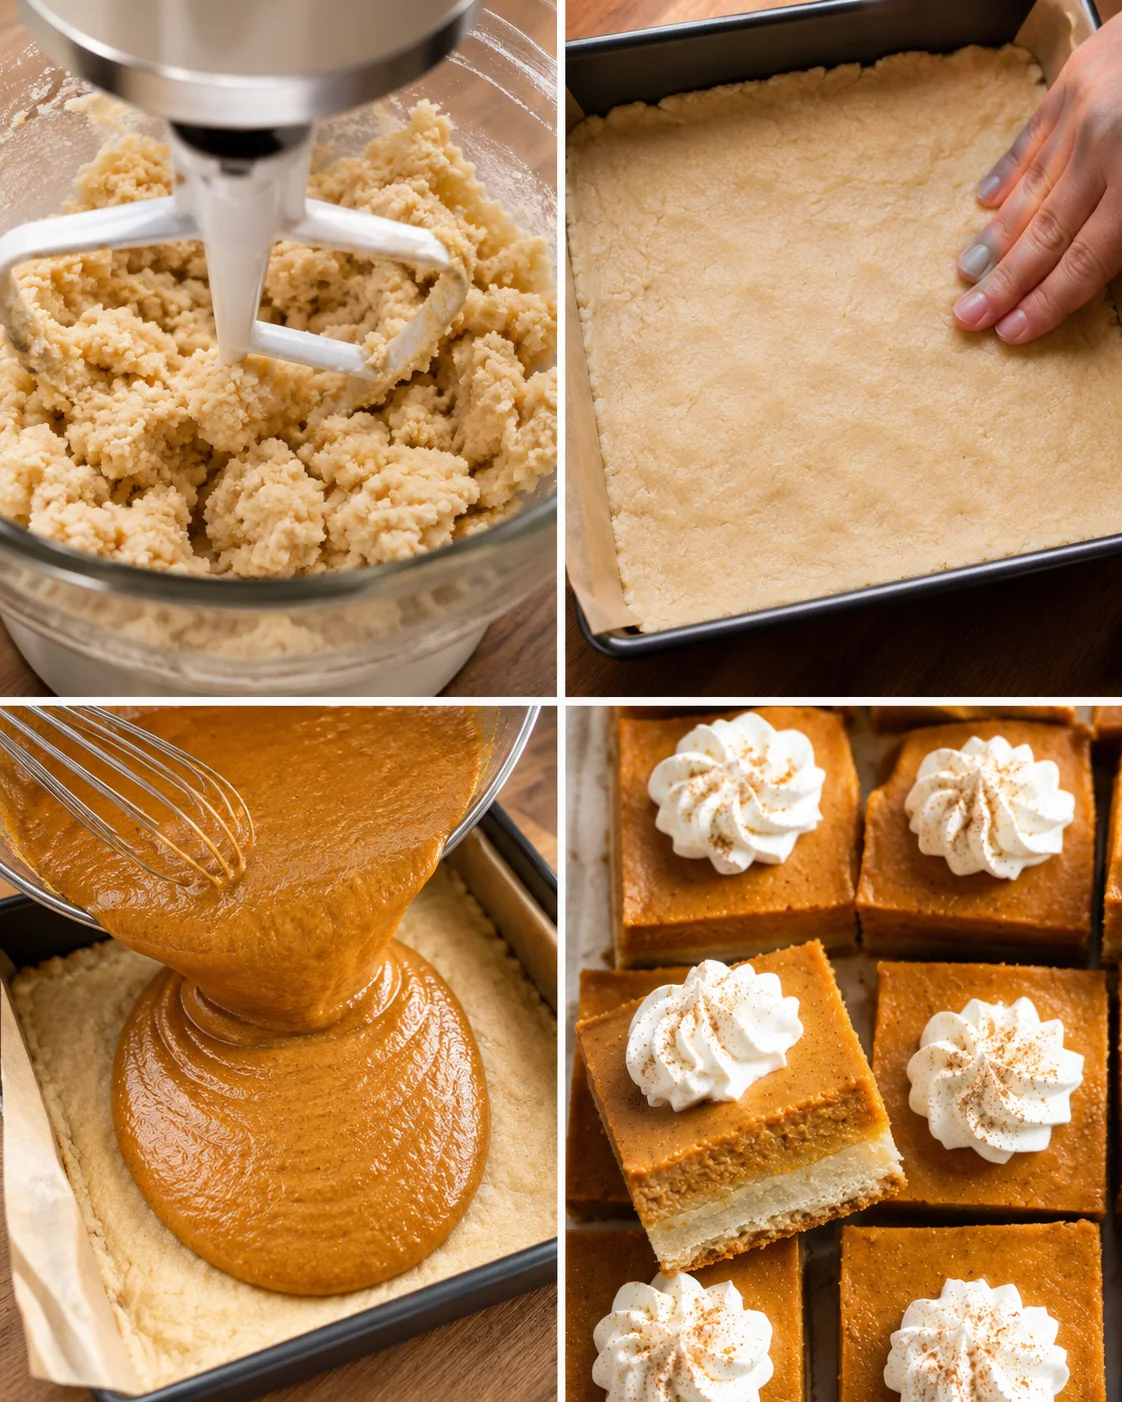
- Remove from oven and cool on a wire rack for 45–60 minutes.
- Refrigerate the pan and chill for at least 3 hours or overnight.
- Whip heavy cream and powdered sugar with a whisk attachment on medium-high speed until firm peaks form; keep chilled.
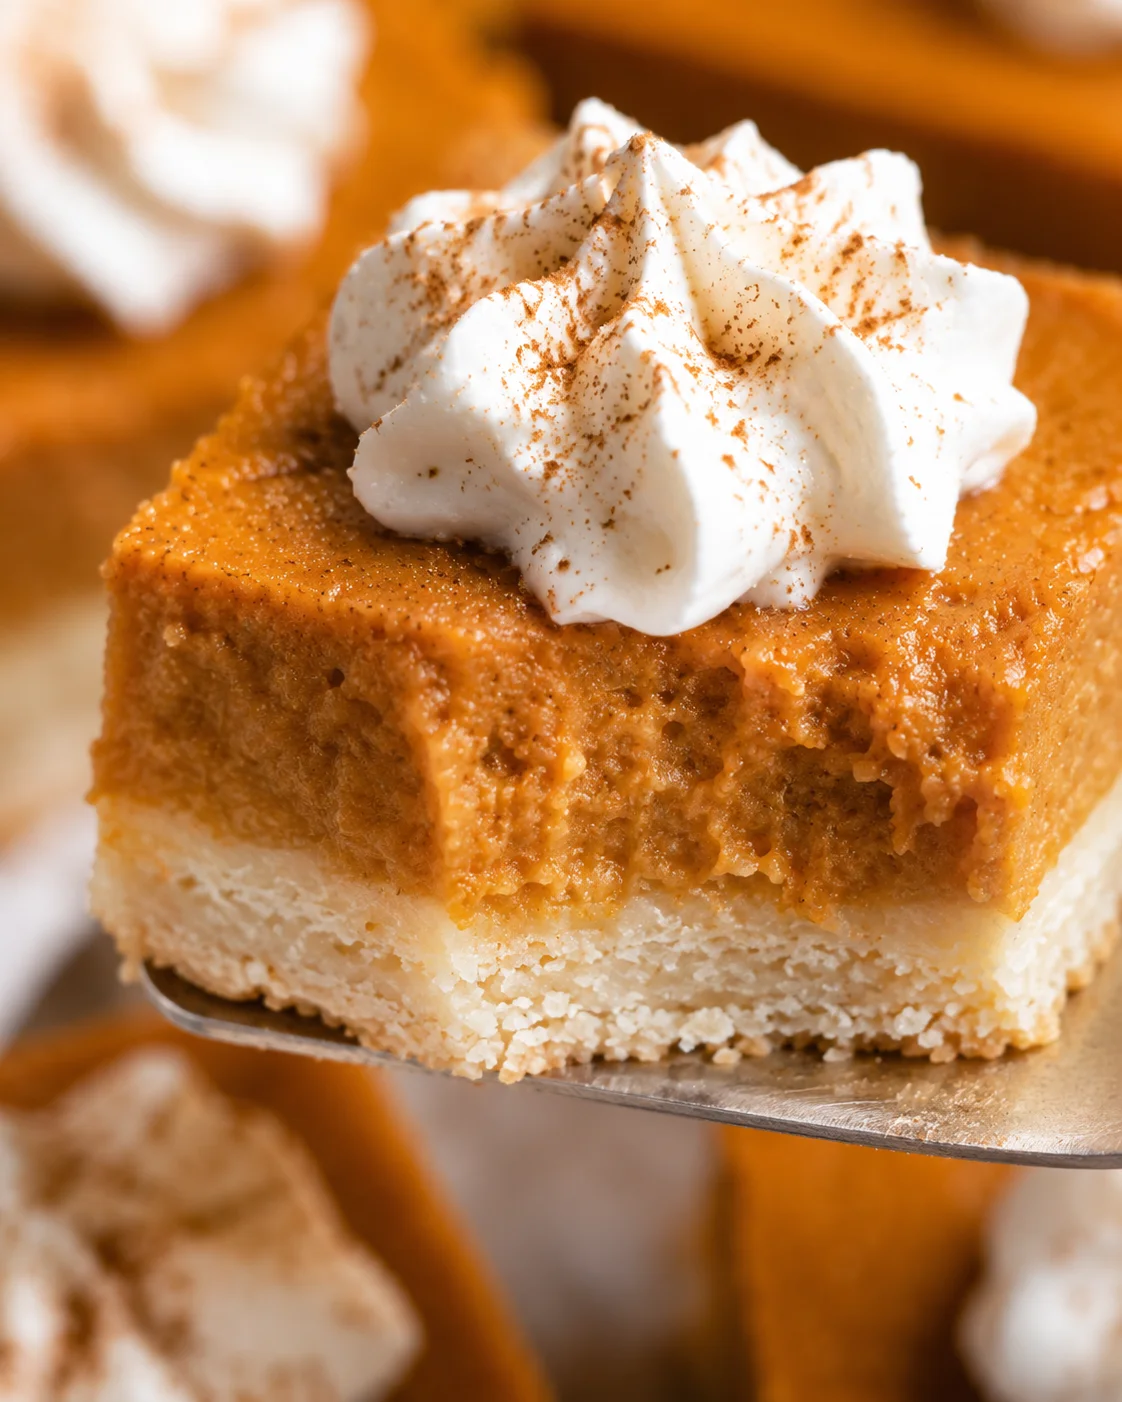
- Top chilled bars with whipped cream and a dusting of nutmeg, then lift from pan using the parchment overhang and cut into 16 squares.
Expert Tips and Shortcuts
- Weigh your flour for the best results. If you’re using measuring cups, spoon the flour in and level it off to avoid packing it down, which can lead to a drier crust.
- Make sure your butter and eggs are at room temperature for smooth mixing and a buttery shortbread crust.
- Press the crust evenly into the pan with the bottom of a measuring cup to help the pumpkin filling bake evenly. Don’t forget to leave that nice parchment overhang for easy removal!
- Pre-bake the crust until the edges just turn golden and the center is barely set — this helps keep the base crisp and prevents sogginess once the filling goes on.
- Set the baking pan on a rimmed baking sheet before putting it in and out of the oven. This catches drips and makes handling easier.
- Don’t overbake the pumpkin filling. Pull the bars from the oven when the edges are firm but the center still jiggles a bit (see pumpkin custard doneness tips). They’ll finish setting as they cool and chill.
- Cool the bars completely on a wire rack for about 45-60 minutes, then refrigerate for a few hours or overnight to get those clean slices.
- For perfect slices, lift the chilled bars out using the parchment edges. Use a sharp knife dipped in hot water, wipe it dry between cuts for neat edges and less sticking.
- If you decide to freeze, do so before adding whipped cream. Wrap bars tightly in two layers of plastic wrap plus foil and freeze for up to 2 months. Thaw in the fridge before serving.
- Planning ahead? Bake and cool the bars up to 2 days in advance. Add whipped cream just before serving to keep it fresh and fluffy.
Flavor Swaps and Mix-Ins
These pumpkin pie bars are wonderful as is, but if you want to mix things up, here are some tasty ideas to try:
Biscoff cookie crust – Swap out the shortbread crust for a cookie-crumb base made from crushed Biscoff cookies—use the method in this graham cracker crust recipe and simply substitute Biscoff. Their warm spices and caramel notes complement pumpkin beautifully and add a fun twist.
Toasted meringue – Instead of whipped cream, try a fluffy meringue topping toasted with a kitchen torch. It adds a sweet, marshmallow-like finish that’s pure magic!
Salted caramel – Pumpkin and caramel are a match made in dessert heaven. Drizzle your favorite salted caramel sauce over the bars after they cool for an indulgent treat. A scoop of vanilla ice cream on the side is pure bliss.
Bourbon whipped cream – Stir a splash of good-quality bourbon into the heavy cream before whipping for a subtle boozy twist that adults will love.
Storing and Freezing Tips
These pumpkin pie bars disappeared fast at my house — not a crumb left! Like regular pumpkin pie, they’re best stored in the fridge and kept nice and chilled until you’re ready to serve. If you want to freeze some, cool the bars completely first. Wrap them snugly in two layers of plastic wrap plus a layer of foil to protect them in the freezer. Freeze for up to 2 months. When you’re ready to enjoy, thaw in the fridge for about 6 hours and add whipped cream right before serving.
Wishing you a Happy Thanksgiving and a cozy baking session!
Frequently Asked Questions
- Q: Can I use pumpkin pie filling instead of pumpkin puree? A: No, pumpkin pie filling is already sweetened and spiced, which changes the recipe’s texture and flavor. Stick to plain canned pumpkin puree or homemade pumpkin puree for best results.
- Q: Can I make this with homemade pumpkin puree? A: Yes! Use cooked pumpkin that’s been pureed smoothly—here’s how to roast pumpkin for homemade puree. If it seems watery, drain it or simmer it down until thick so your filling isn’t runny.
- Q: Can I swap evaporated milk or half-and-half for heavy cream? A: You can, but the filling will be less rich and creamy. Heavy cream brings the best silky texture.
- Q: What if I want to make this in a different pan size? A: Using an 8×8 pan will give you thicker bars and will need a little more baking time—check after 40 minutes and bake longer in 5–10 minute steps until edges are set. A 9×13 pan will yield thinner bars and shorten the bake time.
- Q: How long do these bars last? A: Keep them refrigerated in a tight container for up to 4 days. Don’t add whipped cream topping until you’re ready to serve.
- Q: Can I make these gluten-free or egg-free? A: For gluten-free, try a 1:1 gluten-free flour blend; texture might be a bit different. Egg-free or vegan swaps aren’t ideal here since eggs help the filling set properly.
- Q: Why did my pumpkin filling crack or dry out? A: Overbaking is the usual culprit. Take the bars out when the edges are firm but the center still jiggles slightly—this helps keep them moist. They’ll firm up as they cool and chill.
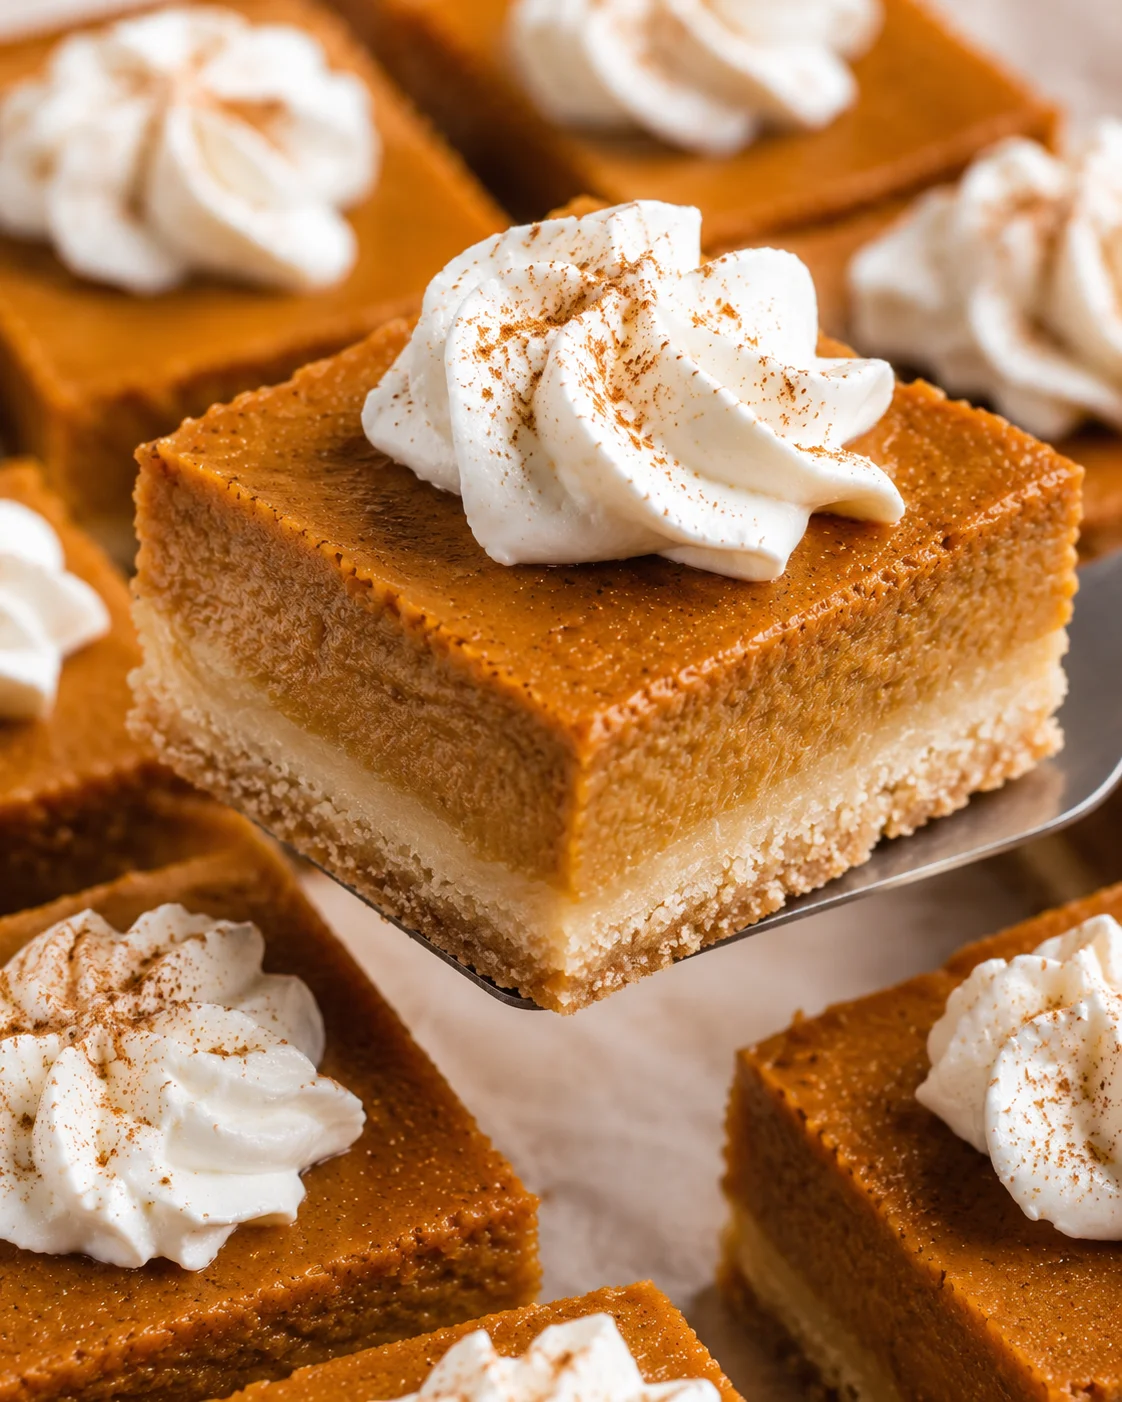
Delicious pumpkin pie bars with a buttery shortbread crust and creamy pumpkin filling, spiced with cinnamon, ginger, nutmeg, and cloves. Easy to prepare, baked in a 9×9 pan, and chilled before serving. Perfect for Thanksgiving or holiday gatherings.
- Prep Time: 15 minutes
- Cook Time: 55 minutes
- Total Time: 70 minutes plus chilling time (at least 3 hours)
- Yield: 16 bars 1x
- Category: Dessert
- Cuisine: American
Ingredients
- 1/2 cup (113 g) unsalted butter, softened to room temperature
- 1/4 cup (50 g) granulated sugar
- 1/4 cup (50 g) light brown sugar, packed
- 1 egg, at room temperature
- 1 teaspoon vanilla extract
- 1 1/2 cups plus 2 tablespoons (205 g) all-purpose flour, spooned and leveled
- 1/2 teaspoon baking powder
- 1/2 teaspoon ground cinnamon
- 1/8 teaspoon kosher salt
- 1 15-ounce can pumpkin puree (not pumpkin pie filling)
- 1 1/4 cups (10 ounces) heavy cream
- 3 large eggs
- 1/2 cup (100 g) light brown sugar, packed
- 1/3 cup (66 g) granulated sugar
- 2 teaspoons vanilla extract
- 1 tablespoon cornstarch
- 1 teaspoon pumpkin pie spice
- 1 teaspoon cinnamon
- 1 teaspoon salt
- 1 cup heavy whipping cream
- 2 tablespoons powdered sugar
Instructions
- Preheat oven to 350°F and line a 9×9-inch baking pan with parchment paper, leaving a 1–2 inch overhang; set aside.
- Beat softened butter, granulated sugar, and light brown sugar in a stand mixer fitted with the paddle attachment for 3 minutes until light and fluffy, scraping down the bowl as needed.
- Add the egg and vanilla and mix until combined.
- Add flour, baking powder, cinnamon, and salt; mix just until the dough begins pulling away from the sides of the bowl.
- Press the dough evenly into the bottom of the prepared pan, using the bottom of a measuring cup to press into corners and level the surface.
- Bake the crust at 350°F for about 15 minutes, or until edges are lightly golden and the center is nearly set; remove and cool slightly.
- Increase oven temperature to 400°F.
- Whisk together pumpkin puree, heavy cream, eggs, light brown sugar, granulated sugar, and vanilla in a large bowl until smooth.
- Stir in cornstarch, pumpkin pie spice, cinnamon, and salt until evenly combined.
- Pour the pumpkin filling over the pre-baked crust and set the pan on a rimmed baking sheet to catch drips.
- Bake at 400°F for 15 minutes, then reduce oven to 350°F and bake an additional 40 minutes, or until the edges are firm and the center still jiggles slightly.
- Remove from oven and cool on a wire rack for 45–60 minutes.
- Refrigerate the pan and chill for at least 3 hours or overnight.
- Whip heavy cream and powdered sugar with a whisk attachment on medium-high speed until firm peaks form; keep chilled.
- Top chilled bars with whipped cream and a dusting of nutmeg, then lift from pan using the parchment overhang and cut into 16 squares.
Notes
Weighing flour or spooning and leveling the flour improves crust texture by preventing dryness., Use room temperature butter and eggs for smooth mixing and tender crust., Press crust evenly into pan for even baking; use parchment overhang for easy removal., Pre-bake crust until edges are golden and center nearly set to prevent sogginess., Use rimmed baking sheet when baking to catch drips and ease handling., Do not overbake the filling; remove when edges are firm but center jiggles to keep moistness., Cool bars completely before refrigerating for clean slicing., Use a sharp knife dipped in hot water, wiping between cuts, for neat squares., Freeze bars without whipped cream for up to 2 months; thaw in fridge before serving and add whipped cream fresh., Bars can be baked and cooled up to 2 days in advance; add whipped cream just before serving.
Nutrition
- Serving Size: 1 bar
- Calories: Approximately 230 calories per bar (estimate)
- Fat: 11 g per serving (estimate)
- Carbohydrates: 30 g per serving (estimate)
- Protein: 4 g per serving (estimate)
More in Uncategorized
Apple Crisp Cheesecake
Apple Crumble Cheesecake
Caramel Apple Cheesecake Bars